Connecting and configuring OpenClaw AI Agent Gateway on Ubuntu 24.04 LTS
After purchasing and starting the VM, you should know its IP address. You can find it in Amazon’s personal account.
To connect to the Server, you should generate a “Private Key” in advance. This can be done using the following instructions (by choosing the “file format:” option “.ppk” in point 3) Guide – How To – Create and use Key Pair to connect to a VM
- Connecting to the VM using the PuTTY application. You can download it at the following link: Download
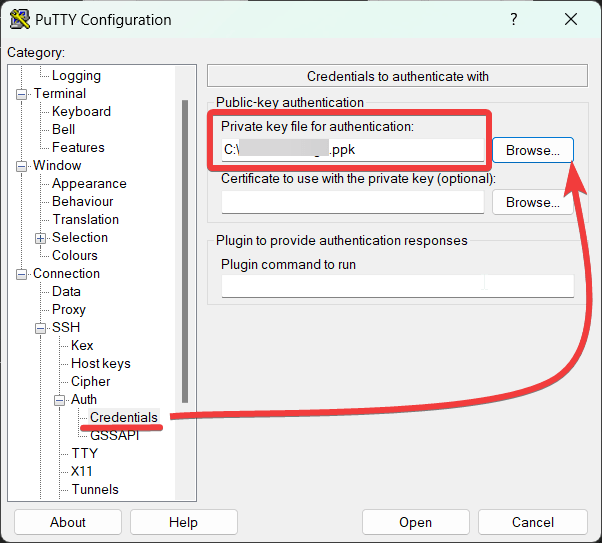
- Go to the section SSH on the left panel, and then to Auth
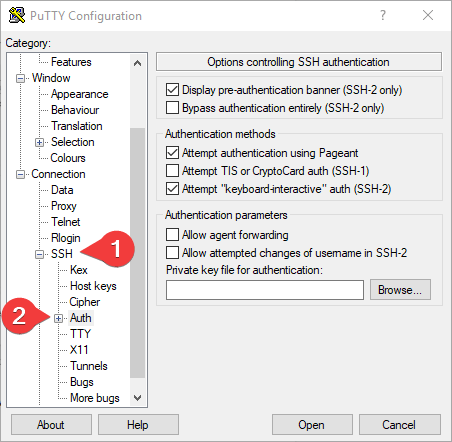
- In the “Auth” section, click “Browse” and specify the path to the .ppk file you received earlier.
- Go to the home page of “Session”, enter the IP address of the VM, and click “Open”.

- In the open console, you will need to enter the login ubuntu.
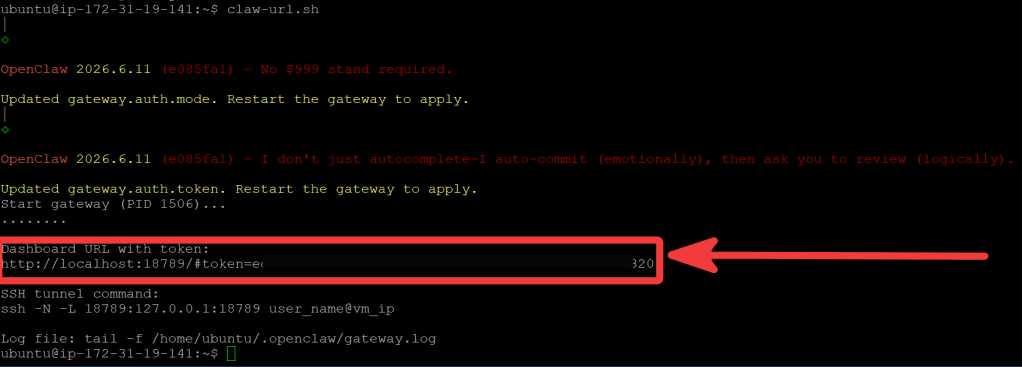
- Run the server configuration using the following command
$claw-url.sh

- Wait for the script to complete execution
Copy and save the URL http://localhost:18789/#token…...
- Type the command $exit to disconnect the VM
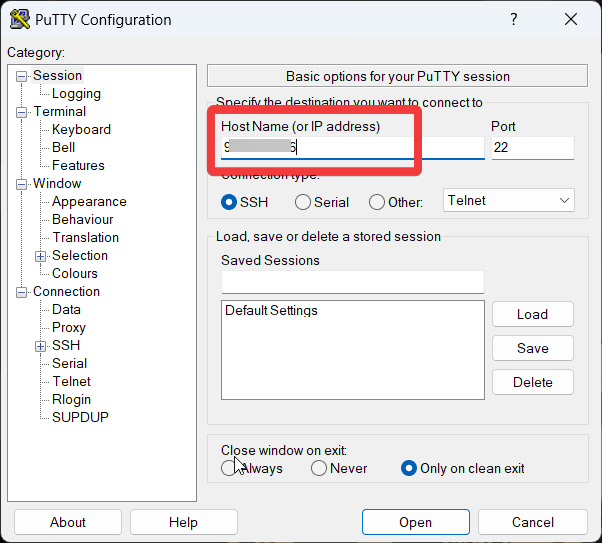
- Now you should set up the SSH tunnel. Run the PuTTY application
- Enter the IP address of the VM in the Host Name (or IP address) field
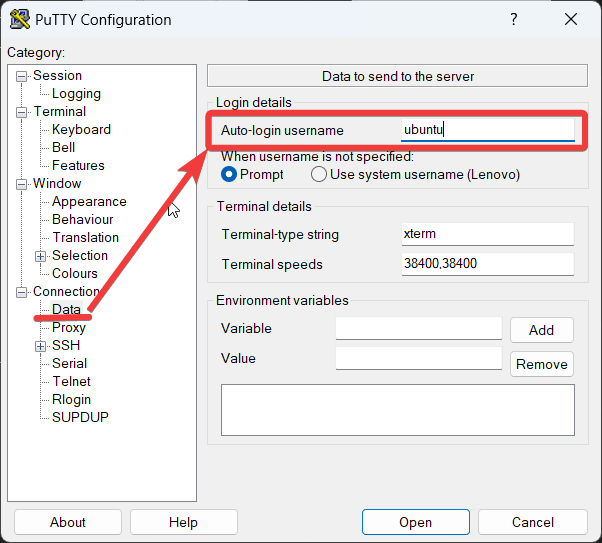
- Go to Connection -> Data and enter ubuntu in the Auto-login username field
- Go to Connection -> SSH -> Auth -> Credentials (or just Auth in older versions). Click Browse… and select your .ppk file
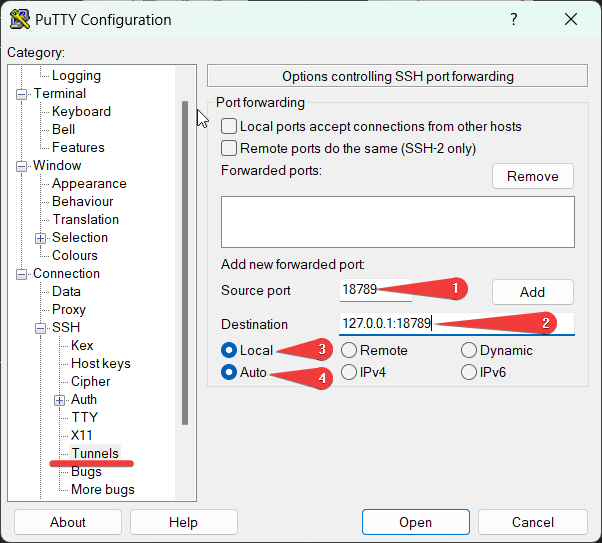
- Go to Connection > SSH > Tunnels and enter 18789 (1) in the Source Port field and 127.0.0.1:18789 (2) in the Destination field. Ensure Local (3) and Auto (4) are selected.
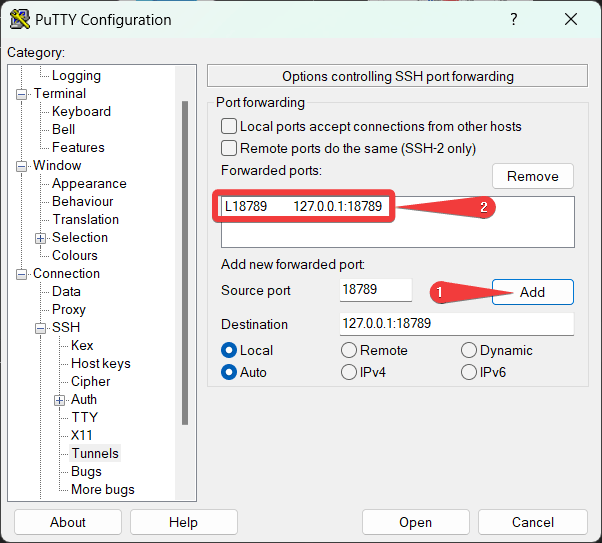
- Click Add (1). You should see L18789 127.0.0.1:18789 appear in the Forwarded ports (2) list.
- Click Open to start the tunnel. Keep the PuTTY terminal window open while you use the tunnel.
- Paste the URL from step 3 into your browser. The start page will open
Now you can use our well-prepared OpenClaw AI Agent Gateway on Ubuntu 24.04 LTS.
Example of using the OpenAI key
- Connect to the VM via SSH (point 1 from the previous section)
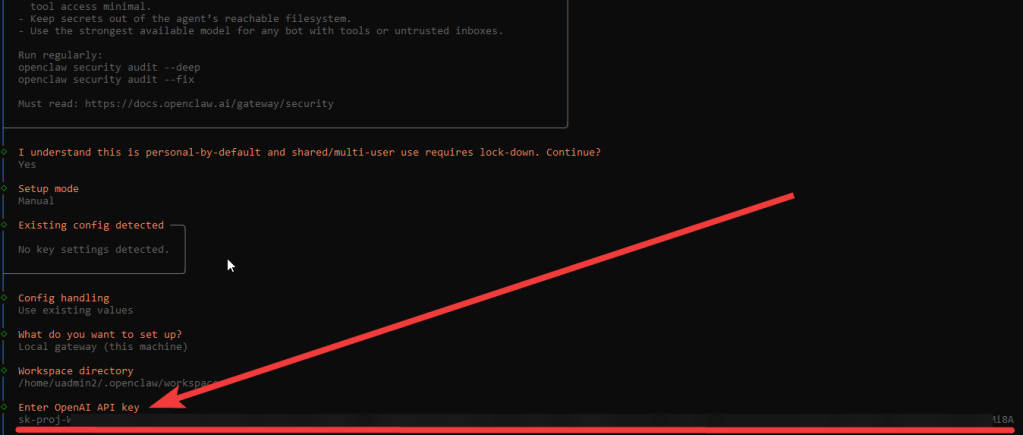
- Enter command $openclaw onboard –auth-choice openai-api-key and follow the instructions
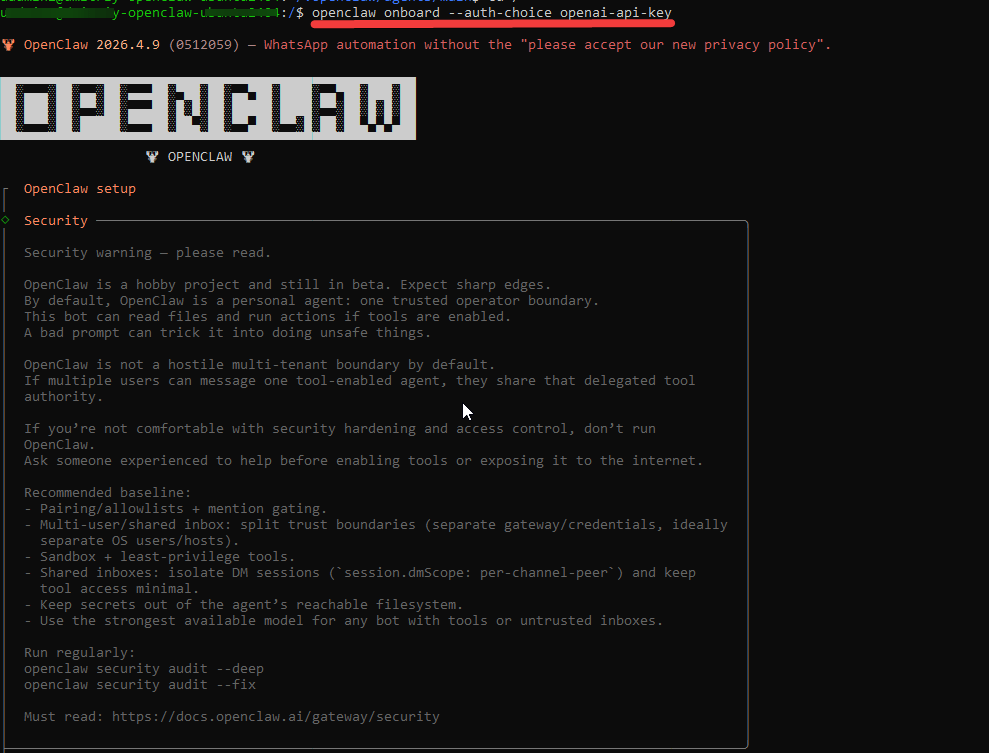
- Add the OpenAI API key when prompted
Useful information
Check the current OpenCLAW version
$openclaw -V
Update OpenClaw and inspect the update channel status
$openclaw update
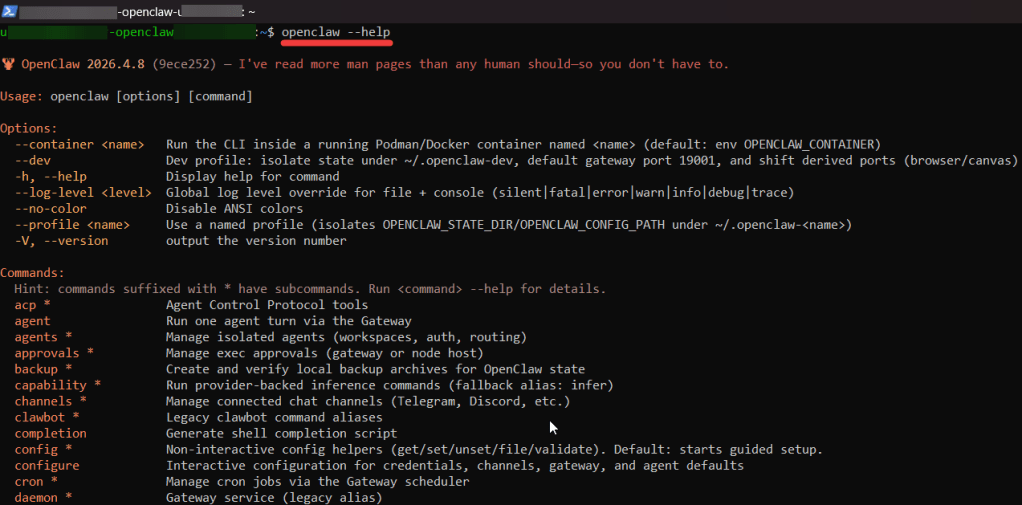
You can get full help by entering
$openclaw –help
Get more with Web – OpenClaw
