TinyProxy is a lightweight HTTP/HTTPS proxy daemon for POSIX operating systems. Designed from the ground up to be fast and yet small, it is an ideal solution for use cases such as embedded deployments where a full-featured HTTP proxy is required, but the system resources for a larger proxy are unavailable.

This is a quick deployment and ready-to-run image.
Simple and rapid installation. Easy to maintain.
Connecting and setting up TinyProxy Easy Proxy Server on CentOS Stream 9 using Windows settings
To connect to the Server, you should generate a “Private Key” in advance. This can be done using the following instructions (by choosing the “file format:” option “.ppk” in point 3) Guide – How To – Create and use Key Pair to connect to a VM
- Launch an instance through your Amazon account. When starting the VM, the proxy server starts automatically.
- To use the proxy server through the built-in Windows tools, you must open the settings.
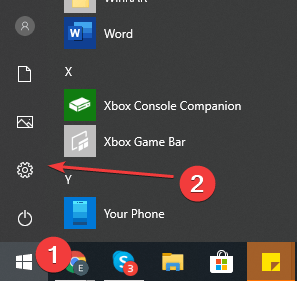
- In Settings, select Network & Internet.

- Go to the “Proxy” section and set the “Use a proxy server” switch to On
- In the Address field, enter the address of the VM, and in the Port field, specify 8888. Then click the Save button.
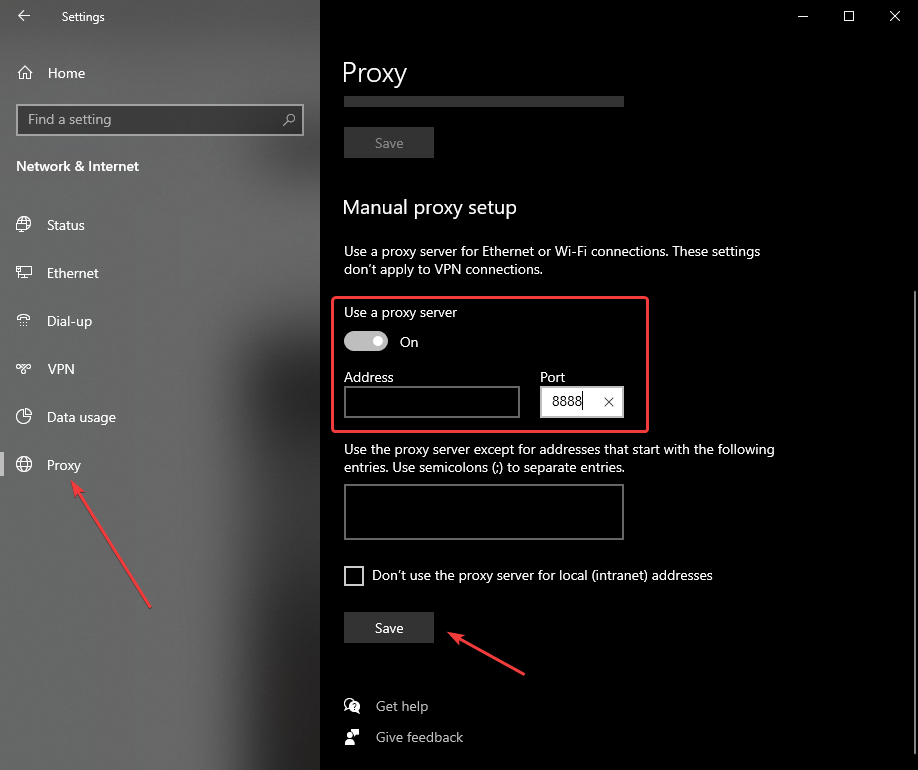
- To check the connection to the proxy server, open the https://www.myip.com/ website in any browser and check if your IP address has changed.
Attention: There may be a problem that with an enabled proxy, you will lose your Internet connection. To fix this problem, you should restart the proxy service manually. To do that, you should connect to the server via SSH.
- Download PuTTY application at the following link – Download
- Go to the section SSH on the left panel, and then to Auth
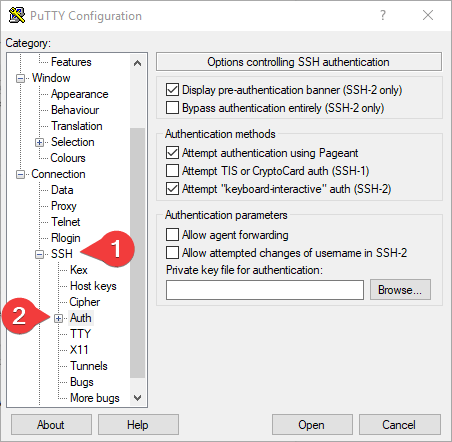
- In the “Auth” section, click “Browse” and specify the path to the .ppk file you received earlier.
- Go to the home page of “Session”, enter the IP address of the VM, and click “Open”.
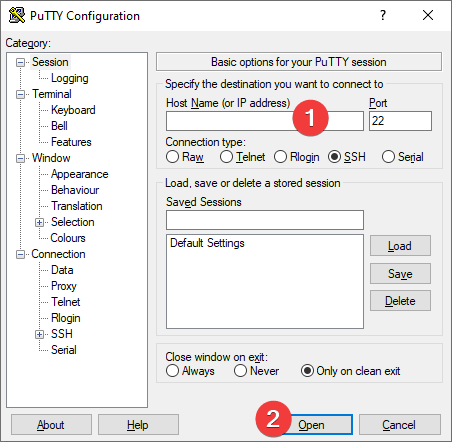
- In the opened console, you will need to enter the login ec2-user.
- Next, you should enter the following commands:
> sudo service tinyproxy stop
> sudo service tinyproxy start
To check server status, enter the following command:
> sudo service tinyproxy status
