Configuration and connection to TinyProxy 1.11.0 Easy Proxy Server for Ubuntu 24.04
- To start the server, you just need to start the Instance through AWS.
- To connect to the VM, you should generate a “Private Key” in advance. This can be done using the following instruction (by choosing the “file format:” option “.ppk” in point 3) – Guide – How To – Create and use Key Pair to connect to a VM
- Download and run Putty
- Go to the “SSH” section in the left panel and then to “Auth”.
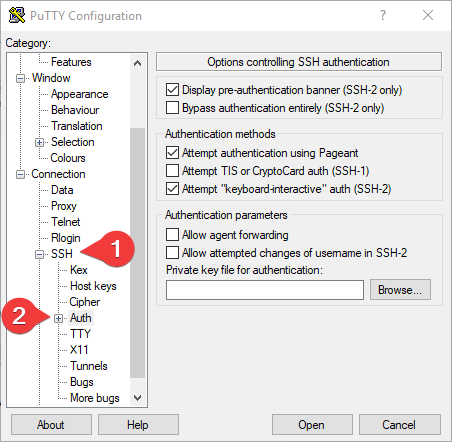
- In the “Auth” section, click “Browse” and specify the path to the .ppk file you received earlier.
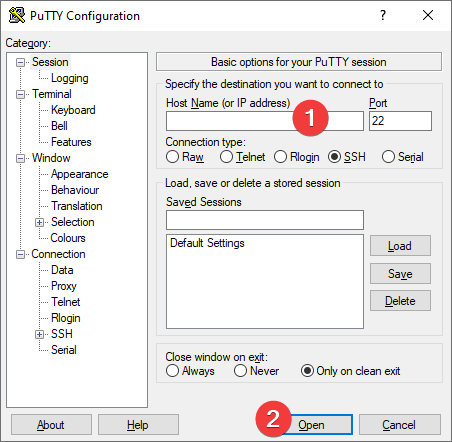
- Go to the home page of “Session”, enter the IP address of the VM, and click “Open”.
- In the opened console, you will need to enter the login ubuntu
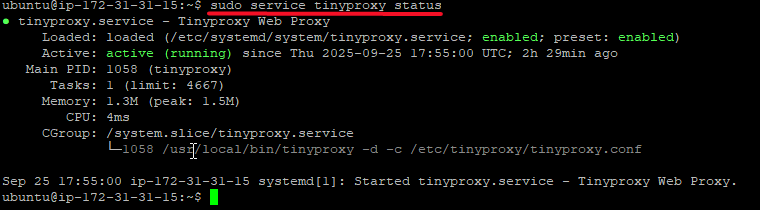
- To check the server status, enter the command:
>sudo service tinyproxy status
- To change the server configuration, enter the following command:
> sudo vi /etc/tinyproxy/tinyproxy.conf
- To manage the server, you can use the following commands:
>sudo service tinyproxy stop
>sudo service tinyproxy start
>sudo systemctl restart tinyproxy
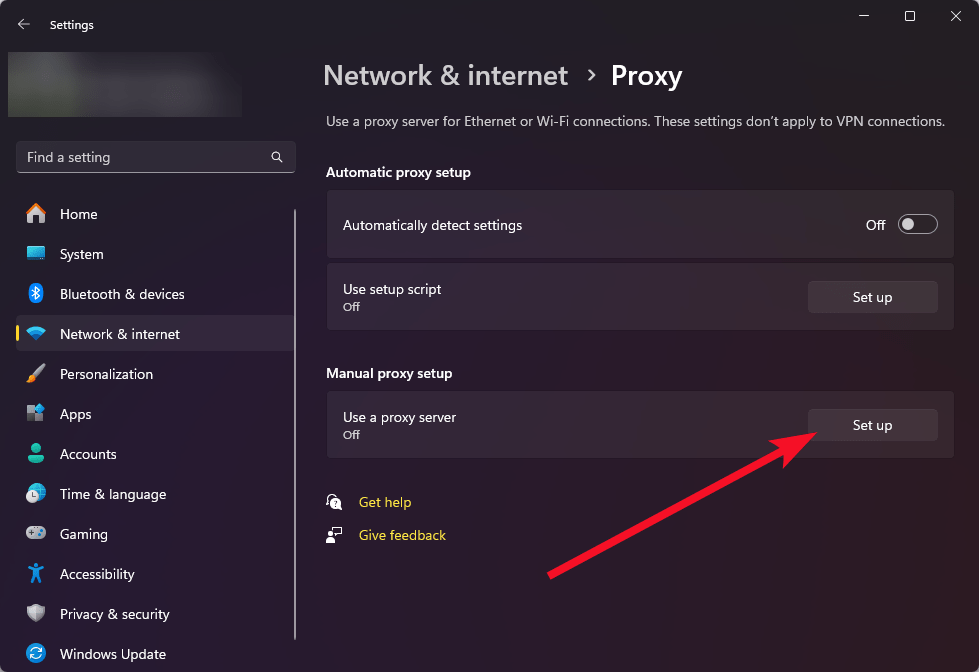
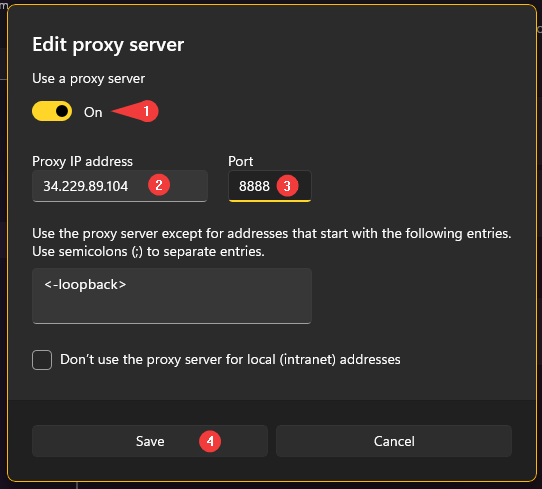
- To use the proxy server through the built-in Windows tools, open Settings > Network & internet > Proxy

- Click Set up in the Manual proxy setup section
- Turn on the Use proxy server (1), enter the IP address of your VM in the Proxy IP address field (2), and in the Port field specify 8888 (3). Then click the Save button (4)
- To check the connection to the proxy server, open the MyIP.com website in any browser and check if your IP address has changed.
