Connection to Squid Auth with Webmin on Linux Stream 10
To work, you should open ports 22, 3128, and 10000 (TCP) in the network properties in the Amazon firewall. After purchasing and starting the VM, you should know its IP address. You can find it in Amazon’s personal account.
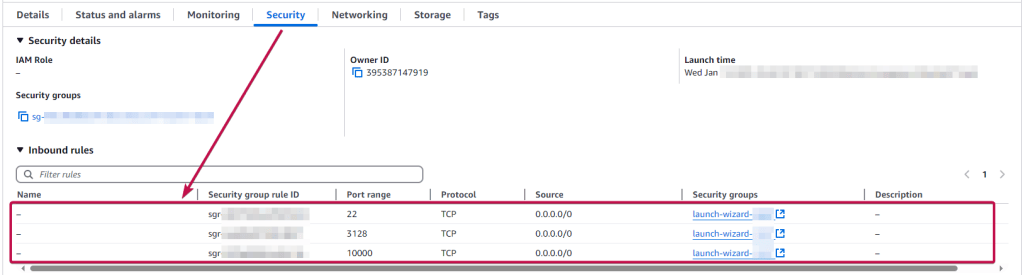
Creating Credentials
To connect to the Server, you should generate a “Private Key” in advance. This can be done using the following instructions (by choosing the “file format:” option “.ppk” in point 3): Guide – How To – Create and use Key Pair to connect to a VM
- Connecting to the VM using PuTTY. You can download it at the following link – Download.
- Go to the SSH section on the left panel, and then to Auth.
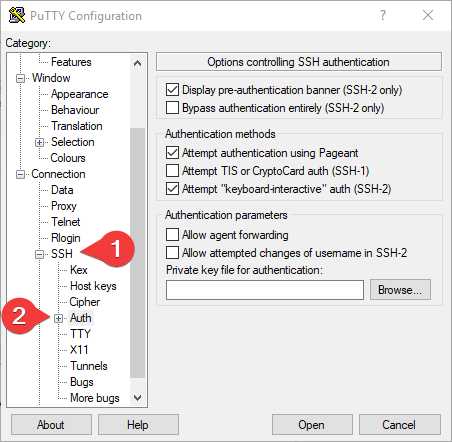
- In the “Auth” section, click “Browse” and specify the path to the .ppk file you received earlier.
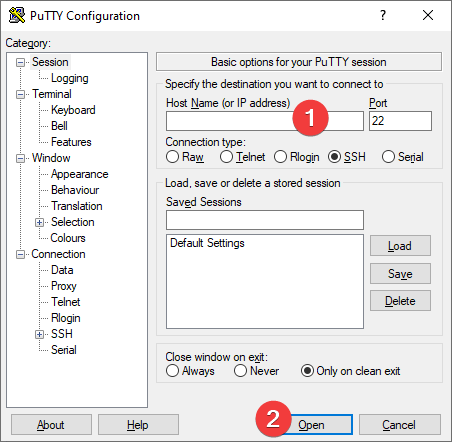
- Go to the home page of “Session”, enter the IP address of the VM, and click “Open”.
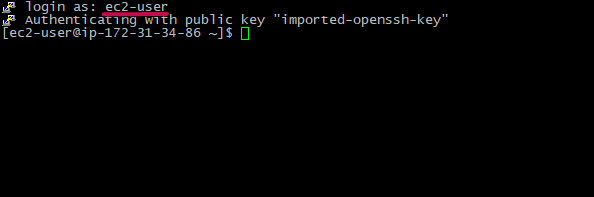
- In the opened console, you will need to enter the login ec2-user
- Now you can use the following commands to manage users in Squid:
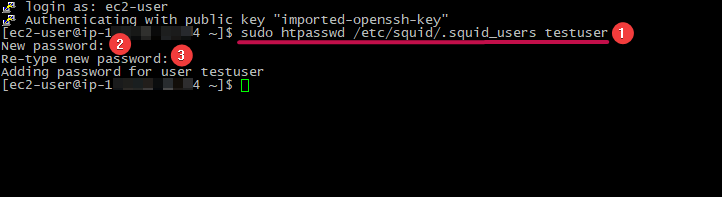
sudo htpasswd /etc/squid/.squid_users newusername – create a new user.
You need to enter the username (1), enter the password (2) for the new user, then repeat the password (3).
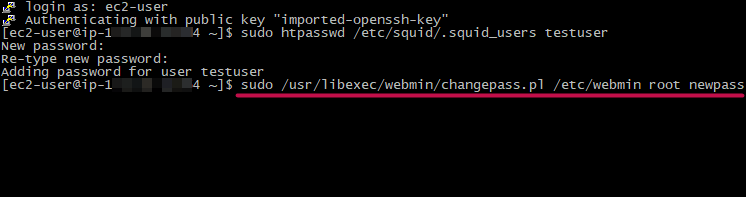
- To get credentials to log in to the Webmin server, enter the following command in the console:
$ sudo /usr/libexec/webmin/changepass.pl /etc/webmin root NewPassWord, where NewPassWord is your new password
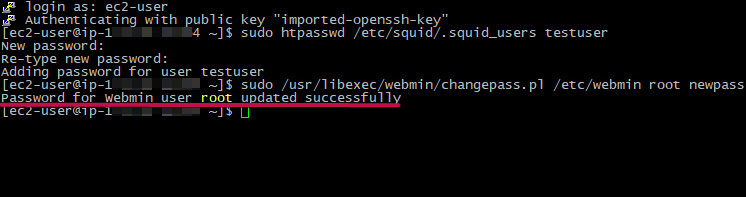
- The following message is displayed when a password has been set for the “root” user.
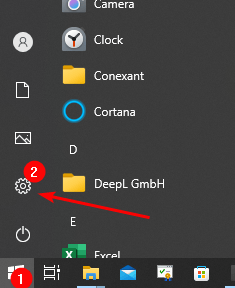
- To use the proxy server through the built-in Windows tools, you must open the settings. Click “Start” (1), then “Settings” (2).
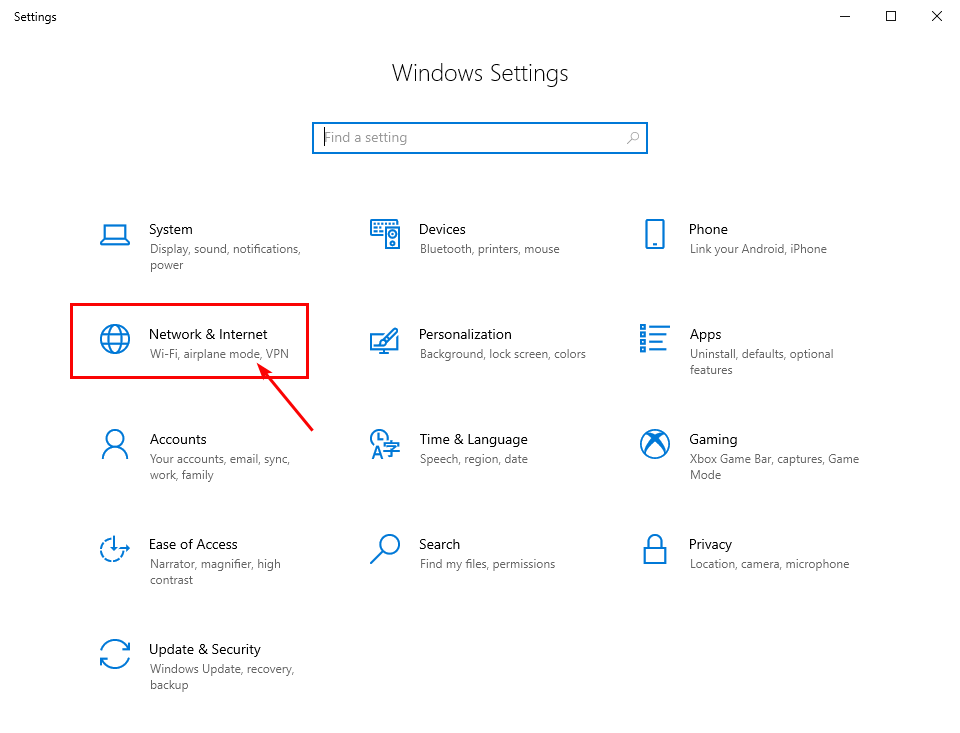
- In Settings, select “Network & Internet”.
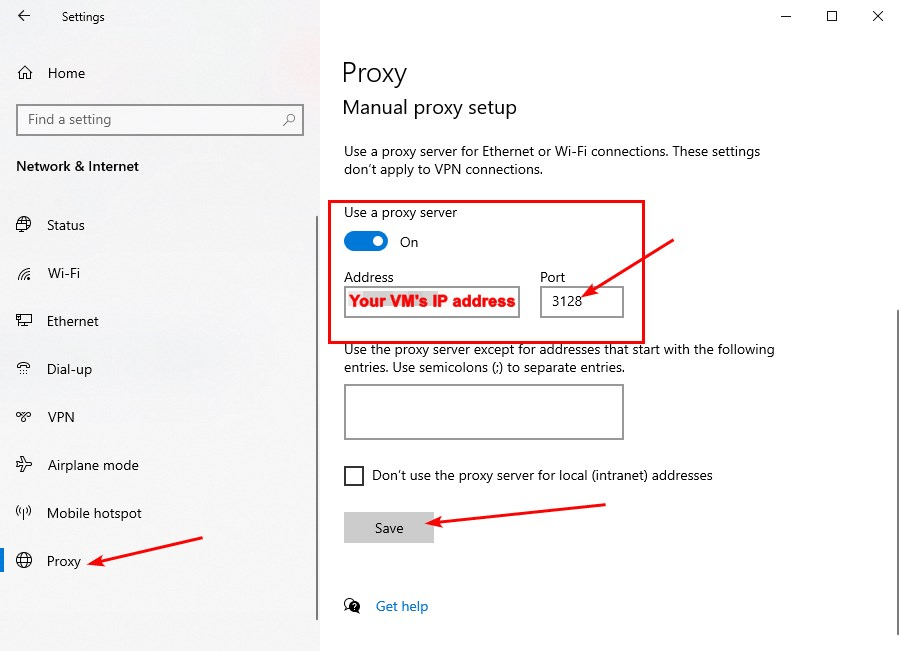
- Go to the “Proxy” section and set the “Use a proxy server” switch to On.
In the Address field, enter the VM address, and in the Port field, specify 3128. Then click the Save button.
Connecting to Webmin
- In your browser, enter https://ip:10000. For example: https://11.22.123.123:10000
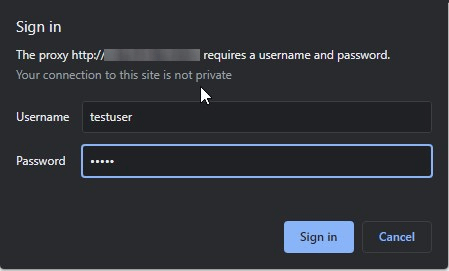
- To work on the Internet using a proxy server, you will need to enter the login and password that you entered when you created the new user (Step 2)
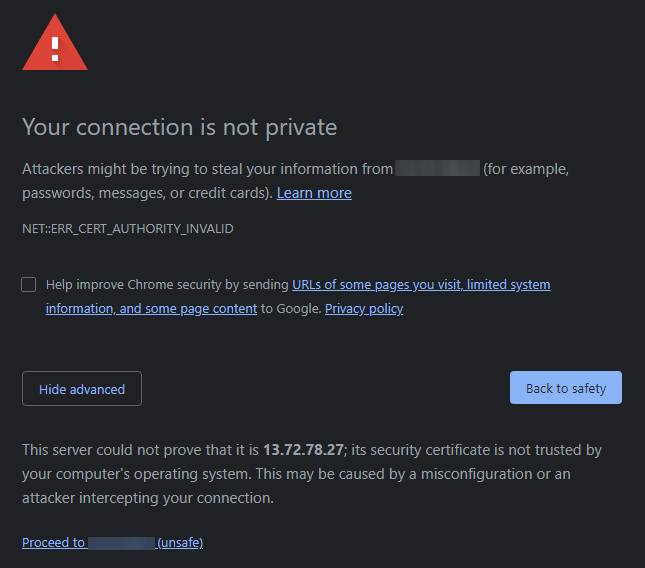
- When you go to the address, you will need to accept a self-signed certificate; for this, click the <Advanced> button and then <Proceed to “vm_ip” >
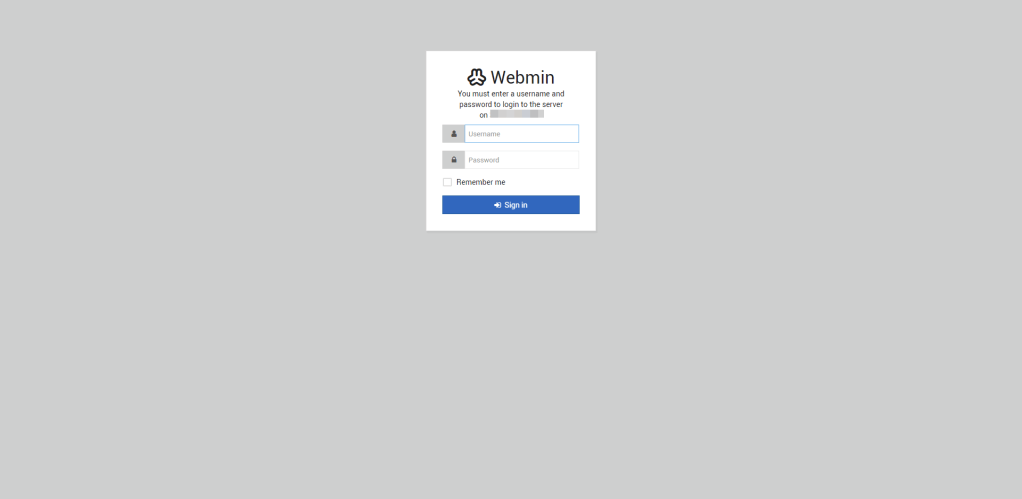
- The authorization page will open.
Enter the root login and your new password created in step 3
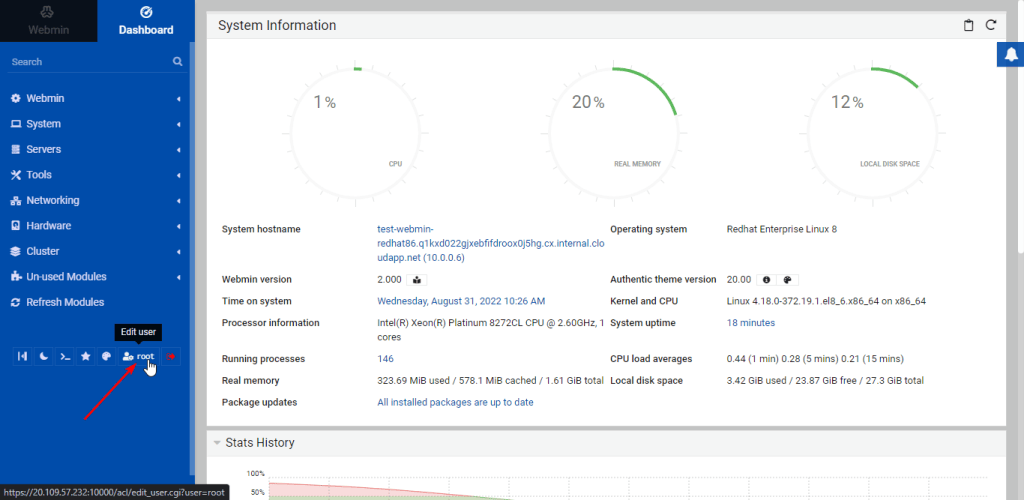
- To change the username and password, you need to click the “root” button.
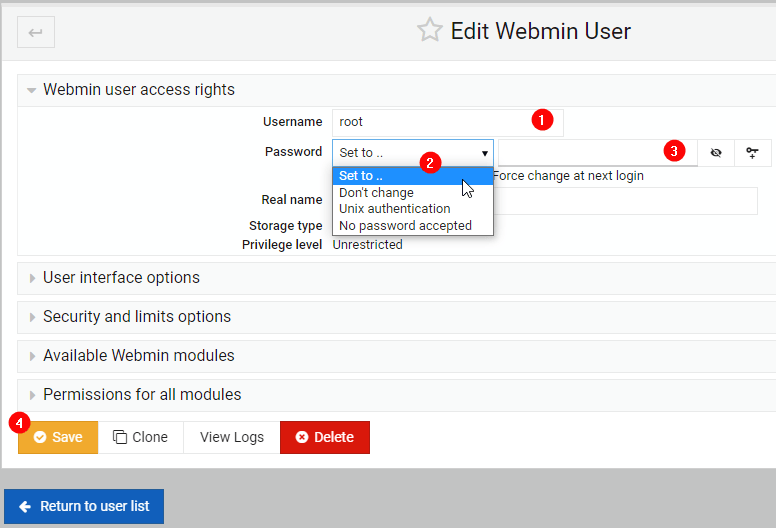
- To change, follow the steps:
1) In the “Username” field – enter your nickname;
2) In the “Password” field, choose “Set to”;
3) Enter a new password;
4) Click the “Save” button
More documentation about Webmin
Visit the Webmin Forum to get answers to your questions.
About Squid Proxy
SquidFaq – Squid Web Proxy Wiki

