Minecraft Bedrock Game Server for Ubuntu 18.04 LTS is an indispensable offer for those who want to create a Dedicated Minecraft Java Game Server. This Image allows you to create a fully customizable server, adjust all its parameters manually, and invite other players.

This is a quick deployment and ready-to-run image.
Simple and rapid installation. Easy to maintain.
How to start and connect to Minecraft Bedrock Edition Server for Ubuntu 18.04
- To start the server, you just need to start the VM.
- Run your client to play the Minecraft Bedrock Edition.
- Click “Play” on the main menu.
- Go to the “Servers” tab and click “Add Server”.
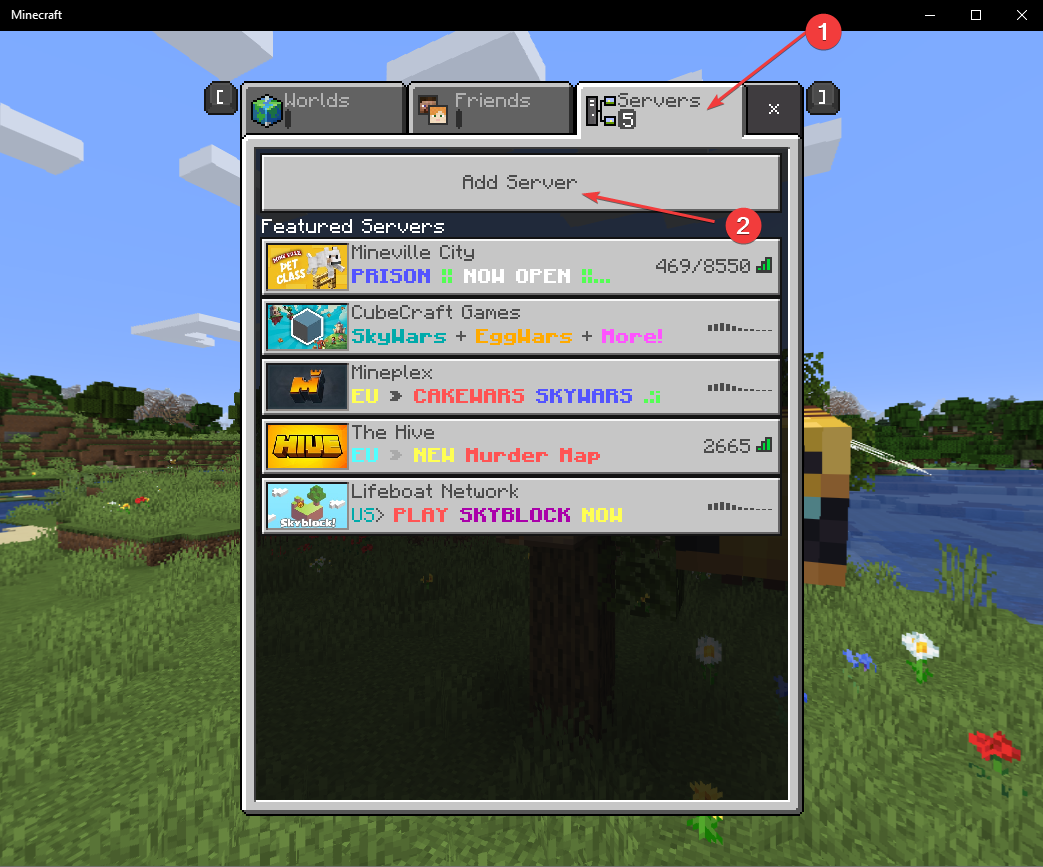
- In the appeared window, in the “Server Name” field name the server as you like.
- In the “Server Address” field enter the IP address of the VM and click “Play”. The “Port” field leave with no changes.

Сonfiguration and connection to the server using PuTTY
To connect to the VM, you should generate a “Private Key” in advance. This can be done using the following instruction (by choosing the “file format:” option “.ppk” in point 3)
Guide – How To – Create and use Key Pair to connect to a VM
- Download and run Putty
- Go to the “SSH” section in the left panel and then to “Auth”.
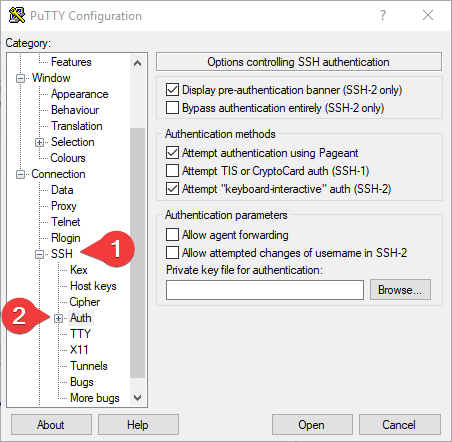
- In the “Auth” section, click “Browse” and specify the path to the .ppk file you received earlier.
- Go to the home page of “Session”, enter the IP address of the VM and click “Open”.

- In the opened console you will need to enter the login ubuntu
- To manage the server, you can use the commands described in the basic usage tab on the page – https://linuxgsm.com/lgsm/mcbserver/
