Mantis Bug Tracker is an issue tracker that provides a delicate balance between simplicity and power. The most common use of MantisBT is to track software defects. However, MantisBT is often configured by users to serve as a more generic issue tracking system and project management tool.

This is a quick deployment and ready-to-run image.
Simple and rapid installation. Easy to maintain.
The connection to Mantis Bug Tracker System Windows 2019 AWS
- First, to connect to Mantis Bug Tracker System, you should open port 80 by the TCP Protocol in the network security group.
- To access Mantis Bug Tracker you should go by the link http://ip/mantis in a browser
(wherein the link instead of “IP” type the real IP of the virtual machine or DNS name on Amazon)
When you click on the link, you will see the following:

- When deploying the VM, a login and password for access are created in the system. They are standard during the first deployment of MantisBT.
- In the Username field, you should enter the login and click <Login>. Then you will see the page:
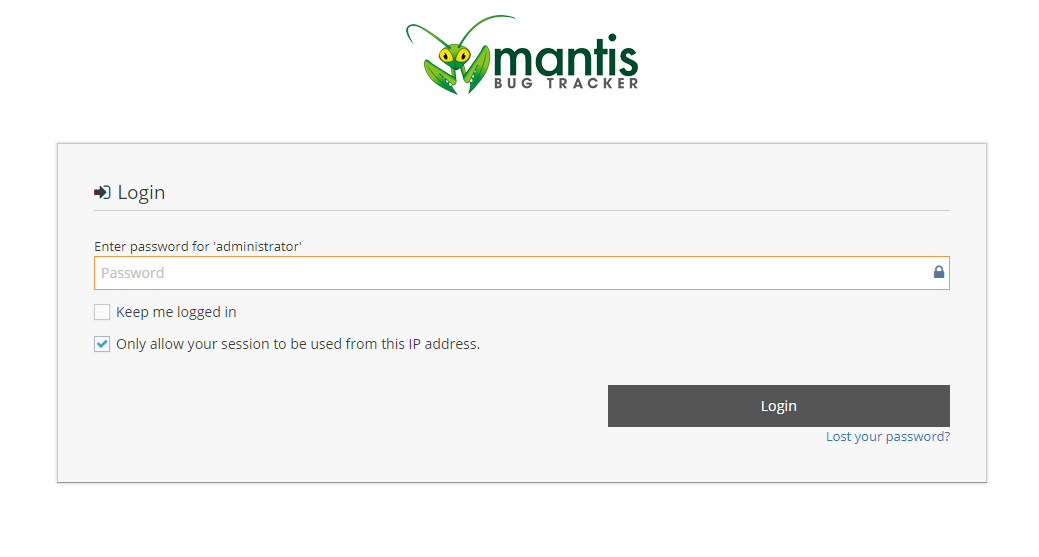
- On the page that is displayed above, in the “Password” field, you should enter
the default password and click “Login” to complete the authorization.
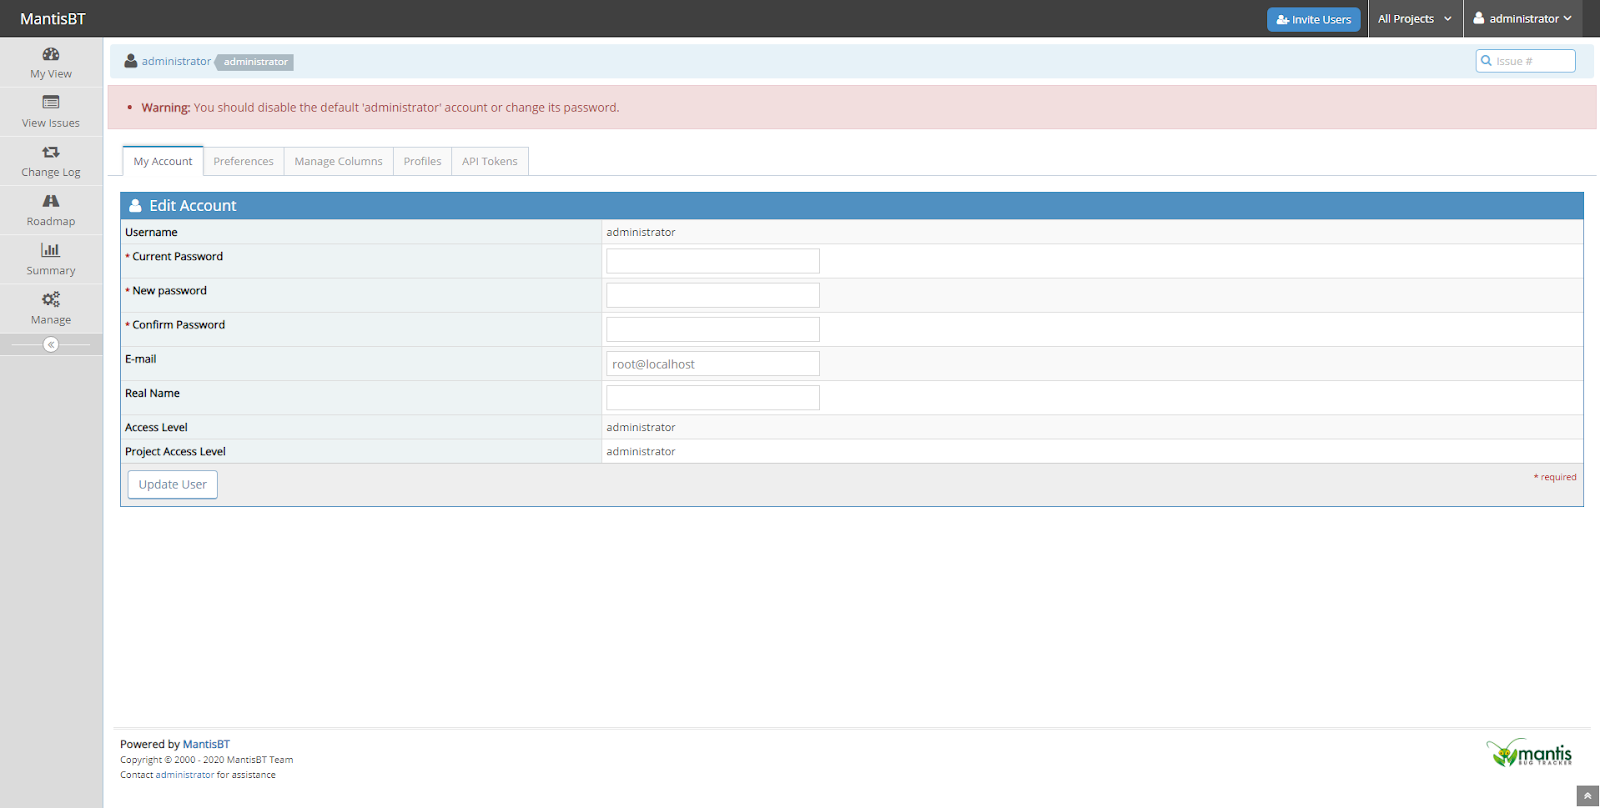
- After logging in, it is possible to change the default password at any convenient for you.
- In the “Confirm Password” field type the default password.
- In the “New Password” field enter any password convenient for you.
- In the “Confirm Password” field type the new password again.
- Also, you should enter your e-mail address in the “E-mail” field.
To connect via RDP, you must create a password for the connection first. To do this, use the following Guide. On the desktop, there is the file called “Admin_Guide” where is the instruction and the detailed description of how to work with the Mantis Bug Tracker.
