Configuring and connecting to iRedMail on RHEL 8
- Start your VM
It is recommended to use the Instance type “t2.medium” or higher when installing the VM. To start the server, you just need to start the VM.
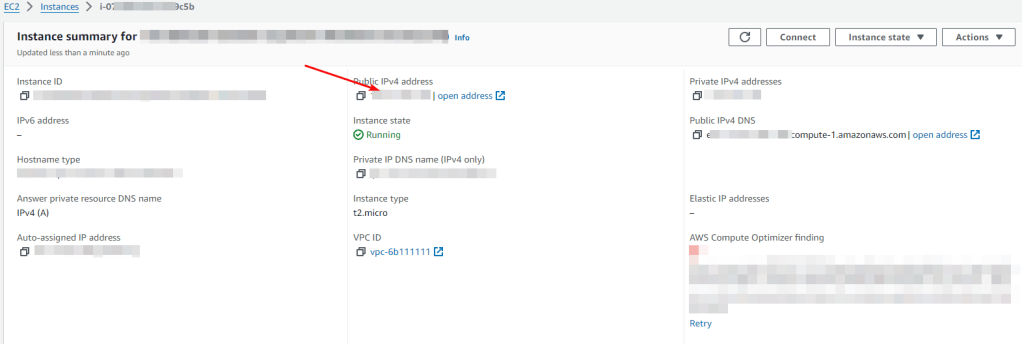
- To customize the Server, first, you need to know the server IP address. You need to select the virtual machine from the list. Your IP is displayed in the line “Public IPv4 address”.
- For the server to be usable, open TCP ports 25, 80, 110, 143, 443, 587, 993, 995 in your VM’s security group.
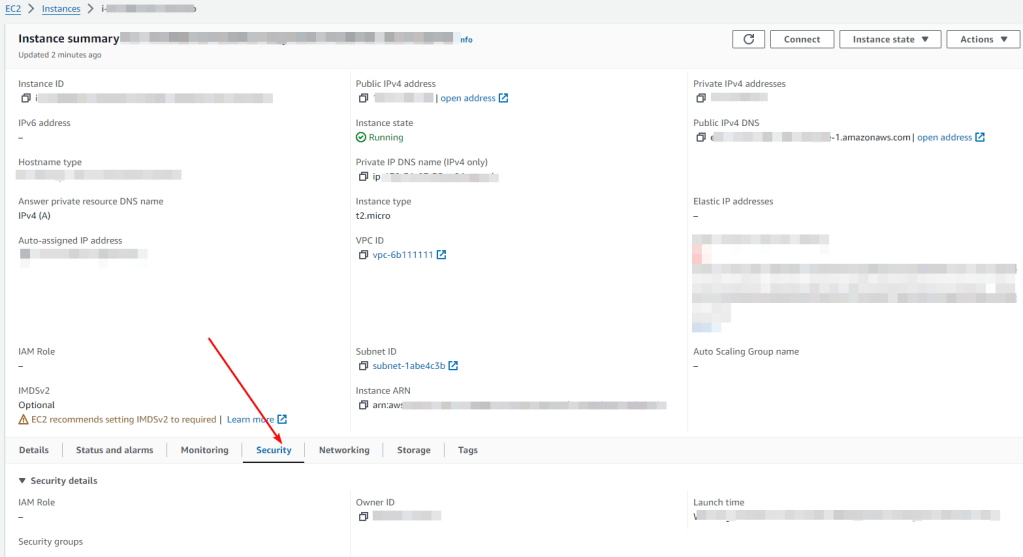
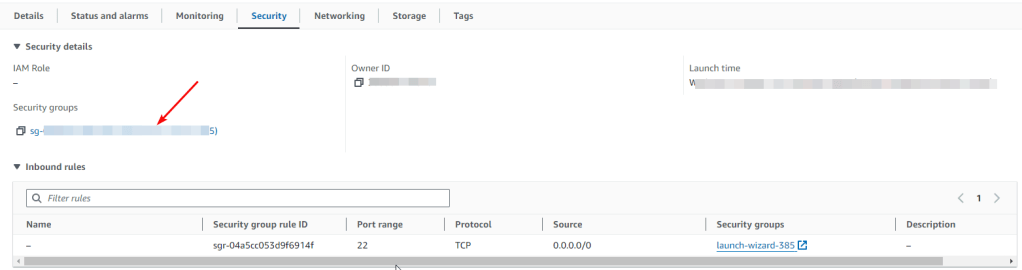
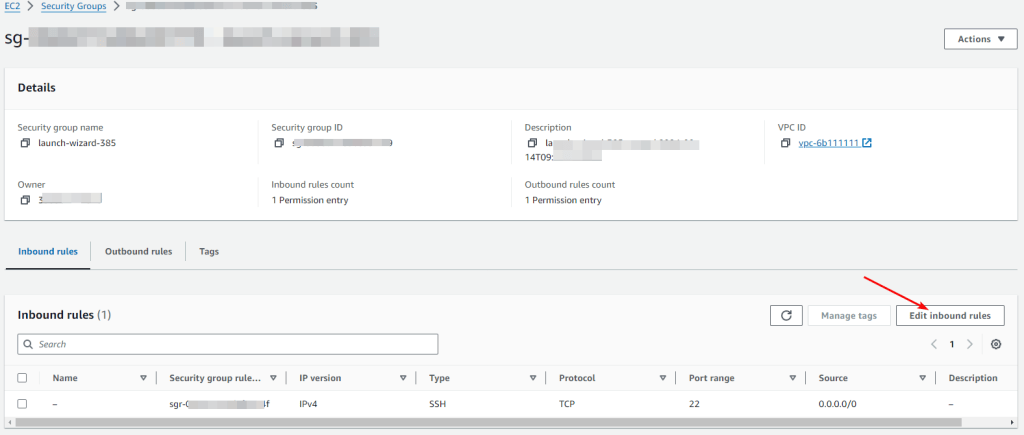
- Static IP address – Your virtual machine should have a static IP address if you do not want to constantly change the domain settings (because if the address is elastic, after the reboot of the machine it’ll change to the static one).
- Get a random admin password.
- To get the password, you should connect to the VM. To do that, generate a “Private Key” in advance. This can be done using the following instructions (by choosing the “file format:” option “.ppk” in point 3): Guide – How To – Create and use Key Pair to connect to a VM
- Download and run PuTTY.
- Go to the “SSH” section in the left panel (1) and then to “Auth” (2).
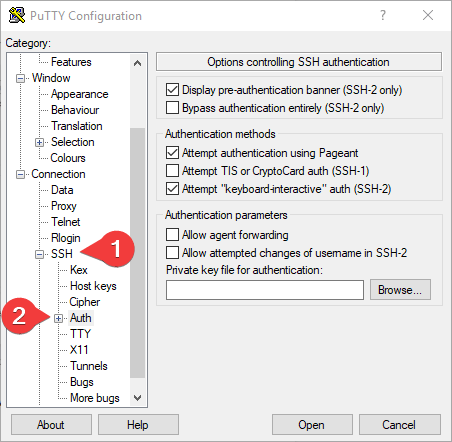
In the “Auth” section, click “Browse” and specify the path to the .ppk file you received earlier.
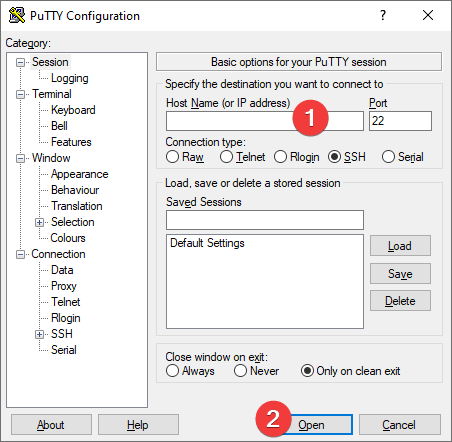
- Go to the home page of “Session”, enter the IP address of the VM (1), and click “Open” (2).
- In the opened console, you will need to enter the login ec2-user
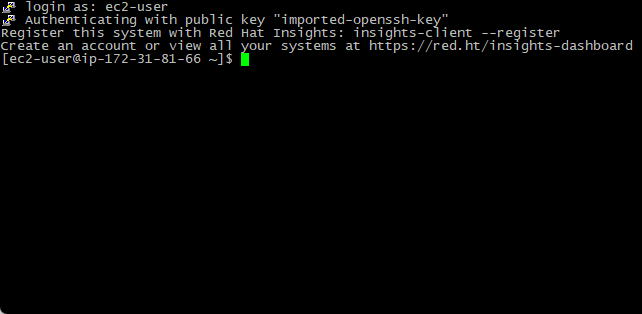
- Connect to your server.
After creating the machine, it’s possible to get access to the web panel either directly through the IP address or by adding MX domain records.
The instructions on how to do that:
Google Domain – https://support.google.com/a/answer/6248174?hl=en
Namecheap – https://protonmail.com/support/knowledge-base/dns-records-namecheap/
GoDaddy – https://www.godaddy.com/help/what-is-an-mx-record-324
iRedmail MX setup information: https://docs.iredmail.org/setup.dns.html#mx
For your site, where you’ve bought the domain – please Google “youdomainSeller add MX records” or contact the seller’s customer support.
Please consider that it’s better to use the static IP address for the mail server. Sometimes it takes up to 24 hours to activate the MX records.
Access to the inbox – through the web panel
Here is the default data for the connection. As an example, we have taken the IP address of our VM. Instead of it, you should write yours:
– Web admin panel (iRedAdmin): https://youVirtualMachineIP/iredadmin/ (http://youdomain/iredadmin/)
– Roundcube webmail: https://youVirtualMachineIP/mail/
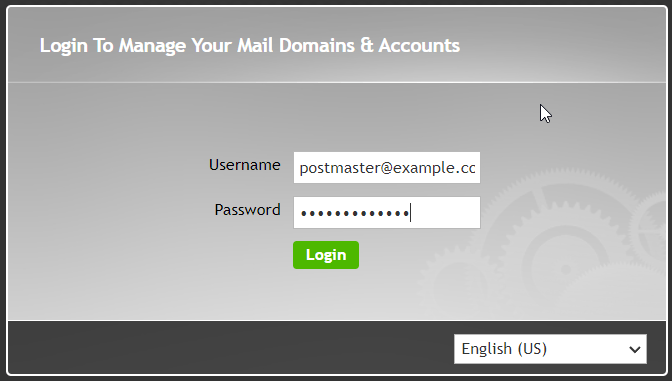
- Log in to the admin panel – https://youVirtualMachineIP/iredadmin/
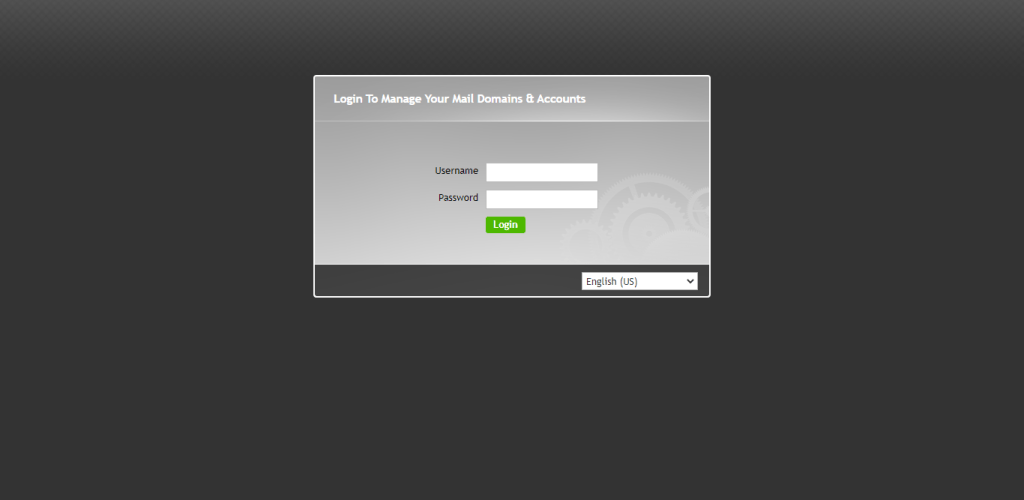
You should enter the following credentials:
– Username: postmaster@example.com
– Password: postmasterpwd
The next window opens.
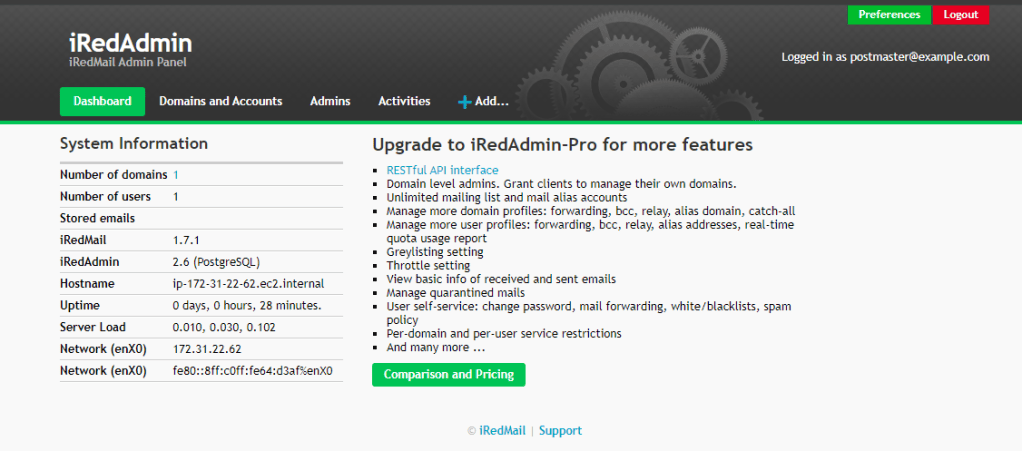
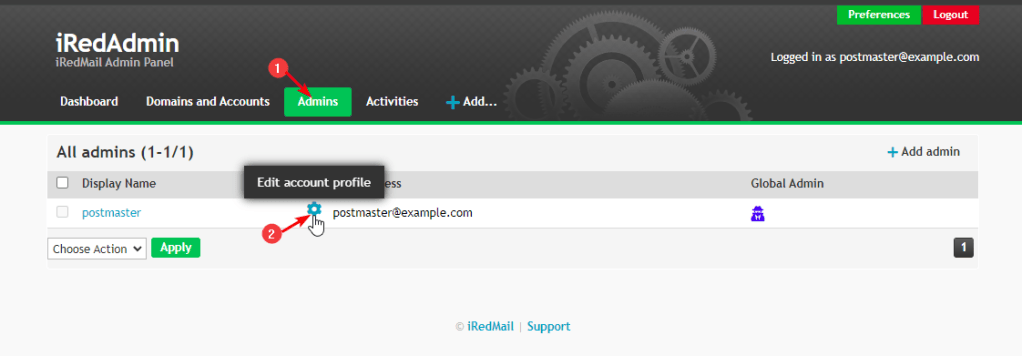
To change the default password on this page, go to Admins -> Edit account.
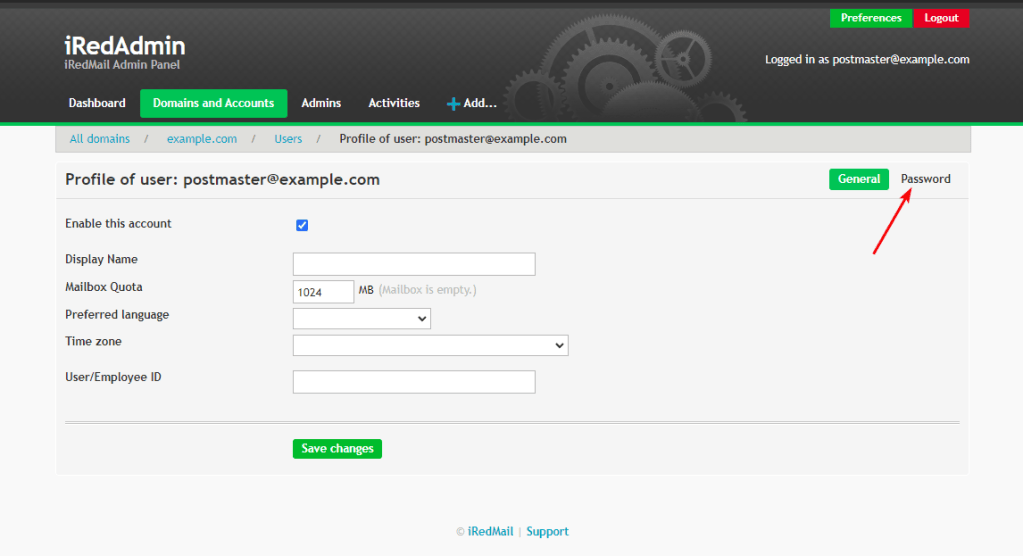
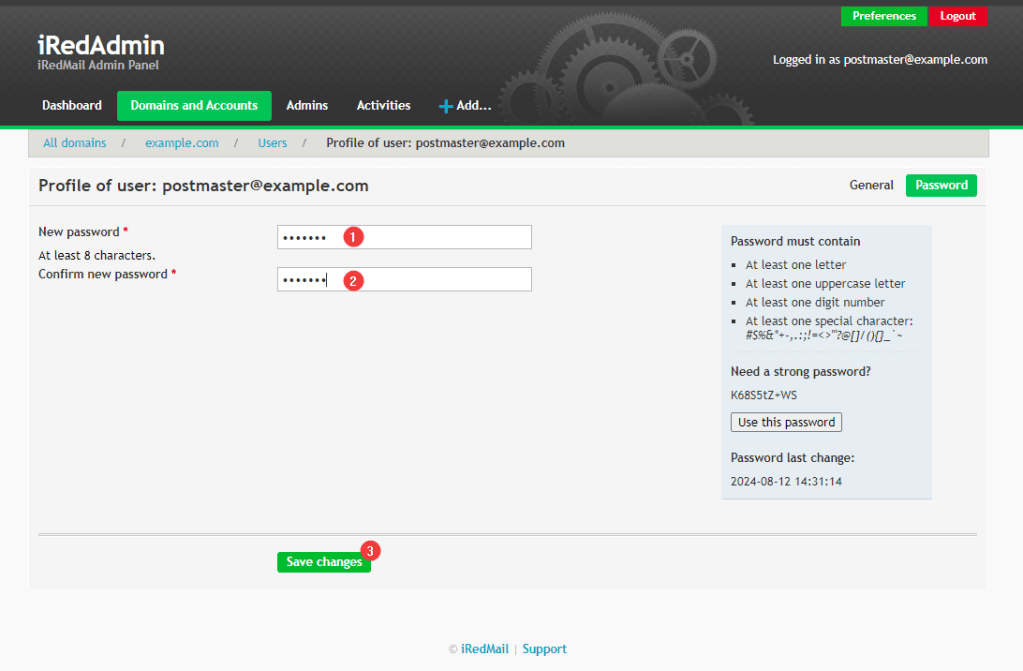
After you have opened the settings window, go to the Password tab.
Enter (1) and reenter (2) the new password, and save (3) the changes.
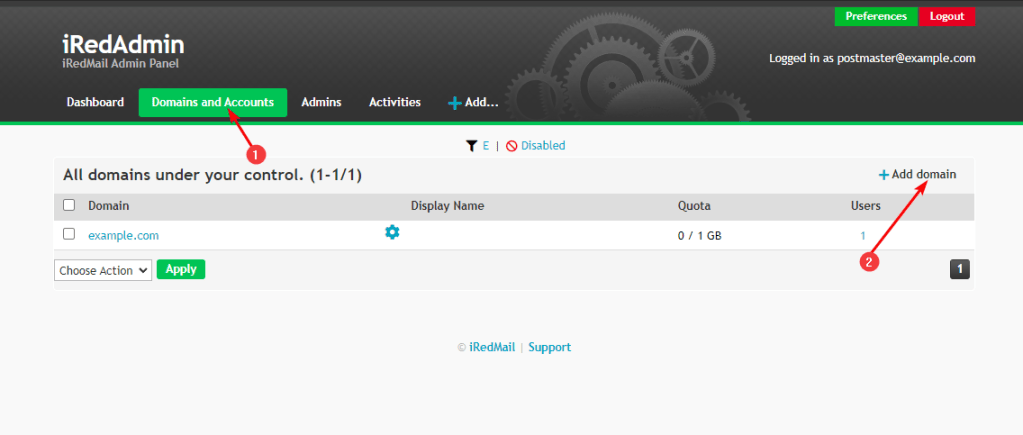
To add a domain name in the admin panel, go to Domains and Accounts -> Add domain.
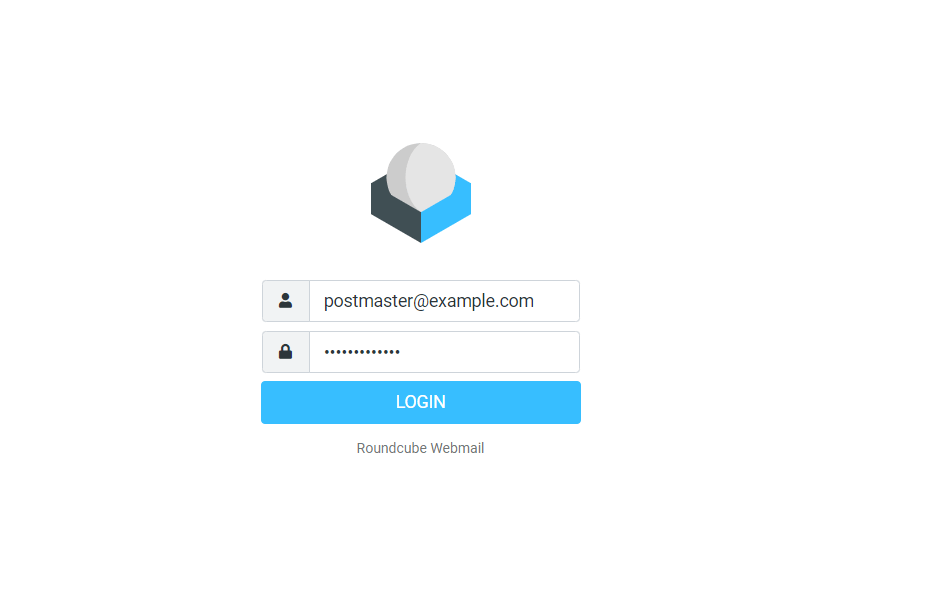
- Log in to the mailbox (test account) – https://youVirtualMachineIP/mail/
You should enter the following credentials:
– Username: postmaster@example.com
– Password: postmasterpwd
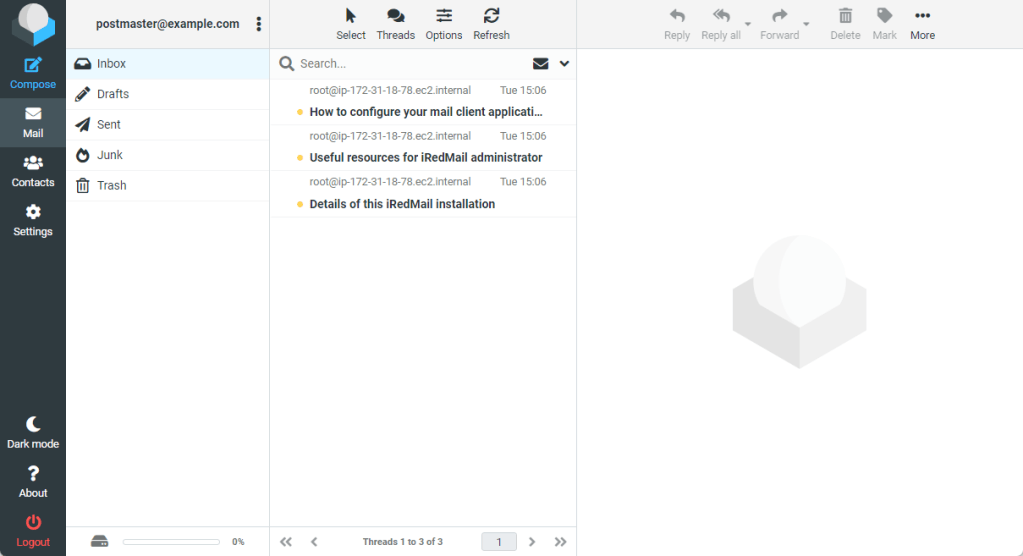
The next window is displayed.
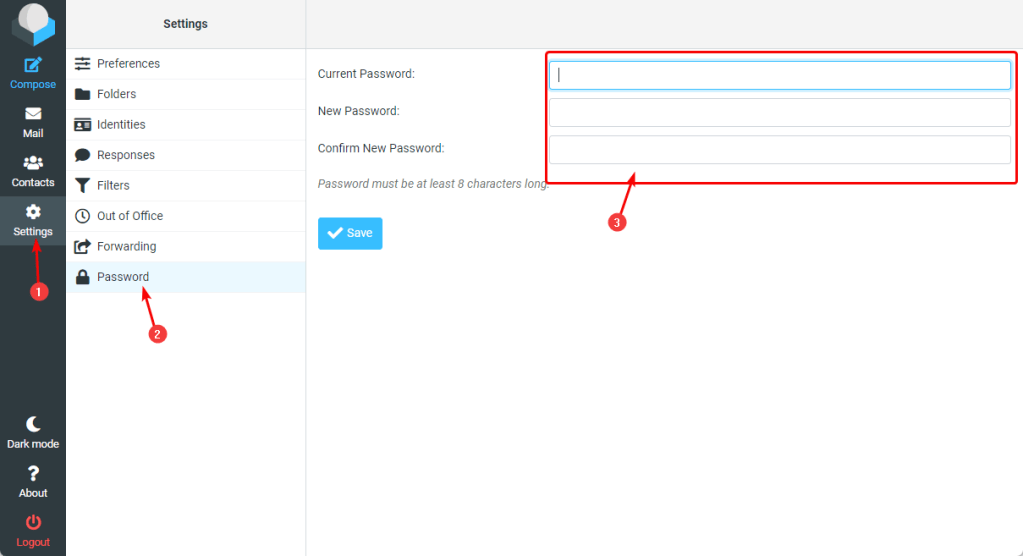
The password change for the mailbox (not for the admin’s account):
Settings > Password > Type the current password > Type the new password > Save
For more details, please see the topic “Configure mail client applications” in the iRedMail Documentation.
or use these links:
- Exchange ActiveSync: Setup Outlook 2013 for Windows
- Setup Thunderbird: POP3/IMAP, SMTP and global LDAP address book
- Setup Thunderbird: SOGo Address Book and Calendar synchronization with CardDAV and CalDAV
- Exchange ActiveSync: Set up Android devices
- Exchange ActiveSync: Set up BlackBerry 10 devices
- Exchange ActiveSync: Set up iOS devices
- Mac OS X: Add contact service (CardDAV) in Contacts.app
- Mac OS X: Add calendar (CalDAV) and task (Reminders) service in iCalendar app
 Tidal Media Inc. — Software for Windows & Cloud Solutions