FTP Server for Windows 2016 is a powerful tool for data transfer. It’s possible to upload and download files, transferring them between the server and your computer or connecting multiple computers across the Internet in a simple way.
![]()
This is a quick deployment and ready-to-run image.
Simple and rapid installation. Easy to maintain.
To install the FTP Server in Azure, please consider all the advantages of our marketplace solution that will lead to full secure FTP server setup into your Azure tenant.
As soon as your Azure VM was deployed, several adjustment steps should be done to start using this FTP Server.
Sign In
Sign in with the credentials that were provided while the VM creation.
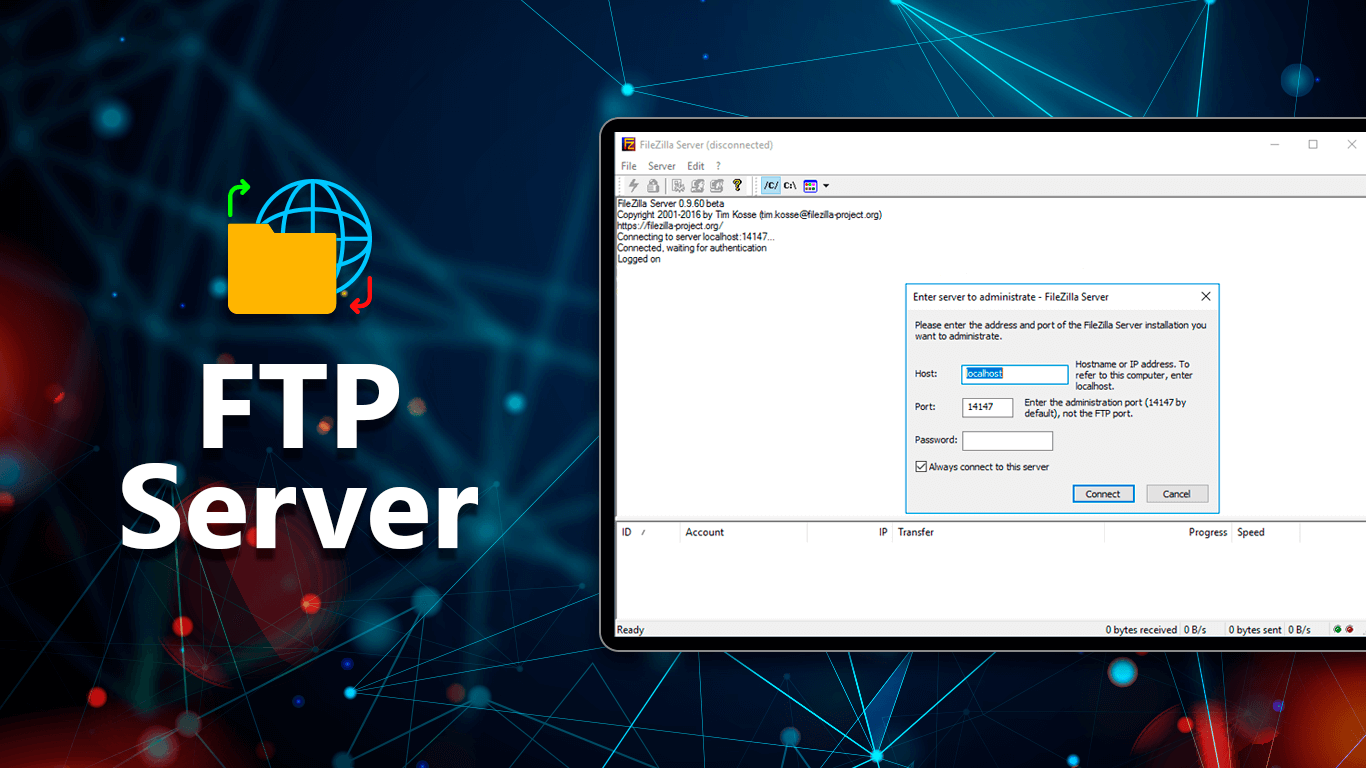
Start Up FileZilla Server Instance
Start up the FileZilla Server Instance application, with the shortcut on your desktop. In the pop up window click Connect as displayed below (the password field is empty).

Passive Mode Settings
When the connection has been established, it’s possible that some errors may occur, that is okay ‘cause some more steps should be done.
From the options select:
> Edit > Settings > Passive Mode Settings
Then it’s necessary to set a passive mode port range.Typically (50000-51000) ports are used when transferring data to the server.
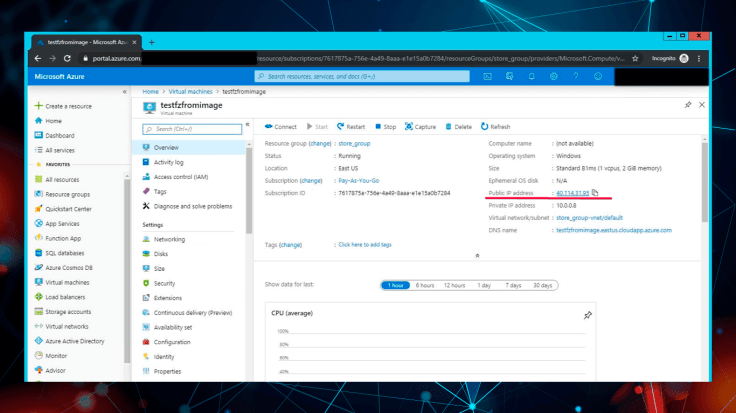
Set Public IP Address
To allow the third-party clients to connect – ensure that your VM has the correct public IP Address (in our case it is 40.114.31.95).
If you faced the problem with attaching the public IP Address, follow the Microsoft’s Guide.
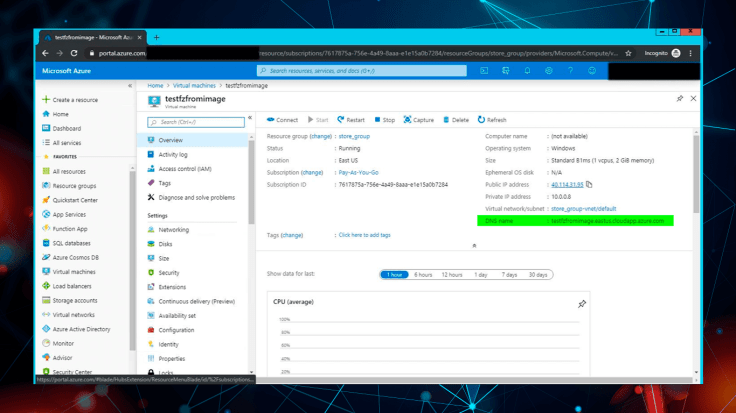
Whenever you have associated the public IP address with the NIC on your Azure VM, attach the IP Address to the Passive Mode Settings, as displayed below (highlighted in green), and also make sure that the Passive Port Range has been added.

Generate Certificate (FTP over TLS)
To accept TLS Connections FileZilla needs the next actions: create a new private key and generate a self signed certificate.
Among the FileZilla options, select the SSL/TLS Settings. Tick Enable FTP over TLS support (FTPS) box.
Then, click on Generate New Certificate and fill in the necessary fields with your company information.
Later you’ll be able to save the Certificate to the Documents or to any other place.
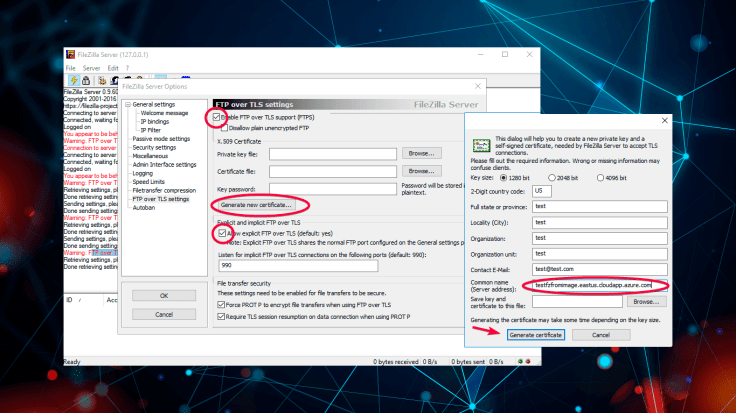
Please ensure, that the public DNS name of your Azure VM was added in the Common Name (Server Address) field.
Save the key on the Local Server and press Generate Certificate. You don’t need to add the password in this case.
Set Up Local Users
To set up local users and give them access to the directories locally on your server you need to select Edit > Users
This is how new users can be joined and their passwords created.
After that, provide the users with the access to the necessary local folders.
There is the pre-configured folder on the VM, located on the C:\FTP Directory which can be used. Also you can setup any amount of folders that you need as well. Moreover, you can setup the groups with the permissions according to their status.
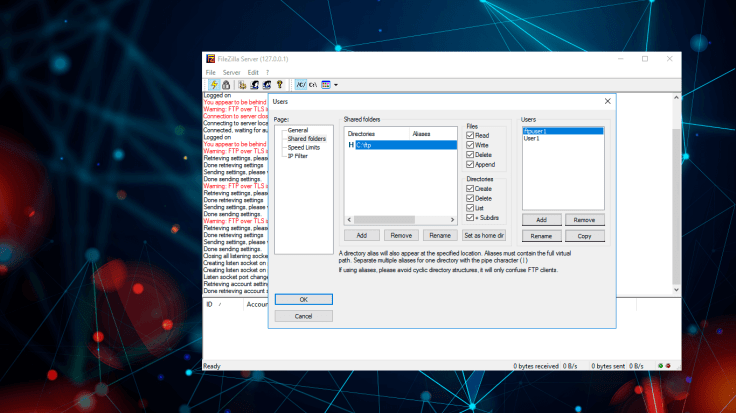
The next step is to assign these users to the needed FTP directories. Go to Shared Folder in the Users Menu and attach the local folders and delegate the necessary permissions.
Now it’s high time to test if you can connect using the FTP Client. If it’s impossible to connect, try the next options to adjust any NSG / Firewall rules.
NSG Rules / Firewall Rules Adjustments
In case you have NSG’s or Firewall appliances in Azure you’ll have to open access to the next ports:
- Port: 21 (Used for FTP)
- Port: 990 (Used for FTPS)
- Port: 14147 (Used for FTP Server Administration)
- Passive Port Range: 50000 – 51000 (Used when transferring data)
In order to open the ports, go to the Virtual machine’s settings in Azure – open Networking and add the necessary ports.
Then you need to open these ports in Windows firewall.
To do this, go to “Windows firewall with advanced security” console, create an inbound rule to allow TCP on port (21, 990…)
FTP Client
Users can use any FTP Client to allow clients to connect. One of the best solutions is to choose FileZilla’s FTP Client.
Support
If you faced any problems with setting up the server this way, feel free to leave your comment below.
Contact us in case you would like to use our Managed Azure Service and allow us to manage your VM’s.
If you want us to help you to implement this FTP Server solution into your environment and make all the configurations, please contact us. We will help you with this as soon as possible.
Disclaimer
This FTP Server solution was built with a help of the altered version of the FileZilla Server Opensource Software. This solution is allowed under the GPLv2 Licence. The original trademarks are owned by the relevant companies. Therefore, no warranty is included with this software.
Use it at your own risk, and if there any damages appear resulting from the use of this software, they will be entirely on your responsibility.

Leave a comment