
Effortlessly manage your digital content with IMPORTER FOR MEDIA PRO, the versatile tool designed to simplify media transfers. Whether you’re working with videos, music, or photos, our software streamlines the import process from various sources.
Seamless integration is at the heart of this versatile tool, supporting a wide array of storage options. Whether you’re using USB flash drives, optical discs, or other portable media devices, the software ensures smooth compatibility. It effortlessly recognizes and interacts with various external storage formats, allowing for quick and efficient file transfers without the need for complex setup procedures.
The application prioritizes simplicity, intelligence, and speed, making file management a breeze. Simplify your digital life with just one click, and leverage all the benefits of our IMPORTER FOR MEDIA PRO.
How to start
- Launch the application. First of all, you need to sign in a cloud system. Click on the ‘gear’ button.

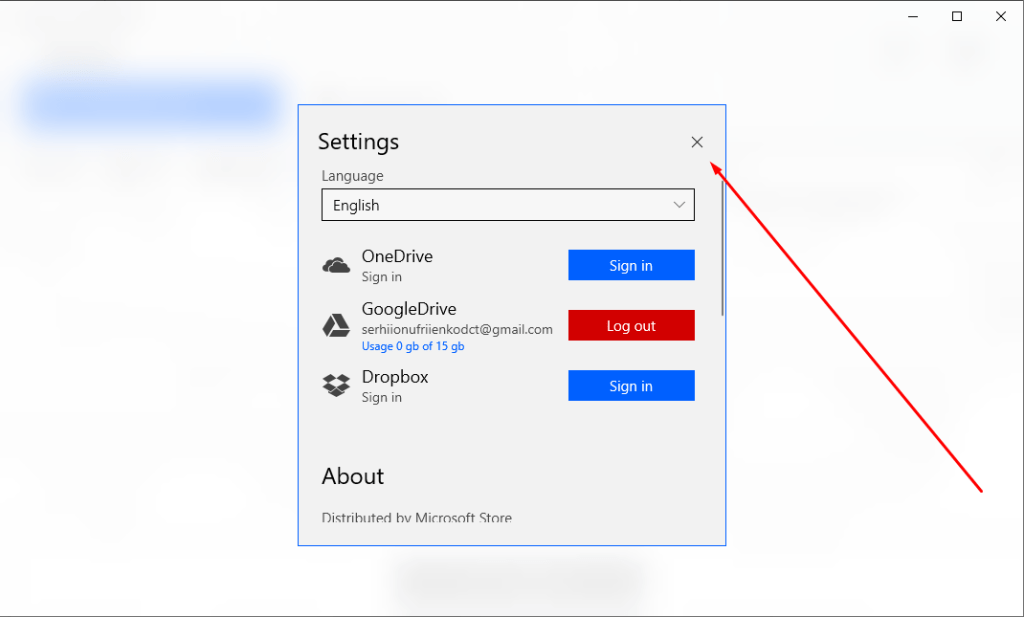
2. You will see the settings tab. Here you can change the language of the application or sign in to the cloud system.

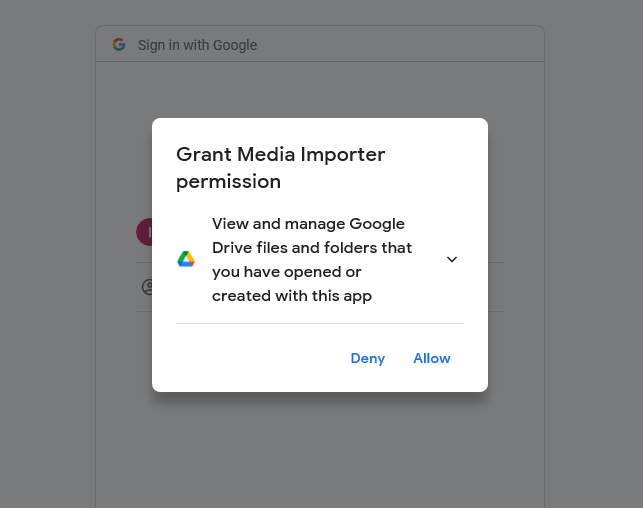
- Click ‘Sign in’ opposite that service, that you want to use and follow instructions.

You have to allow permission to manage cloud service via our application.

If you scroll down, you will see more features, such as:
- see more of our apps
- send feedback to us
- share our app with your friends
- rate our app
- read Privacy Policy

4. Click the ‘x’ button to return to the main page.
5. Select the device, which you want to import files from.

6. Here you can sort files, filter them, or select files for import. Click select.

7. You can also use search to find files. Click on the search field, type the name of the file, and press ‘enter’.
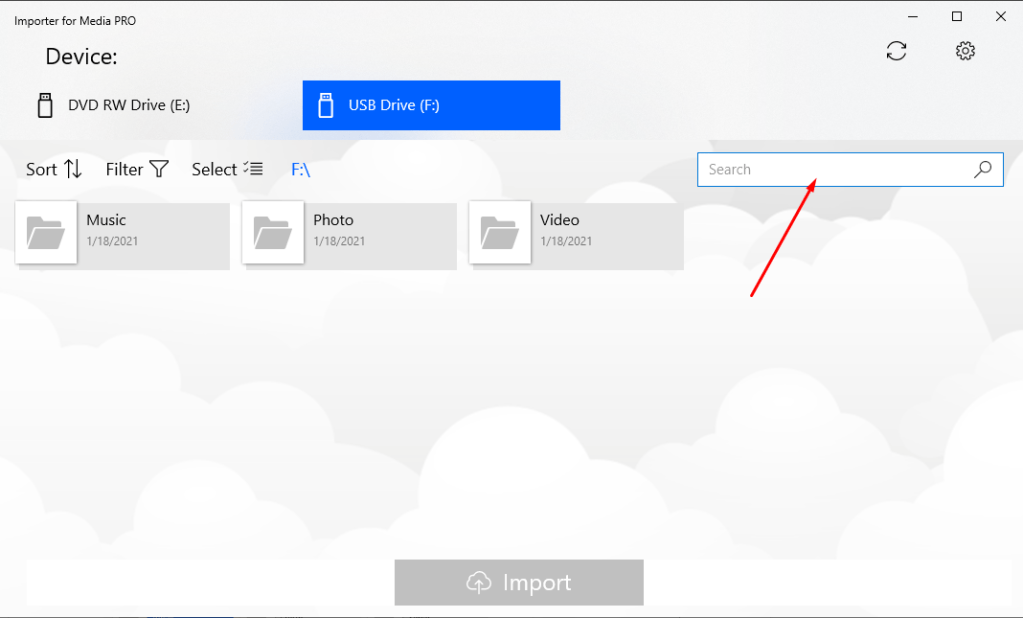
8. You will see the results of your search.

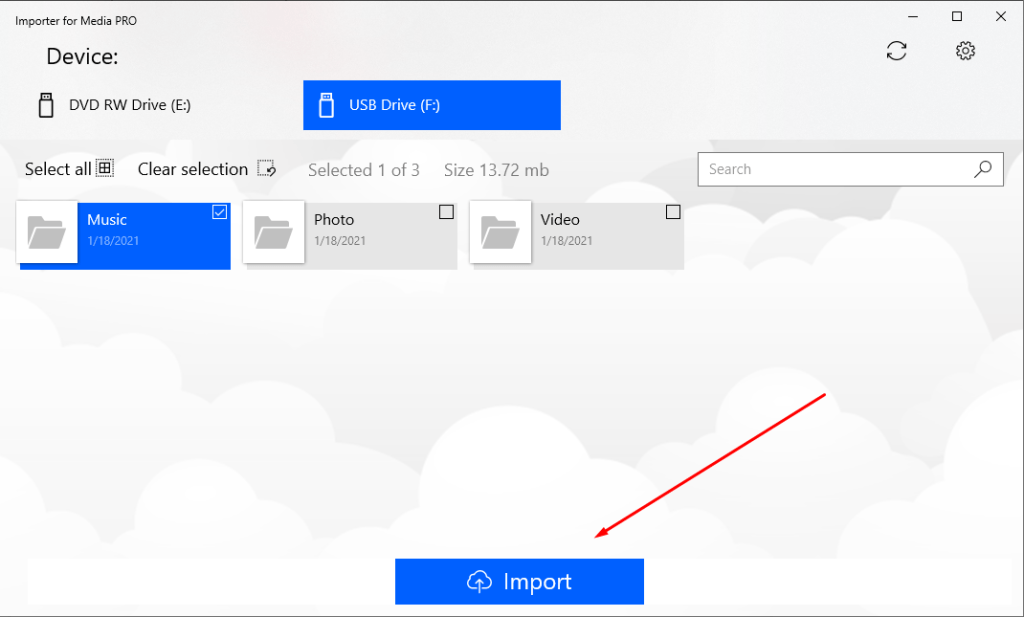
9. To choose the file click on ‘Select’ and click on the files that you want to import.

10. Choose files or folder and click ‘Import ’.
11. Select the service where the files should be uploaded and click ‘Import’.

12. You will see the progress of importing.

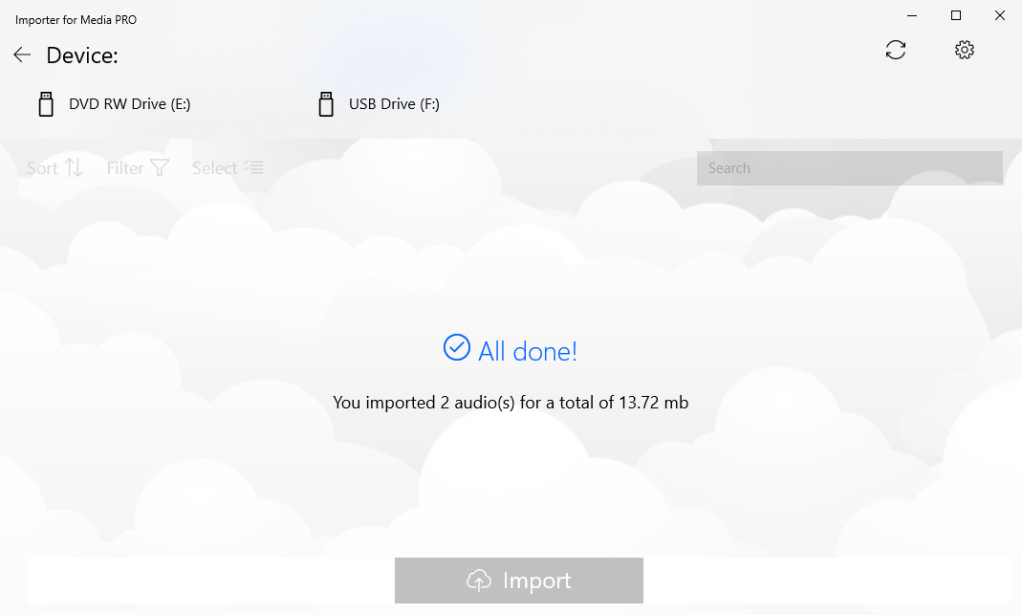
13. In the end, you will see a notification that the import is complete and the details of the import.
We hope these Usage Guidelines were effortless to read and not sophisticated to understand and you have learned how to save your files in the cloud services via IMPORTER FOR MEDIA PRO. We will be glad if it sheds light on all of the questions you have or will get.
Nevertheless, if something was unclear and you require any further information please feel free to contact us at support@tidalmediainc.com! If we can be of assistance on any issue or with advice – It would be a pleasure to provide you with this. Good Luck!
