Deploy a build for Windows from Apache web server, PHP, and MySQL, and get your own local server using our WAMP Server on Windows Server 2019.

This is a quick deployment and ready-to-run image.
Simple and rapid installation. Easy to maintain.
Configuration and connection to WAMP Server on Windows Server 2019 DC
Connection with WAMP
Once WAMP Server is deployed to your cloud environment, it’s ready for use.
On the remote machine:
- Press Win + R.
- In the window that appears, enter “mstsc” and click “OK”.

- In the window that appears, enter the IP of the virtual machine and click “Connect”.

- In the window that appears, enter your username and password and click “OK”.
- Check the box and click “Yes”.

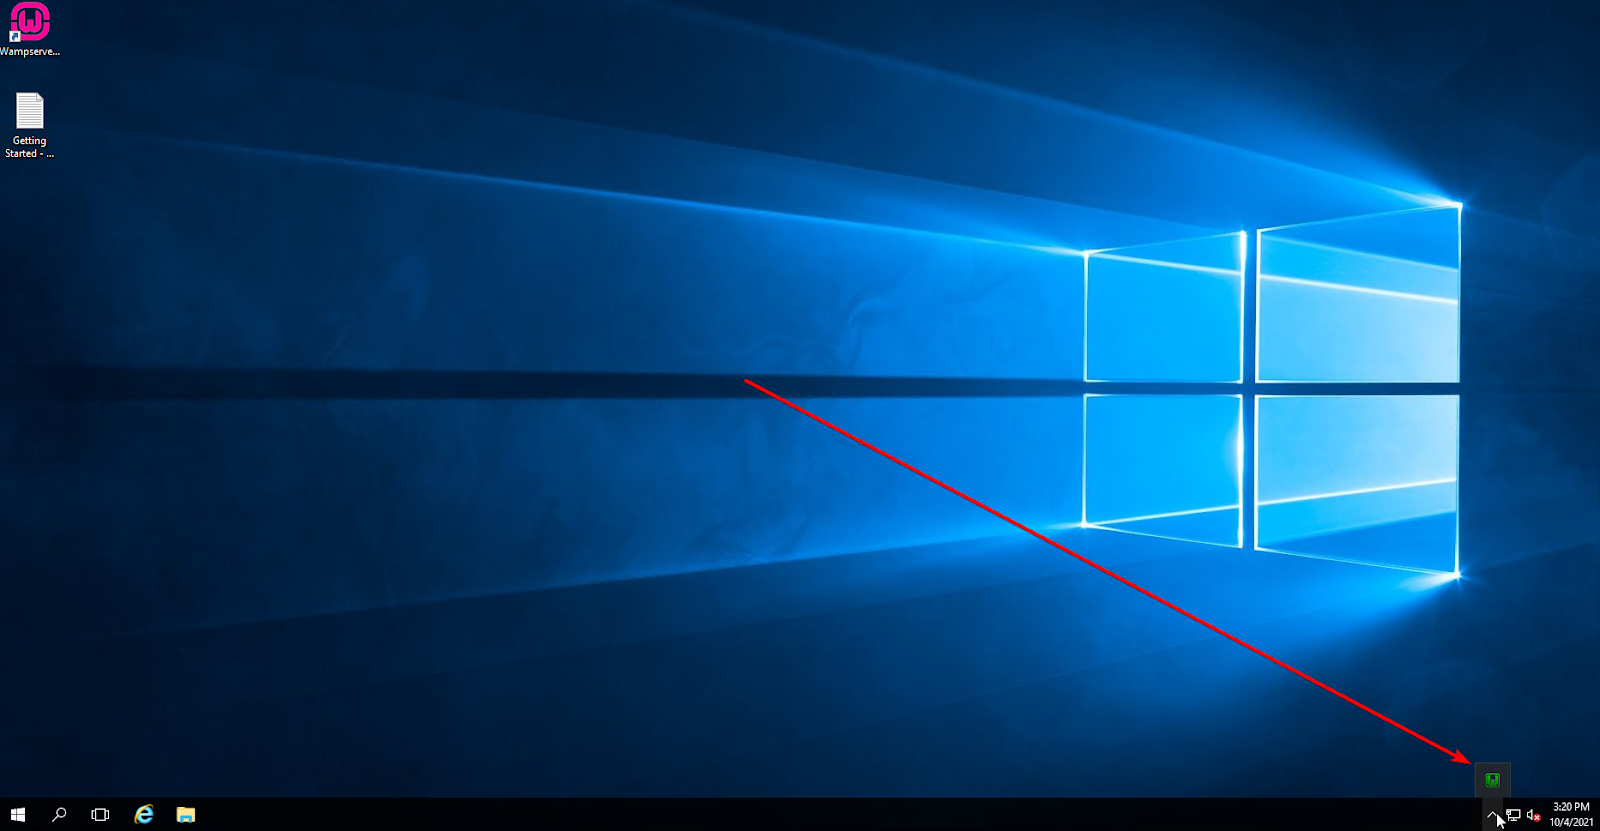
- Launch the WAMP in the remote desktop window displayed after the connection

- Wait until the tray icon turns green
WAMP Login Usernames and Passwords
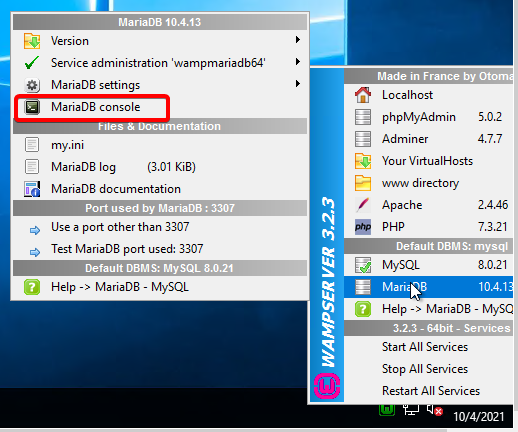
The default credentials for the MariaDB console and MySQL console are:
User: root
Pass: blank (no password is set)

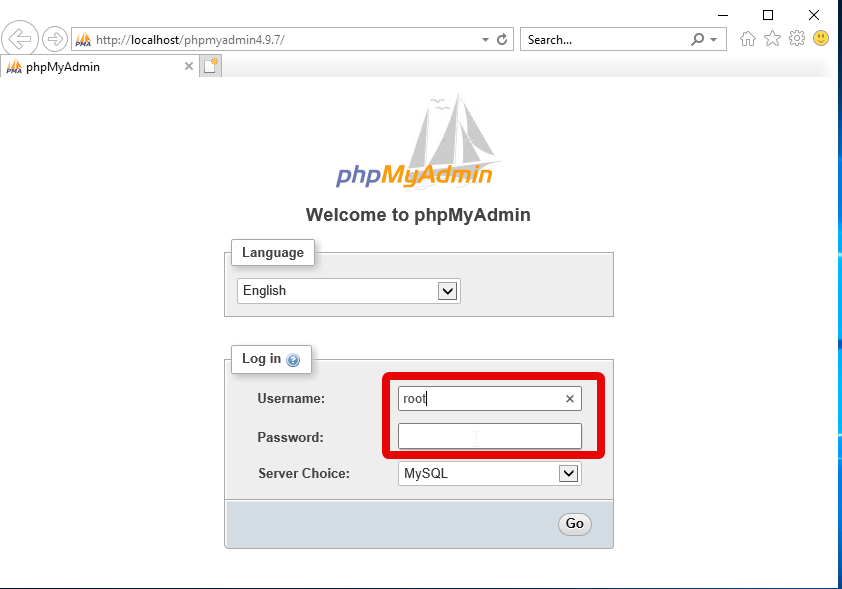
The default credentials for PhpMyadmin are:
User: root
Pass: blank (no password is set)
PhpMyAdmin is configured to use either MySQL or MariaDB.
When calling PhpMyAdmin, there will be a choice of server: MySQL or MariaDB, the default server being the first in the list.
NOTE: If you find the root password doesn’t work, wait 5 mins as during the first boot a start script is setting the root MySQL password and could still be running. You can see if it’s still running by viewing any Windows task schedule jobs. Wait for it to finish and then try logging in again.
MySQL and MariaDB
Or MySQL or MariaDB can be the default database manager.
If MySQL is the default manager, it uses port 3306, which means MariaDB will use port 3307.
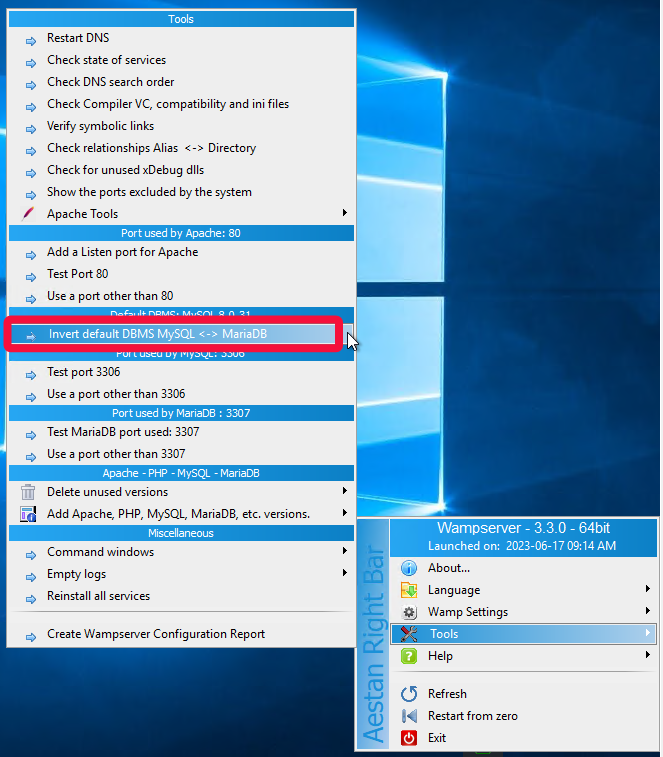
To find out what ports MariaDB or MySQL use, right-click on the WAMP icon -> Tools.
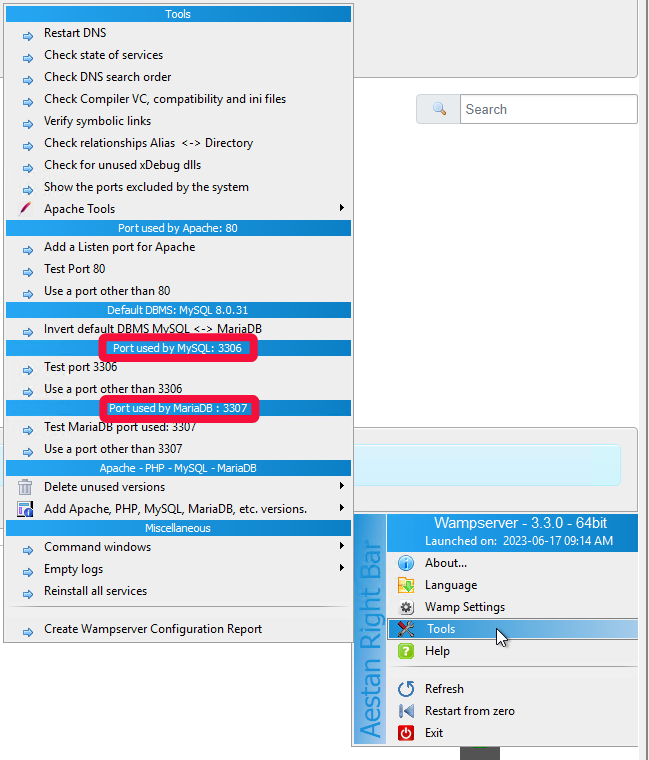
If MariaDB is the default manager, it will use port 3306, which means MySQL will use port 3307. In some cases, it can also be port 3308
If MariaDB is the default database manager and you want to use MySQL, simply right-click the WAMP icon -> WAMP Settings -> Allow MySQL to check

It’s not required to keep using both MySQL and MariaDB managers, only one could be kept and could be even completely disabled both database managers by:
Right-click the WAMP icon -> WAMP Settings -> Allow MariaDB to uncheck
Right-click the WAMP icon -> WAMP Settings -> Allow MySQL to uncheck
Replace MySQL with MariaDB and vice versa
Important note: It is imperative to save your databases in SQL files by exporting them before disabling MySQL. This is the only sustainable way to transfer your databases between MySQL and MariaDB.
There is a tool to reverse the default DBMS with a single click if both are enabled (MySQL AND MariaDB):
– If MySQL is the default DBMS
Right-click WAMP icon -> Tools -> Invert default DBMS MySQL <-> MariaDB
or
– If MariaDB is the default DBMS
Right-click WAMP icon -> Tools -> Invert default DBMS MariaDB <-> MySQL
Of course, it’s necessary to import your previously backed-up databases.
Connection to the database by MariaDB or MySQL
In order for your connections to a database server to be made with MariaDB or MySQL, you must specify the port if it is not the default port 3306.
For example connection scripts usage:
$mysqli = new mysqli(‘127.0.0.0.1′,’user’,’password’,’database’);
or, in procedural terms:
$mysqli = mysqli_connect(‘127.0.0.0.1′,’user’,’password’,’database’);
To connect with a manager that does not use port 3306, you must specify the port number:
$mysqli = new mysqli(‘127.0.0.0.1′,’user’,’password’,’database’,’3307′);
or, in procedural terms:
$mysqli = mysqli_connect(‘127.0.0.0.1′,’user’,’password’,’database’,’3307′);
To check the connections to the MySQL or MariaDB database manager, use the script
wamp\www\testmysql.php by’http://localhost/testmysql.php’
by first modifying the script according to your settings.
Creating or adding a VirtualHost
1. It is necessary to determine where you want to place your local site.
For example: C: \ wamp64 \ www \ Your folder name
For ease of explanation, here are some names:
– sitefolder: the folder where you want to host the local site
– sitename: name to be called local site (http: // sitename /)
We need a folder to host the site, existing before the creation of the VirtualHost, we need to create it using an explorer running as administrator:
– Move in the drive tree to where we want to create a folder “sitefolder”
– Right-click, select “Create” then select “Folder”.
– Launch Wampserver, wait for the WAMP icon
After the icon turns green, right-click on it and select “Localhost”
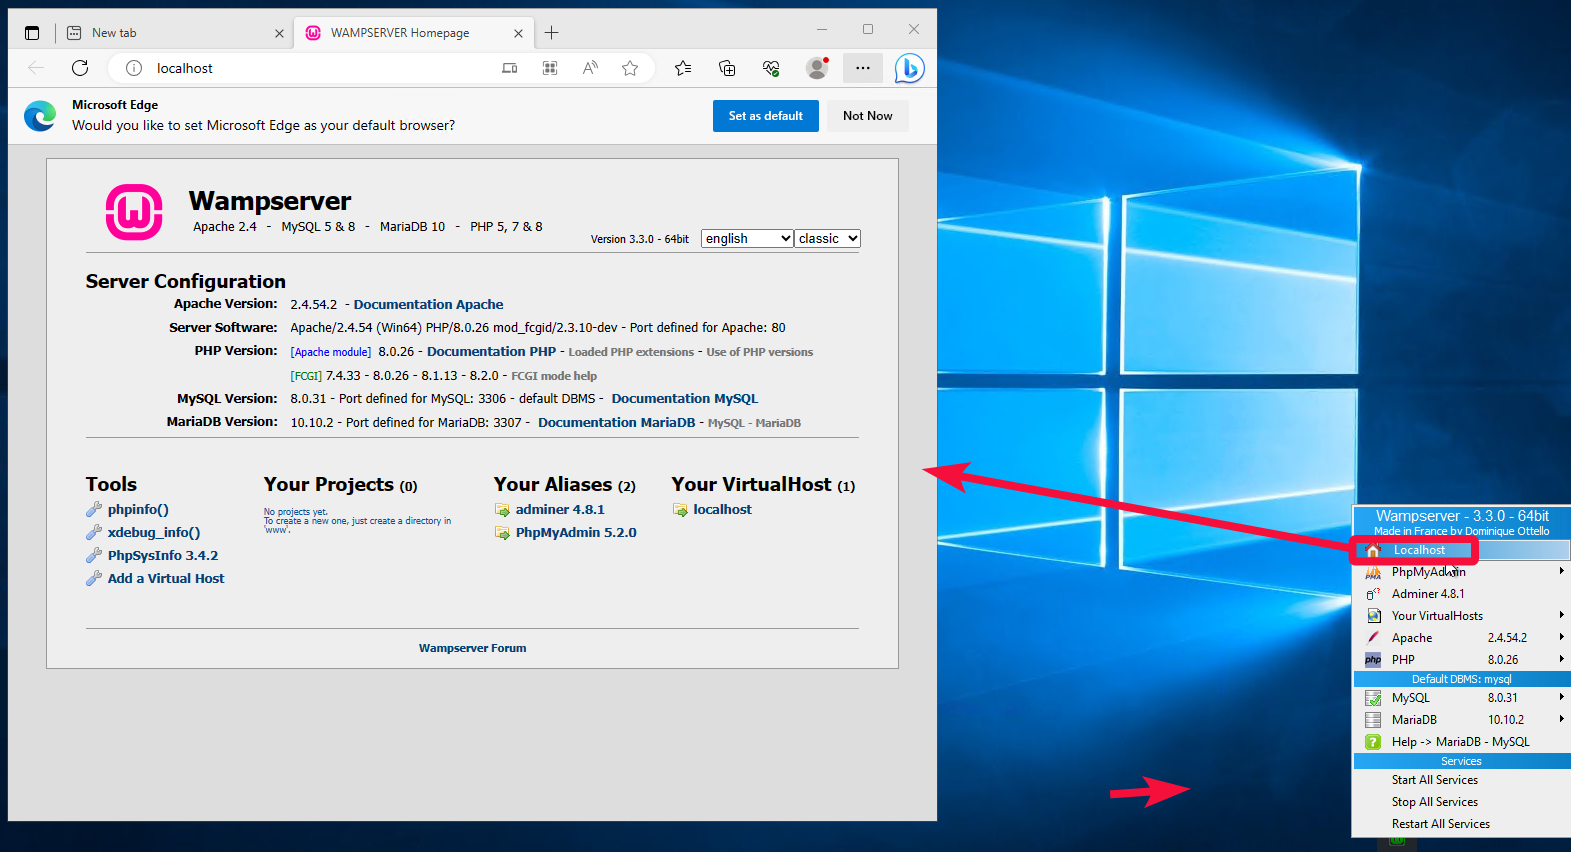
2. In the window that opens, select “Add a Virtual Host”
3. For “Virtual host name Without space – Without underscore (_)” enter:
sitename (1)
For “Full absolute path to the VirtualHost folder. Examples: C: / wamp / www / project / or E: / www / site1 /” type :
“C:/wamp64/www/sitefolder” or shortened C:/sitefolder/ (2)
and click: “Start the creation of the VirtualHost” (3)

4. After this it may be indicated that certain operations required for Windows and Apache to recognize this new VirtualHost cannot be performed automatically by the browser, so a DNS reload is required.

To do this, in the lower panel, click the left mouse button on the WAMP icon -> Tools -> Restart DNS. Wait until the WAMP icon turns green.

5. Now go back to the main menu.
There are items like this in “Your VirtualHost” item:
– localhost
– sitename

It’s all ready to set up the local site in the c:\sitefolder\folder, indicating, if required during installation, that the URL-адрес http://sitename/.
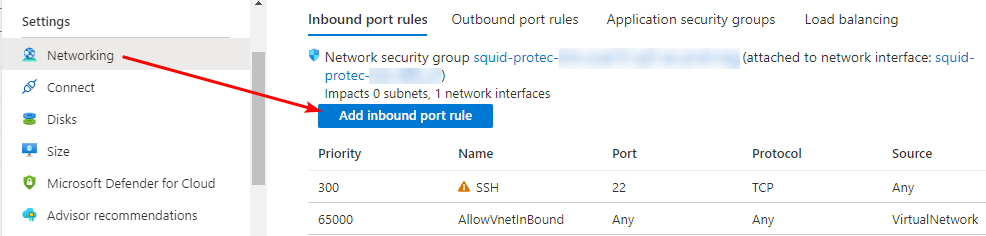
Azure Firewall
WAMP by default assumes local work through a browser. To work with WAMP remotely TCP ports 80 and 443 should be opened in the Azure Firewall for HTTPS traffic.
For the connection to databases TCP ports 3306, and 3307 should be additionally opened in the network properties of the Azure firewall.
To do this, go to “Networking”, then “Add inbound port rules”.
Support and documentation
More detailed instructions on setting up Virtual Hosts on Apache using WAMP can be found on the – PHP, Apache, MySQL, Windows : WampServer
WAMP Support can be found on the forum: – PHP, Apache, MySQL, Windows : WAMPServer
