Connection to VM with OpenClaw Agent Gateway on Alpine Linux 3
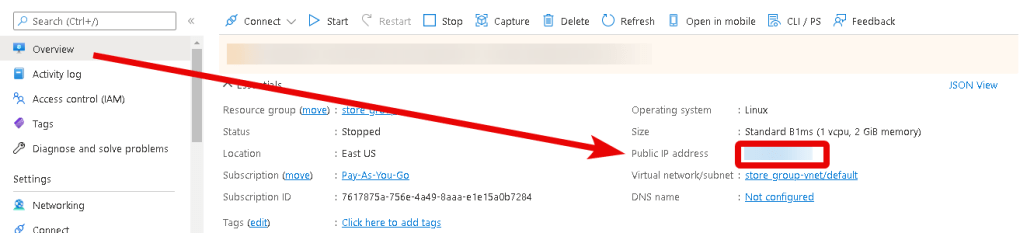
- After purchasing and starting the VM, find its IP address in your Azure account. Select the VM, go to “Overview”, and locate the Public IP Address line.
- To manage the server, you should connect to the VM.
- With OpenSSH
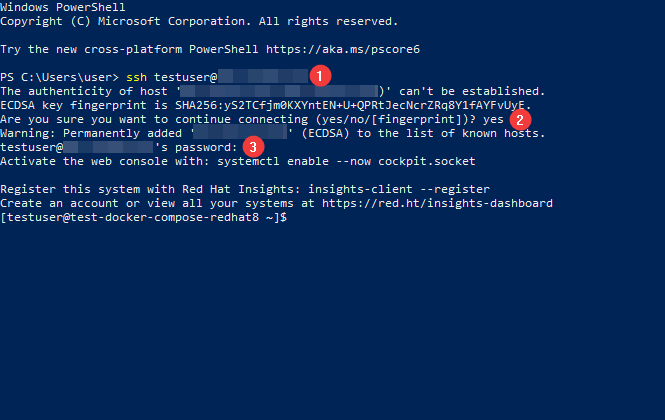
On Windows (version 1809 or later), an OpenSSH client is available, which you can use to connect to Linux servers via SSH. To do this, launch a normal Windows command prompt and enter the command “ssh user@*vm_ip*” (1), where “user” is the username that was specified while creating the virtual machine and “*vm_ip*” is the VM IP address.
Then type “Yes” (2) and enter a password (3) that was specified while creating the virtual machine.
- With the PuTTY application
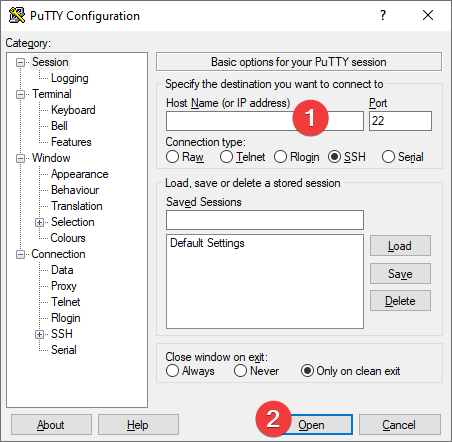
To do this, you need to connect via SSH using the PuTTY application. You can download it at the following link – Download.
Run PuTTY, enter the VM address in the “Host” field (1), and click “Open” (2) to connect.
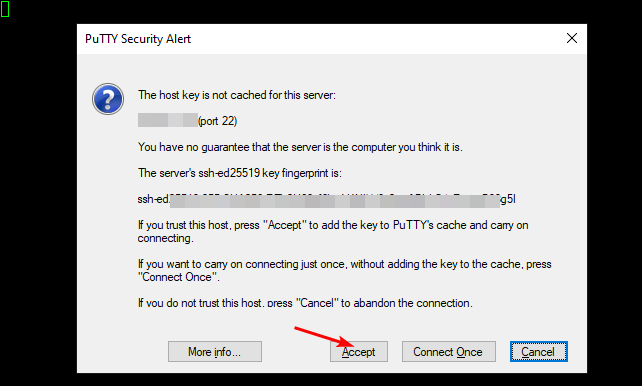
In the window that appears, click Accept.
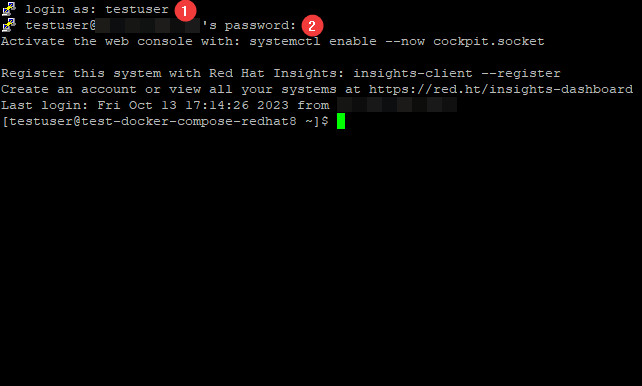
In the opened console, you will need to enter a username (1) and a password (2) that were specified while the VM was being created (you’ll not see the password in the console while entering it).
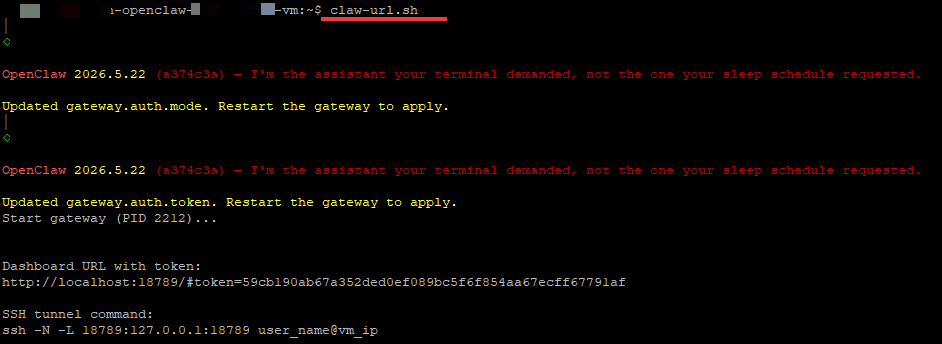
- To start OpenClaw after connecting to the VM, run the following script:
$claw-url.sh
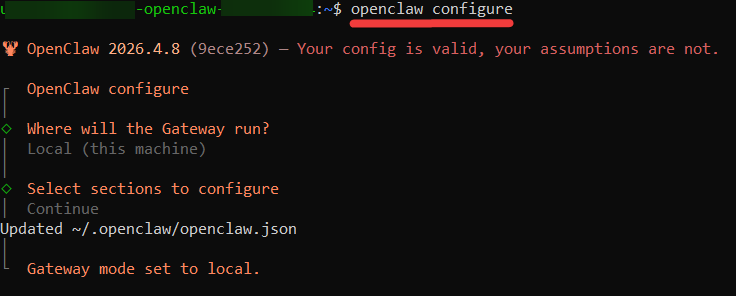
- If you need to change the OpenClaw configuration, run the following command first
$openclaw configure
- Type command
$openclaw dashboard
and follow the instructions provided.
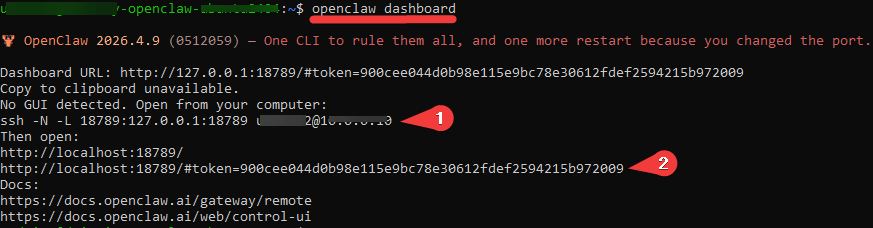
- Disconnect from the VM by typing $exit and set the SSH tunnel using the command: $ssh -N -L 18789:127.0.0.1:18789 user@*vm_ip* (point 1 from the step 7)

- Copy the URL from step 3 and paste it into your browser. The start page will open
Now you can use our well-prepared VM with OpenClaw Secure Agent Gateway on Alpine Linux 3.
Example of using the OpenAI key
- Connect to the VM via SSH (point 2 from the previous section).
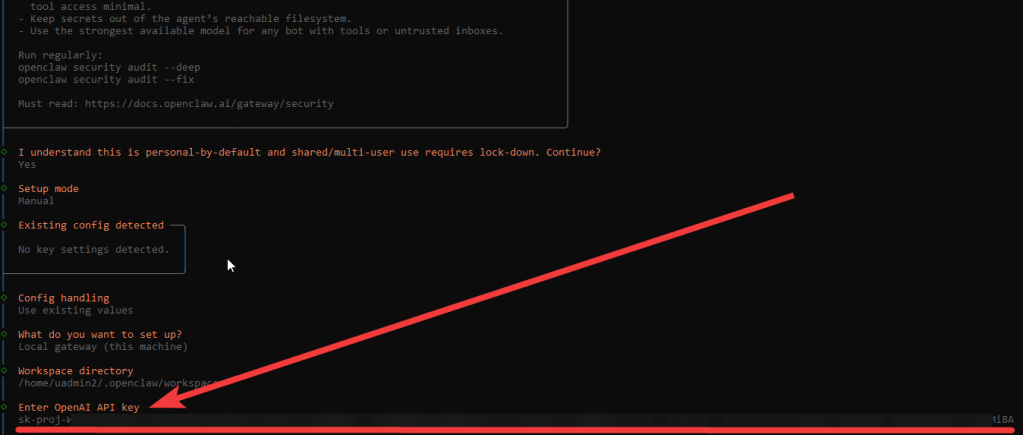
- Enter command $openclaw onboard –auth-choice openai-api-key and follow the instructions
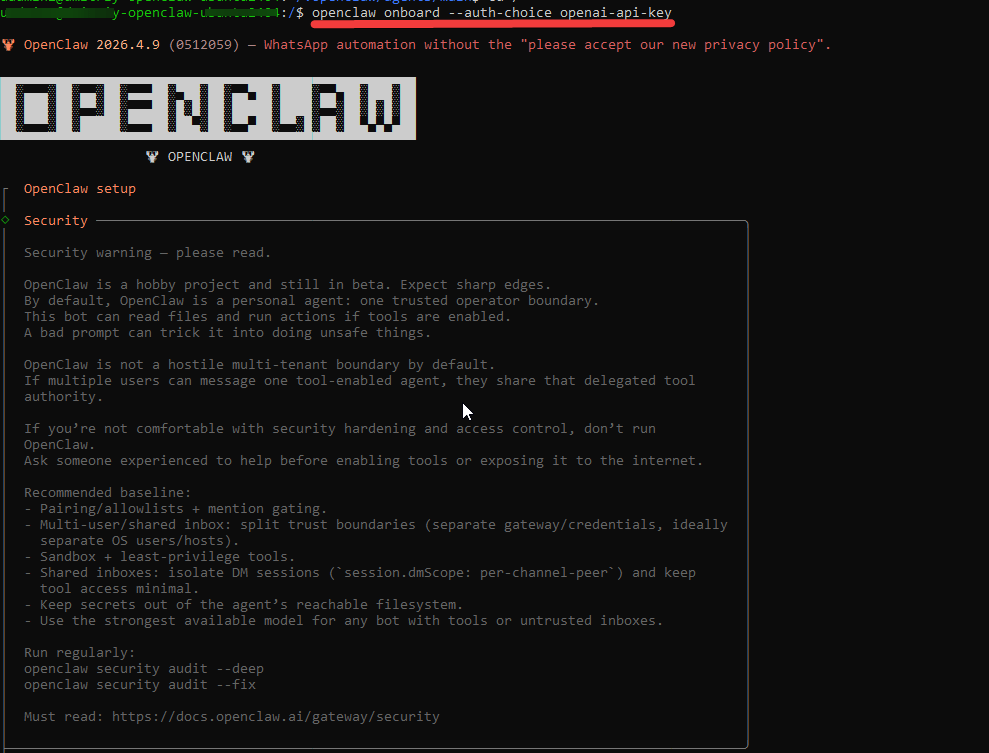
- Add the OpenAI API key when prompted.
Useful information
Check the current OpenCLAW version:
$openclaw -V
Update OpenClaw and inspect the update channel status:
$openclaw update
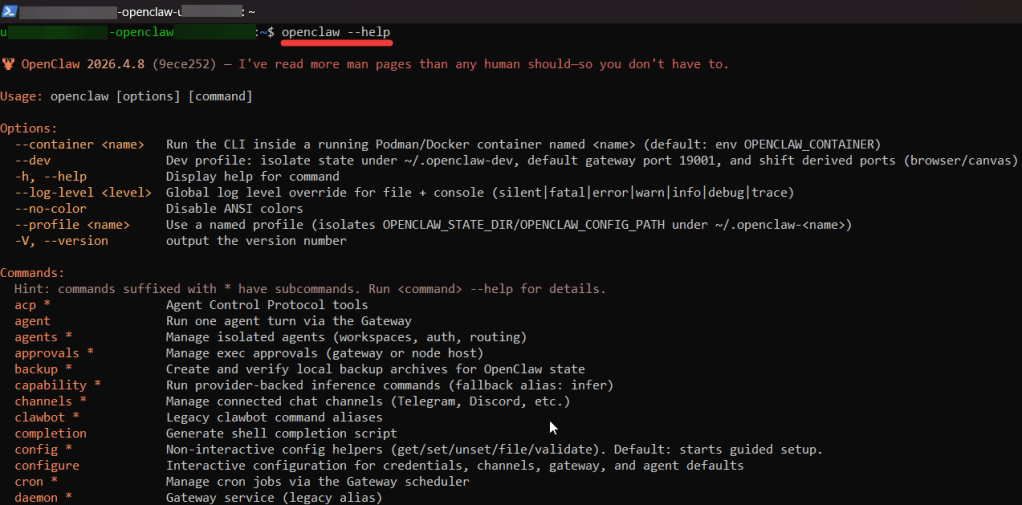
You can get full help by entering:
$openclaw –help
Get more with Web – OpenClaw
