TinyProxy is a light-weight HTTP/HTTPS proxy for Ubuntu operating systems. Designed to be fast and yet small, it is an ideal solution to use in such cases as embedded deployments where a full featured HTTP proxy is required.

This is a quick deployment and ready-to-run image.
Simple and rapid installation. Easy to maintain.
Configuration and connection to TinyProxy Server on Ubuntu 20.04 LTS
- Launch instance through your Amazon account. Proxy server starts automatically when starting the VM.
- To connect to the VM, you should generate a “Private Key” in advance. This can be done using the following instruction (by choosing the “file format:” option “.ppk” in point 3)
Guide – How To – Create and use Key Pair to connect to a VM
- Download and run Putty
- Go to the “SSH” section in the left panel and then to “Auth”.
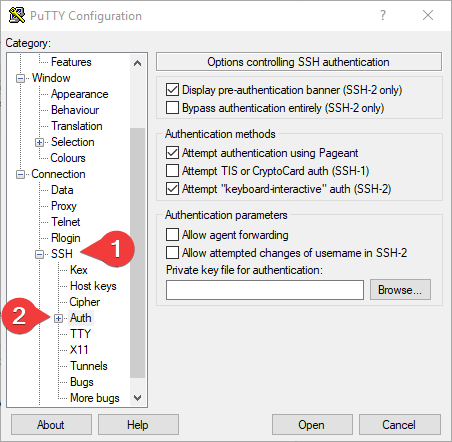
- In the “Auth” section, click “Browse” and specify the path to the .ppk file you received earlier.
- Go to the home page of “Session”, enter the IP address of the VM and click “Open”.

- In the opened console you will need to enter the login ubuntu
- To use a proxy, you should configure login and password for the connection (or use the standard ones that were generated while creating a VM), which can be found by running the following command:
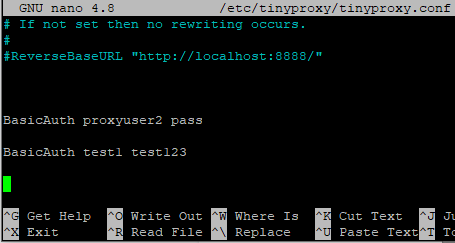
> cat /etc/tinyproxy/credentials - To change a user, or add a new one, you should open the configuration file and enter the data in the form “BasicAuth login password”. To do this, enter the following command:
> sudo nano /etc/tinyproxy/tinyproxy.conf
You can navigate through the document using the arrows on the keyboard and paste the copied text using the right mouse button
- To exit the document, press Ctrl + X on the keyboard. Then “Y” to confirm the save. And Enter to save to the same file.
- Restart the proxy server service for the changes to take effect. To do this, enter the command:
> sudo systemctl restart tinyproxy - To use the proxy server through the built-in Windows tools, you must open the settings
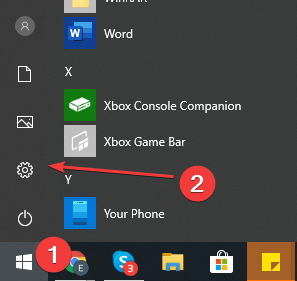
- In Settings select Network & Internet

- Go to the “Proxy” section and set the “Use a proxy server” switch to On
- In the Address field, enter the address of the VM, and in the Port field, specify 8888. Then click the Save button.

- To check the connection to the proxy server, open the https://www.myip.com/ website in any browser and check if your IP address has changed.
