TinyProxy is an image of lightweight, easy-to-use, secure HTTP/HTTPS proxy daemon for Ubuntu operating systems supporting URL-based and domain-based filtering, custom headers, and reverse proxying hardened by Tidal Media Inc. for use in Azure environment.

This is a quick deployment and ready-to-run image.
Simple and rapid installation. Easy to maintain.
The connection to TinyProxy Protected Proxy Server on Linux 7.9 using Windows settings
- Launch the VM through your Azure account. When starting the VM proxy server starts automatically
- To use the proxy server through the built-in Windows tools, you must open the settings

- In Settings select Network & Internet
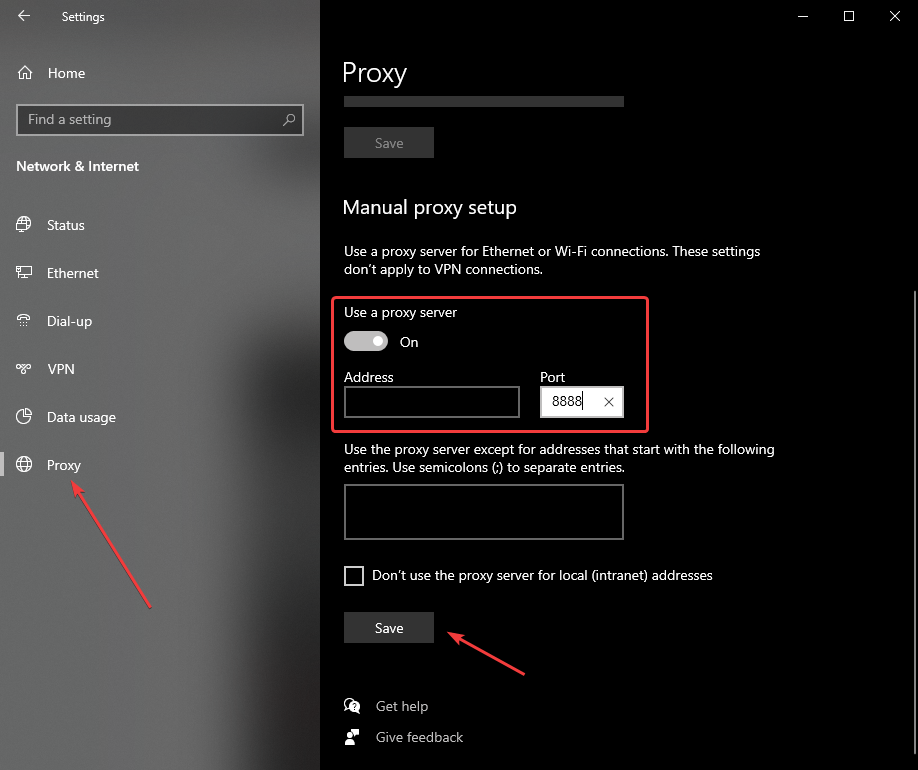
- Go to the “Proxy” section and set the “Use a proxy server” switch to On
- In the Address field, enter the VM address, and in the Port field, specify 8888. Then click the Save button.
- To check the connection to the proxy server, open the https://www.myip.com/ website in any browser and check if your IP address has changed.
Attention. There may be a problem that you will lose your Internet connection with an enabled proxy. To fix this issue, you should restart the proxy service manually.
- To restart the proxy you should connect to the server via ssh. For example, you can connect to a VM via PuTTY – Download.
- Run Putty, enter the VM address in the “Host” field, and click “Open” to connect.

- In the opened console you will need to enter a username and password that were specified while the VM has been created.
- Next, you should enter the following commands:
> sudo service tinyproxy stop
> sudo service tinyproxy start
To check server status enter the following command:
> sudo service tinyproxy status
