Configuration and connection to TeamSpeak VoIP System Server on Linux Stream 10
When starting the VM, the proxy server starts automatically.
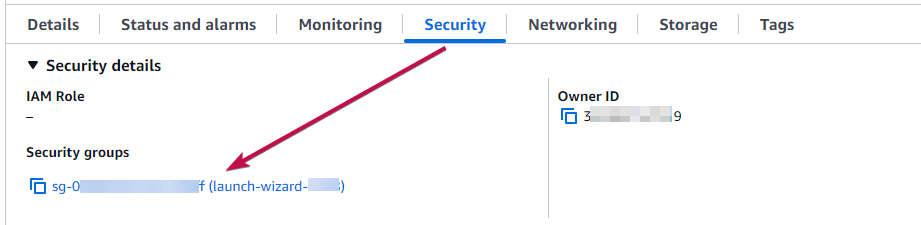
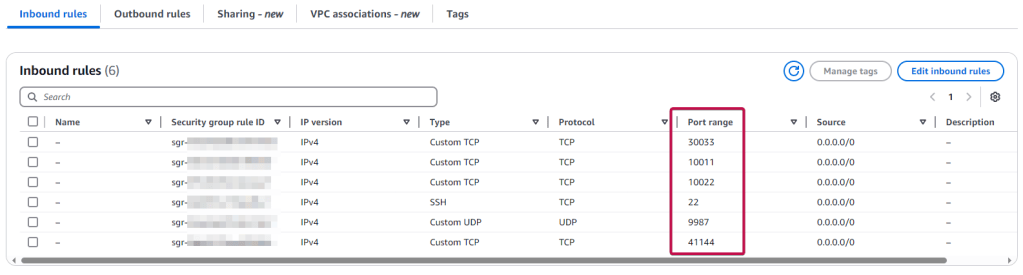
- To work, you should open TCP ports 22, 10011, 10022, 30033, 41144, and UDP 9987 in the network properties of the Amazon firewall.

- Connecting to the VM using PuTTY. You can download it at the following link – Download.
- Go to SSH section on the left panel, and then to Auth
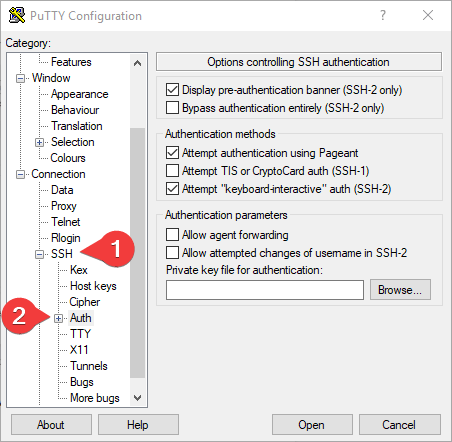
- In the “Auth” section, click “Browse” and specify the path to the .ppk file you received earlier.
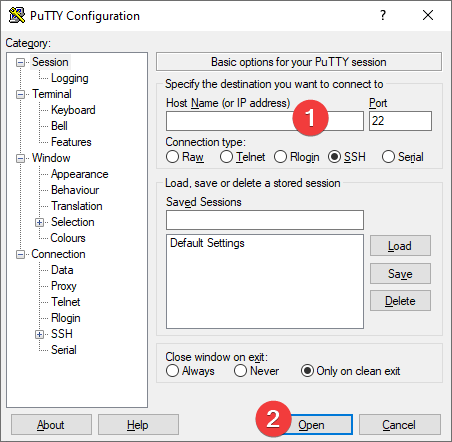
- Go to the home page of “Session”, enter the IP address of the VM, and click “Open”.
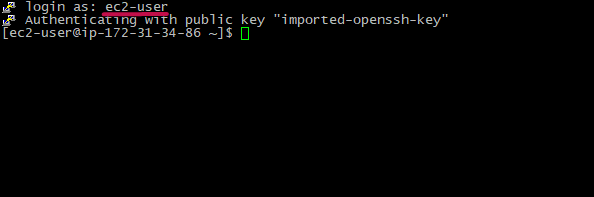
- In the opened console, you will need to enter the login ec2-user
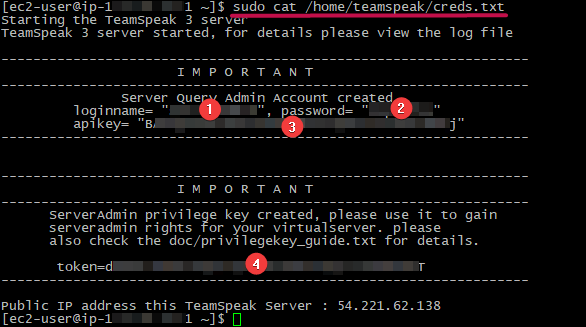
- Enter the command sudo cat /home/teamspeak/creds.txt and save login (1), password (2), apikey (3), and token (4)
- To connect to the server, you need to download the installed TeamSpeak 3 client – Download.
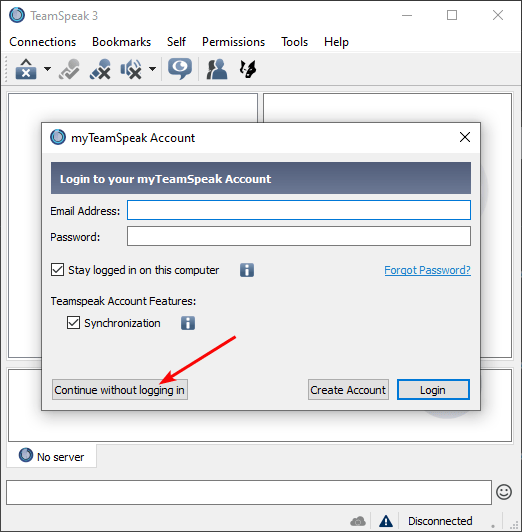
- Start the TeamSpeak application. You can skip authorization by clicking Continue without logging in.
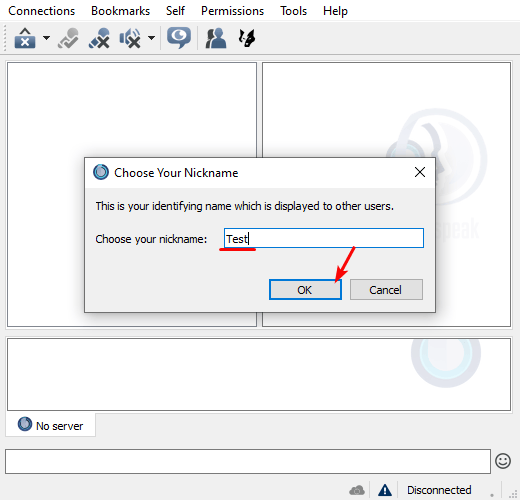
- In the next step, select a name that other users will see.
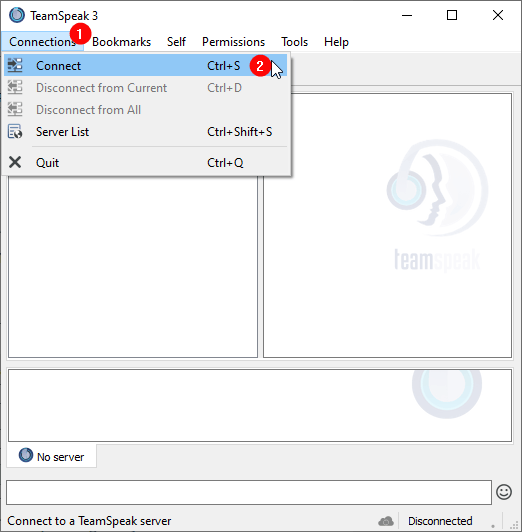
- Click Connections (1) -> Connect (2)
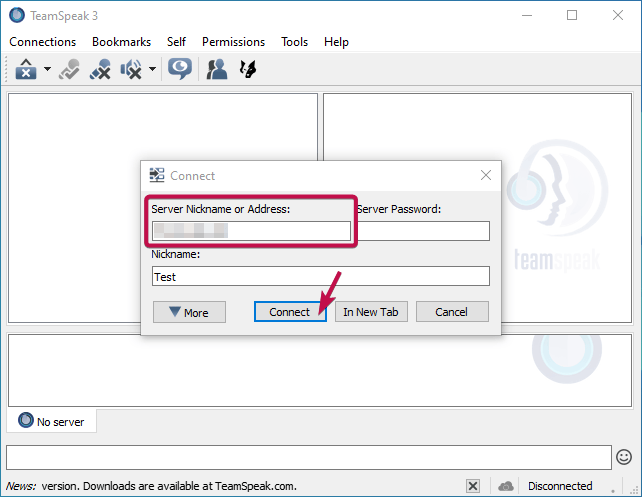
- In the “Server Nickname or Address” field, enter the IP address of the virtual machine and click “Connect”
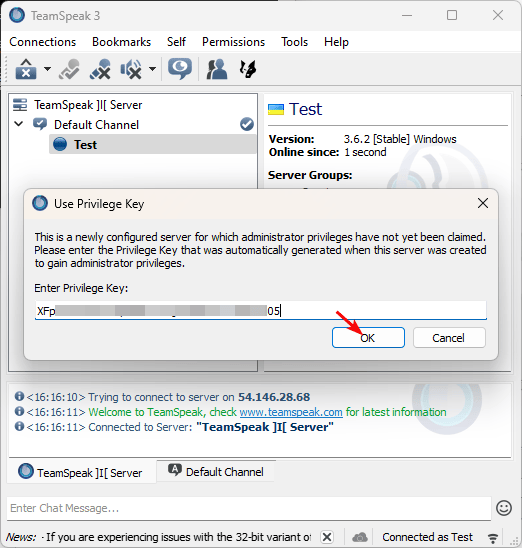
- In the “Enter Privilege key” field, enter the token received in step 3 and click “OK”
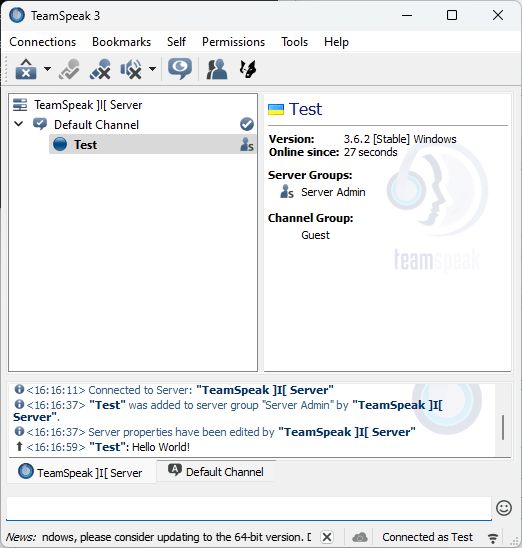
- Completed. You are connected to your server. Other users can connect to you using the virtual machine’s IP address.
- To use Server Query , apply the login, password, and API key from step 3
You can find information on further server configuration at the following address:

