Squid Easy Proxy Server provides a straightforward solution for web caching and proxying tasks on Red Hat 8. Ideal for businesses, educational institutions, and network administrators, Squid Easy Proxy Server streamlines internet access, enhances browsing speeds, and improves network security.

This is a quick deployment and ready-to-run image.
Simple and rapid installation. Easy to maintain.
Connection to Squid Easy Proxy Server on Red Hat 8 using Windows Settings
To start the server, run the VM through Azure Portal.
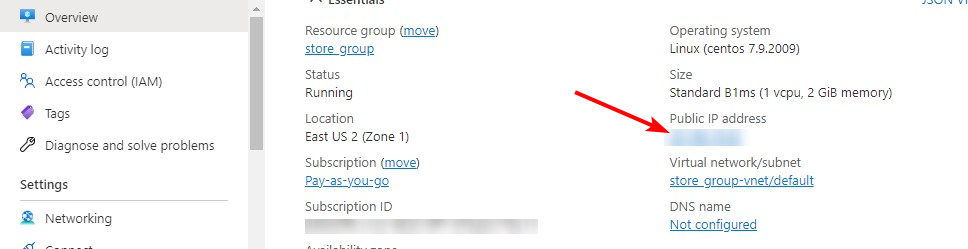
- For the connection to the server, you should know the IP address of the VM. You can find it in the personal account of Azure. (You need to select the virtual machine from the list. By clicking the item “Overview”, your IP is displayed in the line “Public IP Address”).
- To work, you must open port 3128 (TCP) in the network properties in the Azure firewall.

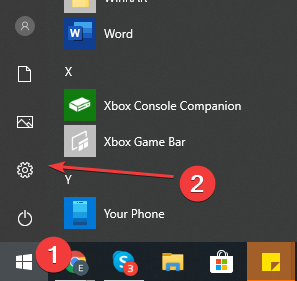
- To use the proxy server through the built-in Windows tools, you must open the settings. Click ‘Start’ (1), then ‘Settings’ (2).
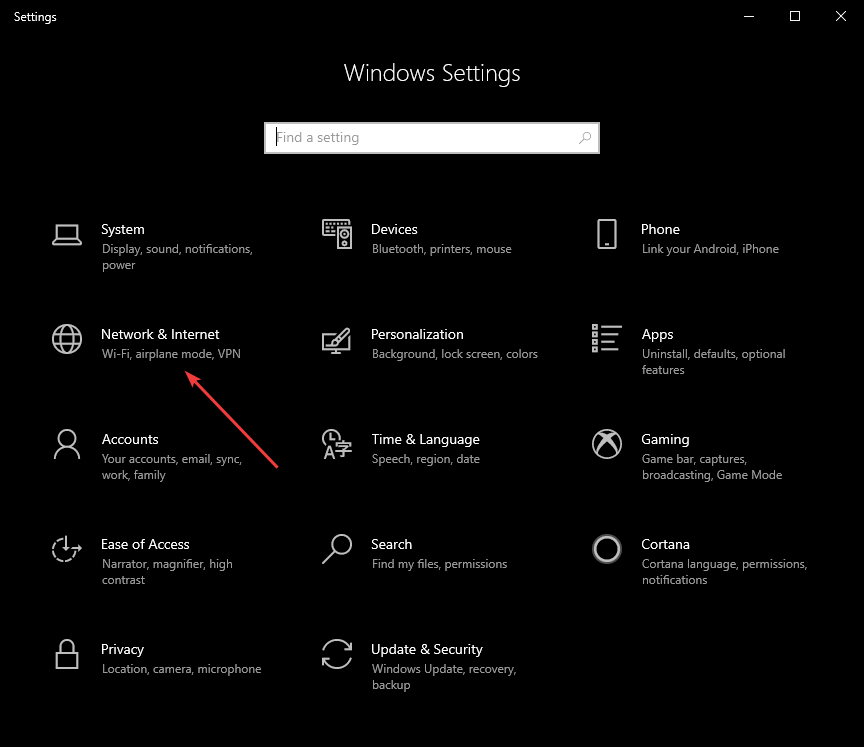
- In Settings, select “Network & Internet”.
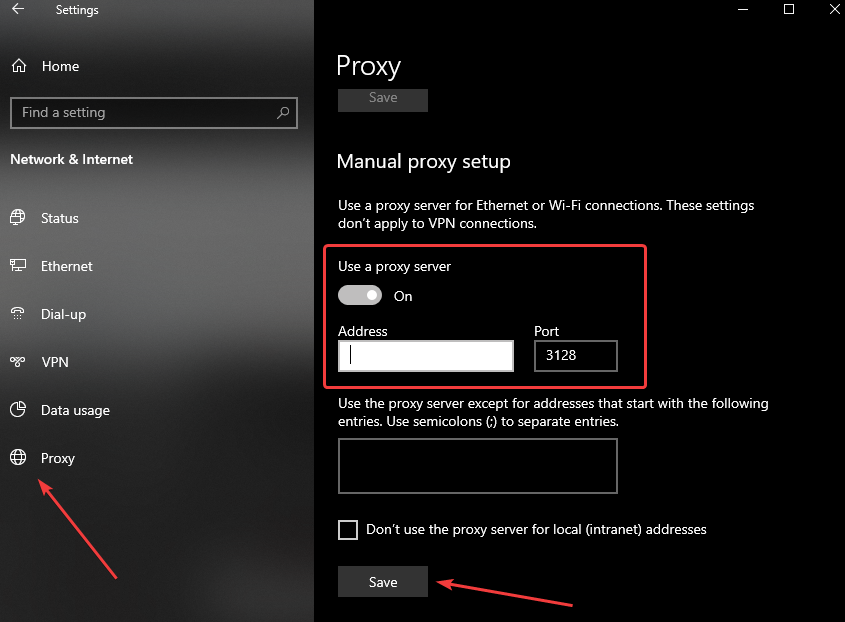
- Go to the “Proxy” section and set the “Use a proxy server” switch to On
In the Address field, enter the address of the VM, and in the Port field, specify 3128. Then click the Save button.
- To check the connection to the proxy server, open the MyIP.com website in any browser and check if your IP address has changed.
Check out the following links for further documentation and support for Squid Proxy.
SquidFaq – Squid Web Proxy Wiki
