Secure SFTP Server based on OpenSSH on Ubuntu 26.04 LTS delivers a modern Linux environment with secure SFTP functionality powered by OpenSSH, providing encrypted and reliable file transfer services for enterprise and cloud deployments.
Configuration and Connection to Secure SFTP Server based on OpenSSH on Ubuntu 26.04 LTS
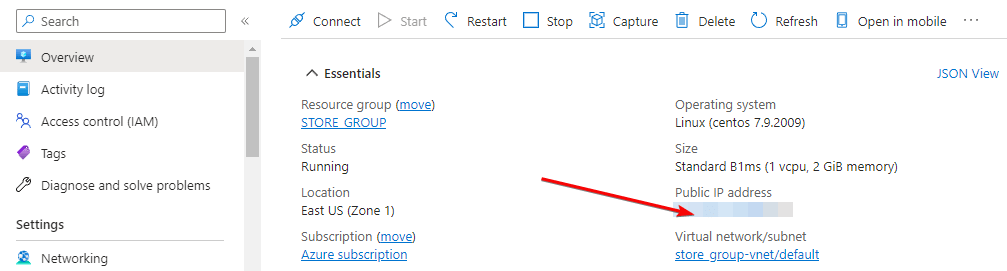
To start the server, run the VM through Azure Portal.
- For the connection to the server, you should know the IP address of the VM. You can find it in the personal account of Azure. (You need to select the virtual machine from the list. By clicking the item “Overview”, your IP is displayed in the line “Public IP Address”).
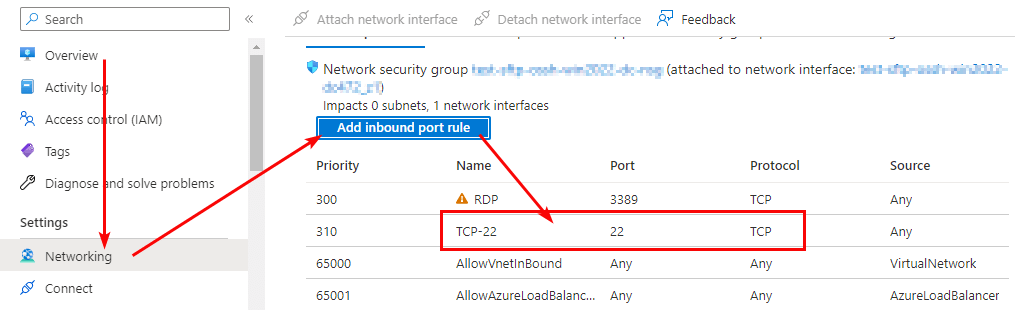
- To work, you must open ports 22 (TCP) in the network properties in the Azure firewall.
- To manage with a server, you should connect to a VM:
- With the PuTTY application
To do this, you need the PuTTY application to connect via ssh. You can download it at the following link – Download
Run PuTTY, enter the VM address in the “Host” field (1), and click “Open” (2) to connect.
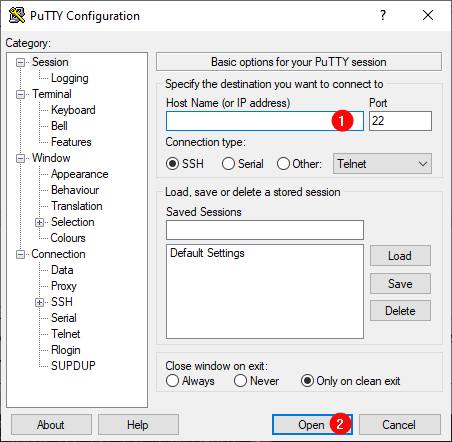
In the opened console, you will need to enter a username and password that were specified while the VM was being created (you’ll not see the password in the console while entering it)
- With OpenSSH
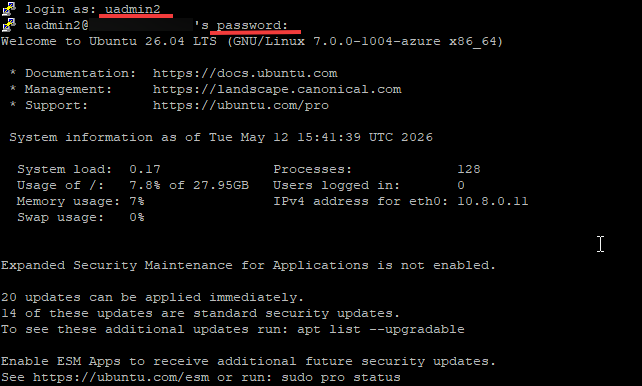
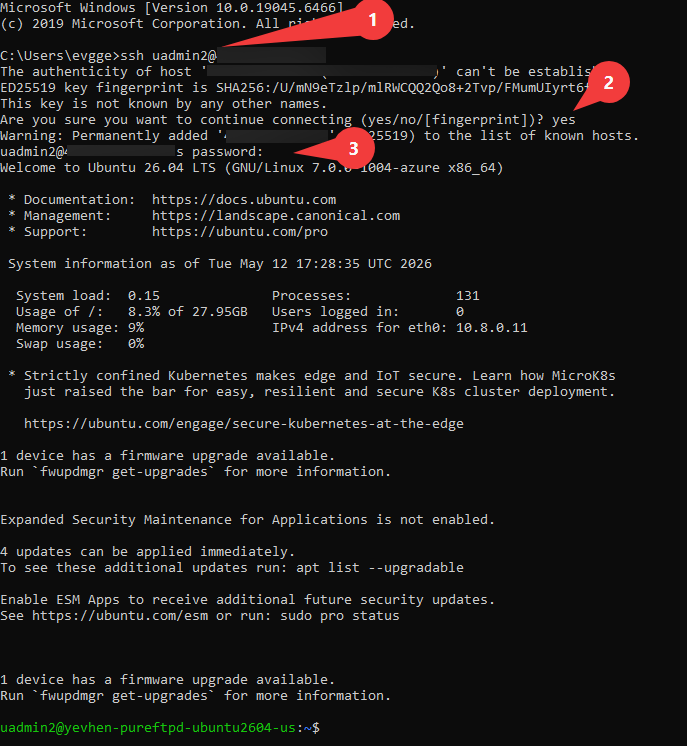
In the Windows 10 operating system (starting with version 1809), an OpenSSH client is available, with which you can connect to Linux servers via SSH. If Windows 10 is suitable and the OpenSSH client is installed, you can start connecting via SSH. To do this, launch a normal Windows command prompt and enter the command “ssh user@*vm_ip*” (1), where “user” is the username that was specified while creating the virtual machine and “*vm_ip*” is the VM IP address.
Then type “Yes” (2) and enter a password (3) that was specified while creating the virtual machine.
- Create a new SFTP user:
sudo adduser <NewUserName>
- Enter and confirm the password when prompted.

- Other fields such as full name, room number, work phone can be skipped by pressing Enterю Then Then type “Y”

Connecting to PureFTP using “FileZilla Client”
- To connect to PureFTPd, it is recommended to use the “FileZilla Client” application (you can download it from the link: Download FileZilla Client for Windows (64bit x86)).
- When connecting to the FTP server, you need to follow these steps:
- In the <Host> field, enter the sftp://<vm_ip> address
- In the <Username> field, enter the <NewUserName>
- In the <Password> field, enter the user password created
- When the data is entered, press Quickconnect
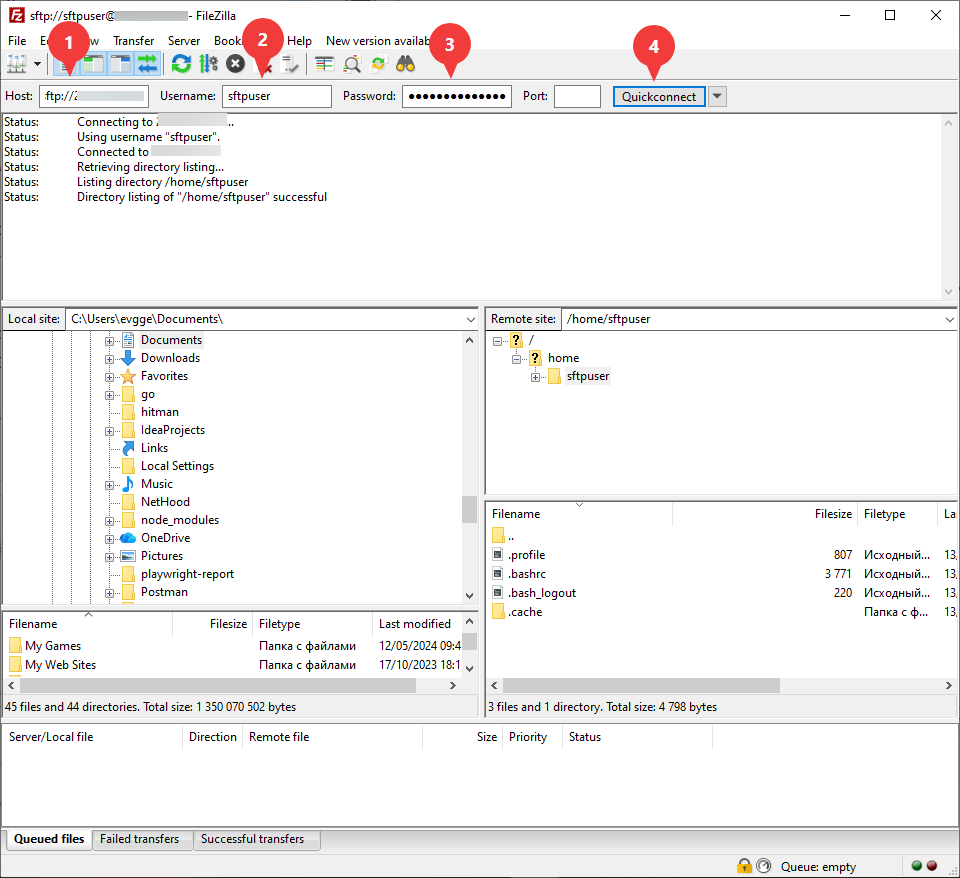
- After entering all the data and clicking on Quickconnect, you will successfully connect to the server.
Your clear and functional SFTP server is ready.
