OBS Studio – Live Streaming Server on CentOS 7.8 is a software suite for recording and live streaming. It provides real-time source and device capture, scene composition, encoding, recording, and broadcasting.
![]()
This is a quick deployment and ready-to-run image.
Simple and rapid installation. Easy to maintain.
The guide how to work with the OBS Studio – Live Streaming Server on CentOS 7.8
- After purchasing and starting the VM you should know its IP address. You can find it in the personal account of Azure. (You need to select the virtual machine from the list. By clicking the item “Overview”, your IP is displayed in the line of “Public IP Address”).
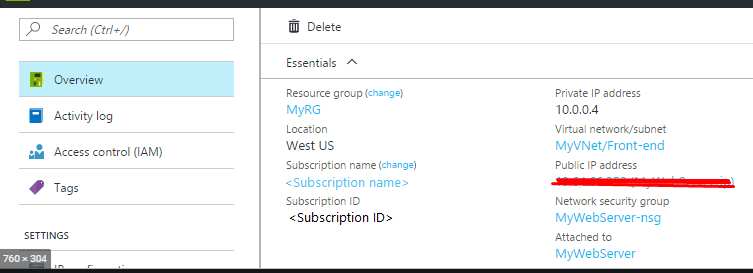
- To work, you must open port 3389(TCP, UDP) in the network properties in the azure firewall.
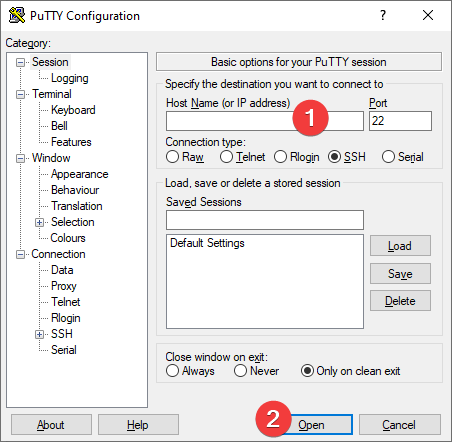
- To connect to a VM, you need the PuTTy application to connect via ssh. You can download it at the following link – Download
- Run Putty, enter the VM address in the “Host” field, and click “Open” to connect.
- In the opened console you should enter a username and password that were specified when creating the virtual machine.
- For the first login, it is necessary to set a password for the root user.
- To do this, enter the following commands: sudo su – passwd root enter the password and confirm it.
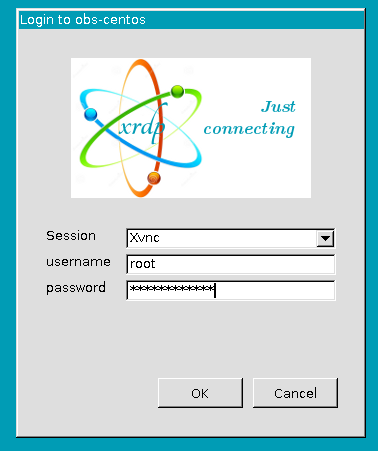
- Now you should connect to the server through the utility mstsc
- Enter IP address and click connect.
- After that you need to enter the root login and the password that you specified.


- Open obs-studio shortcut on the desktop.
- To configure OBS, you should select the tool auto configuration wizard.
- Click “Next”.
- Select the desired settings and click next.
- Сhoose the service where you are going to stream, in our case it is Twitch.
- To stream on Twitch you need to connect your account or enter StreamKey.
- We chose the option of logging into your account, after logging in you need to select some more settings for the streaming on Twitch. After setting, click “Next”.
- After auto-configuration is done you can click “Apply”.
- After that you can start streaming
- To check, you can go to your channel and make sure that the stream is going.


The manual from the developer: https://drive.google.com/file/d/1c0sghJ-waBxXVrsDlgqj2fbGdUfxAcau/view
