Funkwhale is a self-hosted music streaming service that helps you upload, share and enjoy music. Music can be browsed by artist, album, genre, playlist, or record label, as well as by direct searches.
![]()
This is a quick deployment and ready-to-run image.
Simple and rapid installation. Easy to maintain.
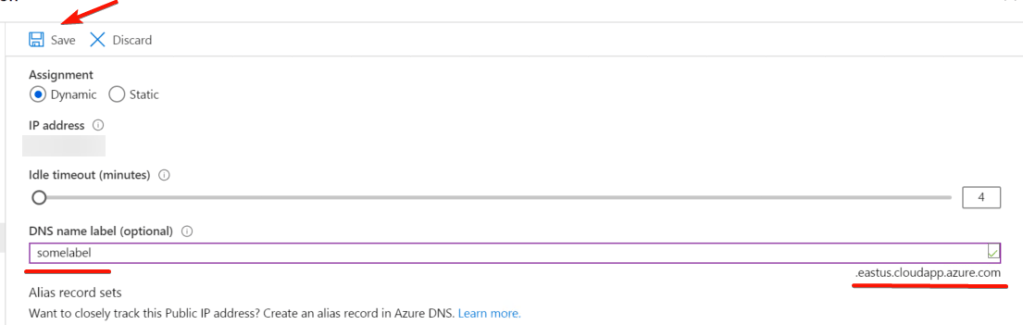
Creating DNS name through Azure Portal
- The first step is to create a DNS name that will be used for the further connection.
You can specify your DNS name (for which an SSL certificate has been already purchased) and skip this step. - To create a DNS name through Azure Portal, go to the VM settings in the “Overview” section.
- Go to “DNS name” settings.

- Fill in the “DNS name label” field and click <Save> at the top.
Connect to a VM using PuTTy
- To connect to a VM, you need the PuTTy application to connect via ssh. You can download it at the following link – Download.
- Run Putty, enter the VM address in the “Host” field, and click “Open” to connect.
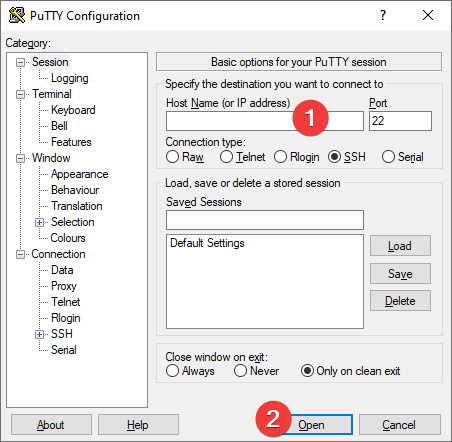
- In the opened console you will need to enter a username and password that were specified the when the VM have been creating.
- Enter the following command.
> sudo nano /funkwhale/.env
- Find the line FUNKWHALE_HOSTNAME (if you don’t see it, make the PuTTY application window bigger).
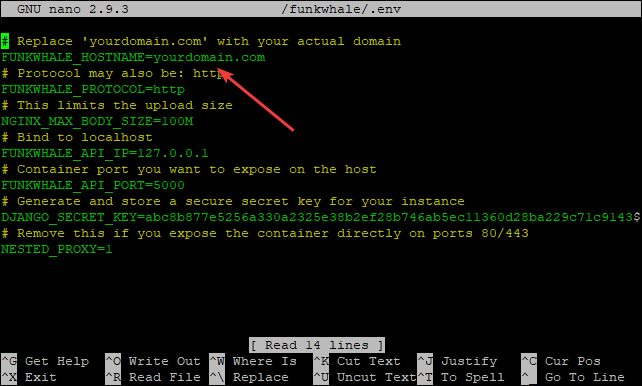
- Instead of the specified address, specify your DNS name or previously created through the Azure Portal. To go to the desired line, use the arrows on the keyboard. To paste the copied text, use the right mouse button.
- Press Ctrl + X on the keyboard to exit the file. You will be prompted to save the changes to the file – press Y on the keyboard to confirm, and then Enter to overwrite to the same file.
- Now you need to restart the portal. To do this, enter the following command. Full restart of the server can take 40-60 seconds:
> cd /funkwhale/
> sudo docker-compose up -d
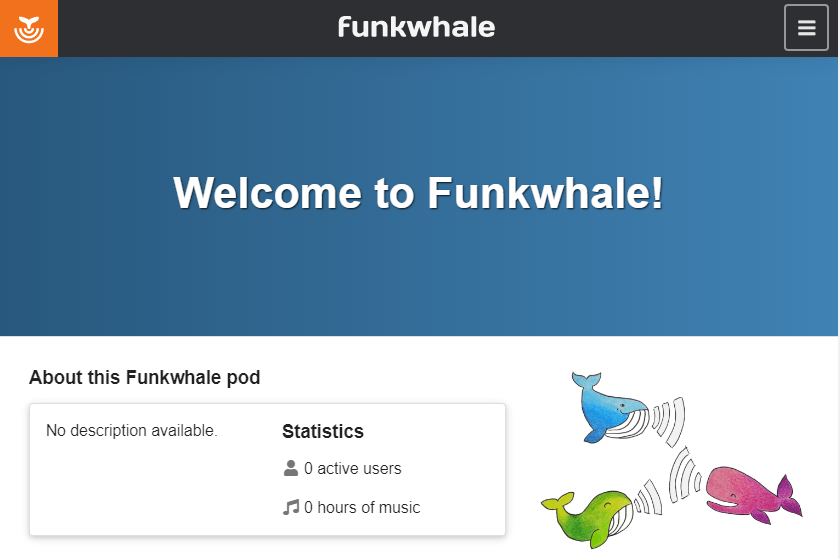
- Now you can go to your DNS name specified in the file when configuring via PuTTy. If an error occurs during the transition, try again in a couple of minutes.
- In order to log in through the administrator account – you need to create it on the server itself. Go back to the console and run the following command:
> sudo docker exec -it funkwhale manage createsuperuser
- Then enter the following data one by one
– Username (e.g. admin)
– Email (anyone, for example dasda@adsda.com)
– Twice Password (minimum 8 characters)
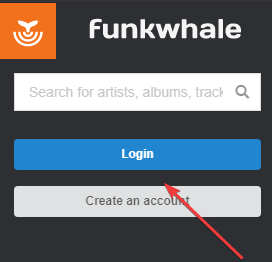
- Now, you can log in to the site using the newly created user. To do this, click the <Login> button and complete authorization.
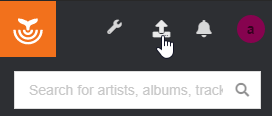
- In order to create your own library and upload files to it, click on the <Add content> button at the top left of the site.
- Click <Get started> next to “Upload third-party content in a library”.

- Enter the name of your library, click the <Create library> button (you can change the remaining fields at your discretion).

- The library page opens. To upload your track, click the <Upload> button and then Proceed.

- Click on the download button, or drag your files directly into the selected area.
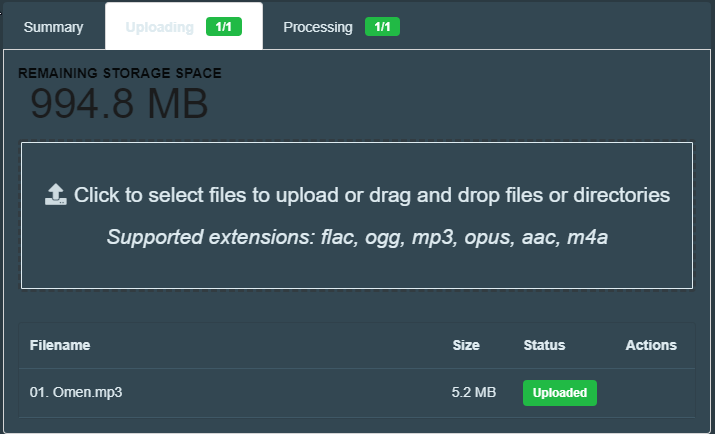
- Done, first track uploaded. Now, in order to play it, press <Browse> and <Play Now> opposite the added track.

- You can find more information on configuring the server at the following links:
Funkwhale’s documentation — funkwhale 0.21 documentation
Administrator Documentation — funkwhale 0.21 documentation
