This is a quick deployment and ready-to-run image.
Simple and rapid installation. Easy to maintain.

To install the FTP Server in Azure, please consider all the advantages of our marketplace solution that will lead to a fully secure FTP server setup in your Azure tenant.
As soon as your Azure VM is deployed, several adjustment steps should be taken to start using this FTP Server.
Settings and connection to FTP Server for Windows Server 2016
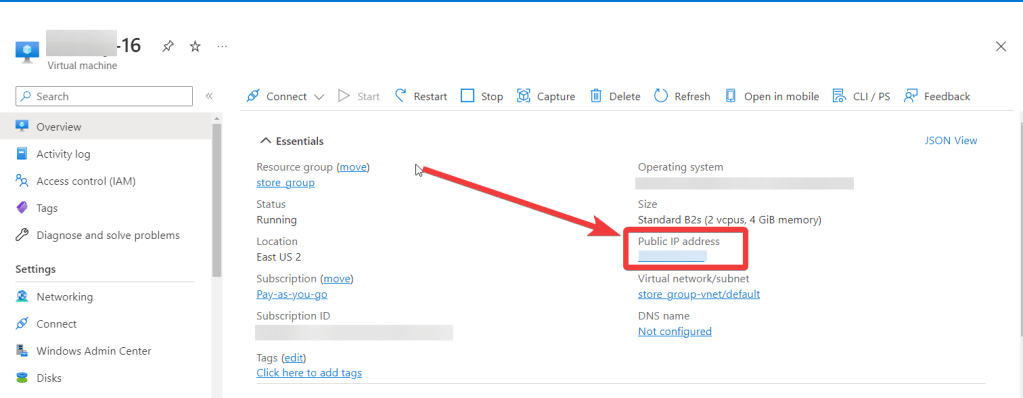
For the connection to the server, you should know the IP address of the VM. You can find it in the personal account of Azure. (Select the virtual machine from the list. By clicking the item “Overview”, your IP is displayed in the “Public IP Address” line).
To work, you must open TCP ports 21 and 50000-51000 in the Networking->Network settings in the Azure firewall.
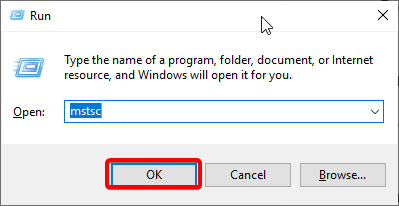
Connecting to the VM
- To connect to the virtual machine, run the “Remote Desktop Connection” shortcut “Win + R”. In the window that appears, enter “mstsc” and click “OK”.
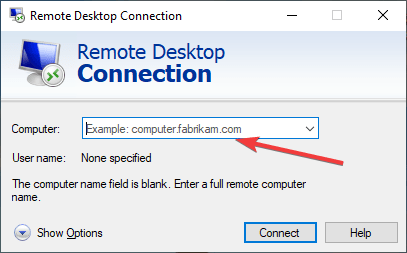
- In the window that appears, enter the IP of the virtual machine and click “Connect”.
- In the window that appears, enter your username and password and click “OK”.
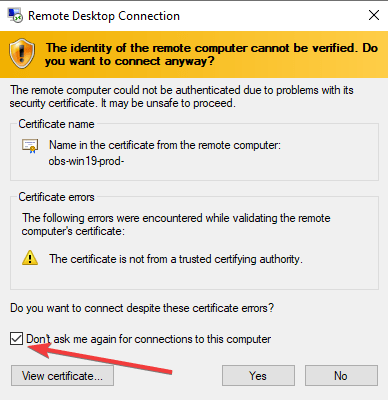
- Check the box and click “Yes”.
Configuring the server
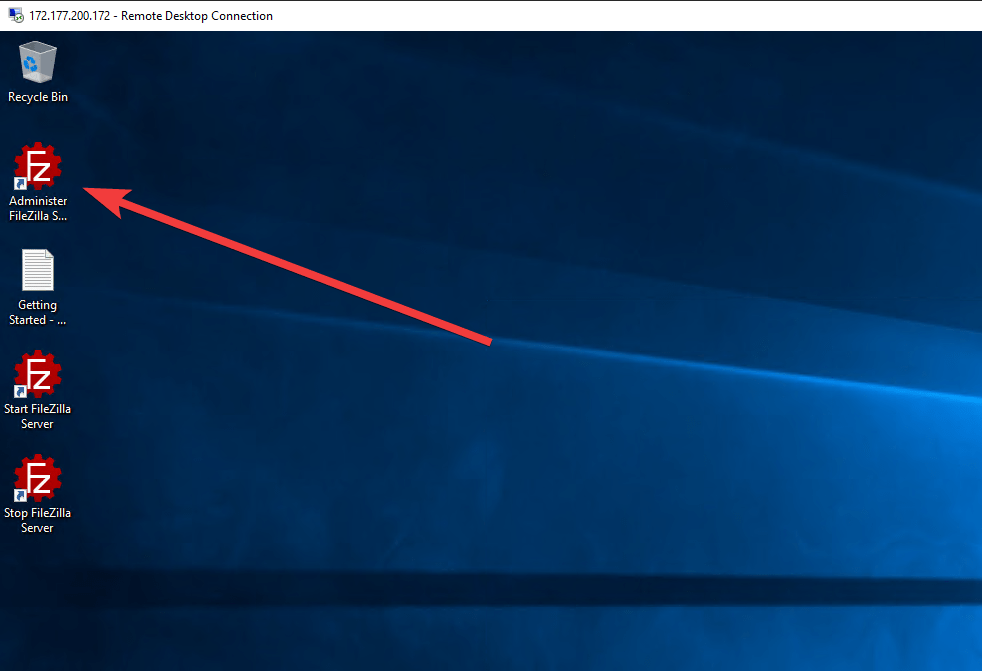
- Start up the Administer FileZilla Server with the shortcut on your desktop (if it does not start when connected)
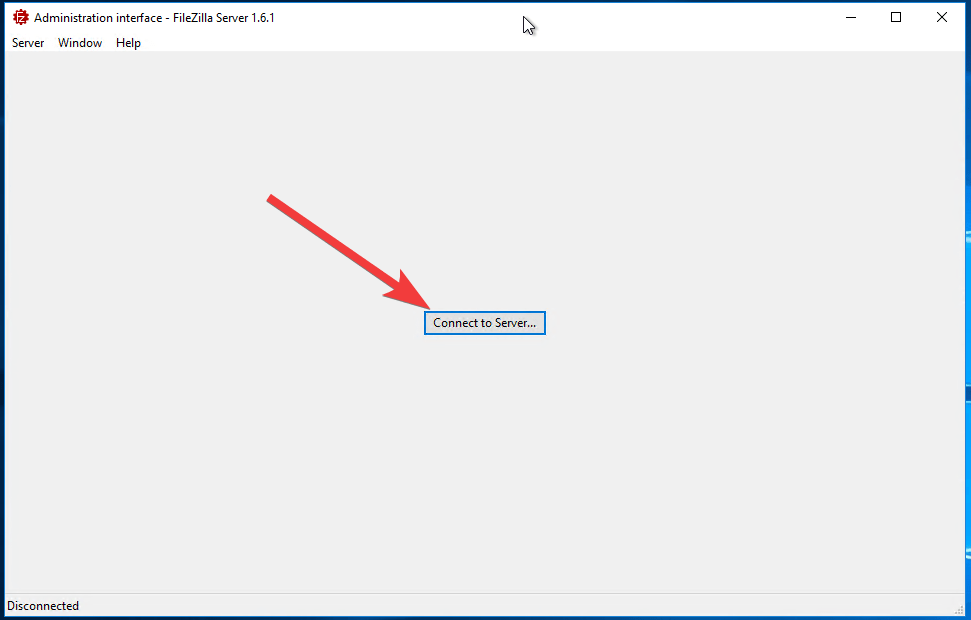
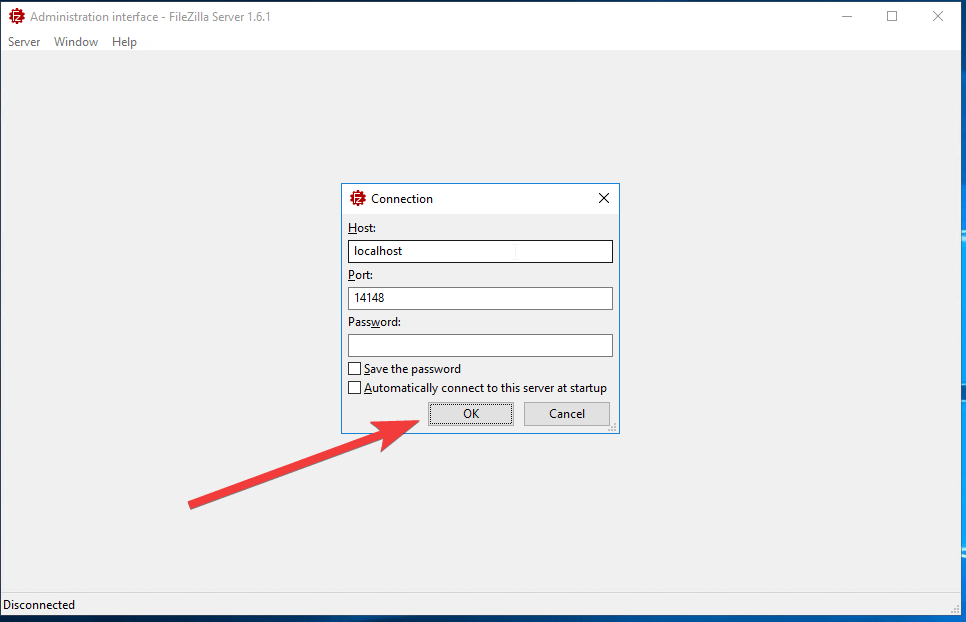
- In the pop-up window, click Connect to Server and OK as displayed below (the password field is empty):
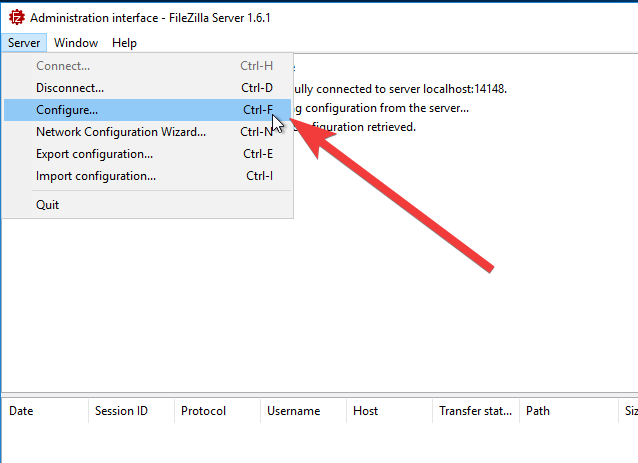
- When the connection has been established, select Server->Configure
- You can check if the Passive mode port range is set. Go to Protocol settings -> FTP and FTP over TLS (FTPS) -> Passive mode, and see if 50000-51000 ports are used when transferring data to the server.

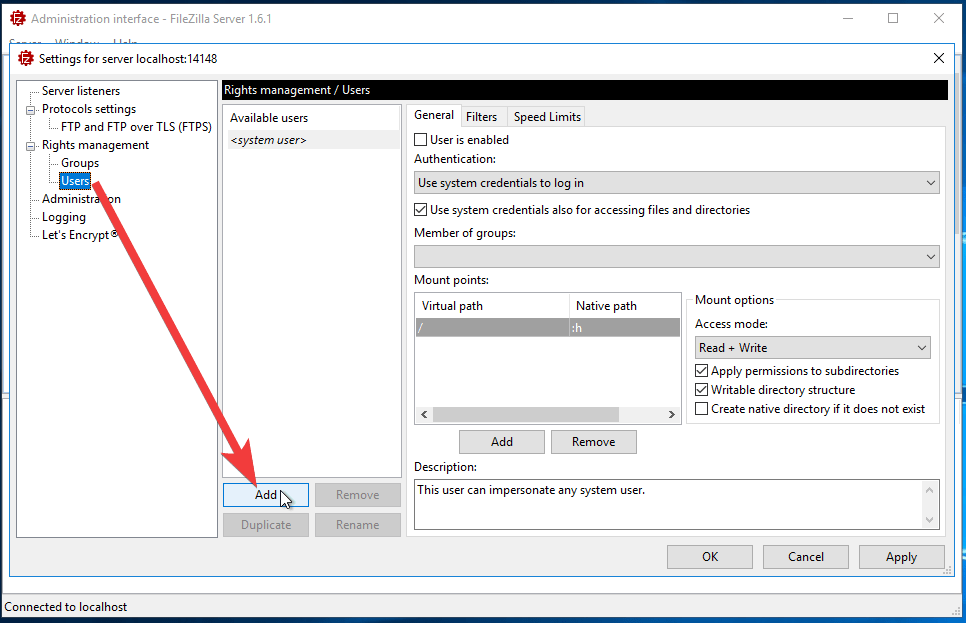
- To set up local users and give them access to the directories locally on your server, you need to select Rights management->Users
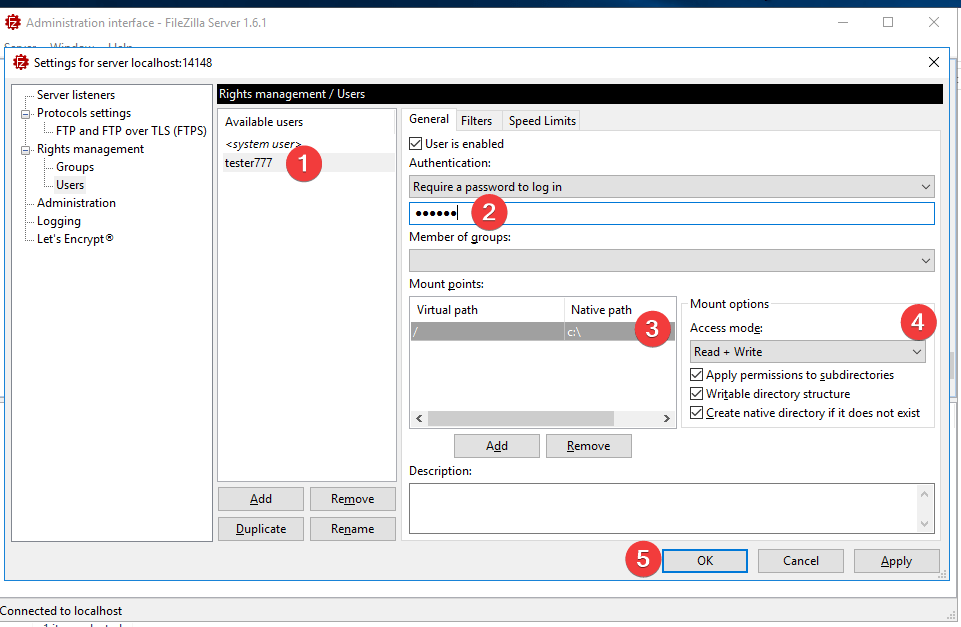
- Enter username (1), password (2), grant access to the required local folders (3), set user rights (4), and click OK (5)
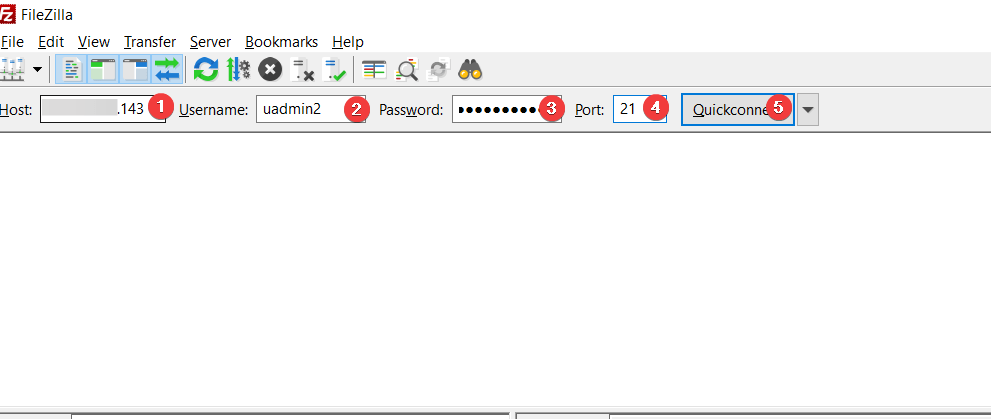
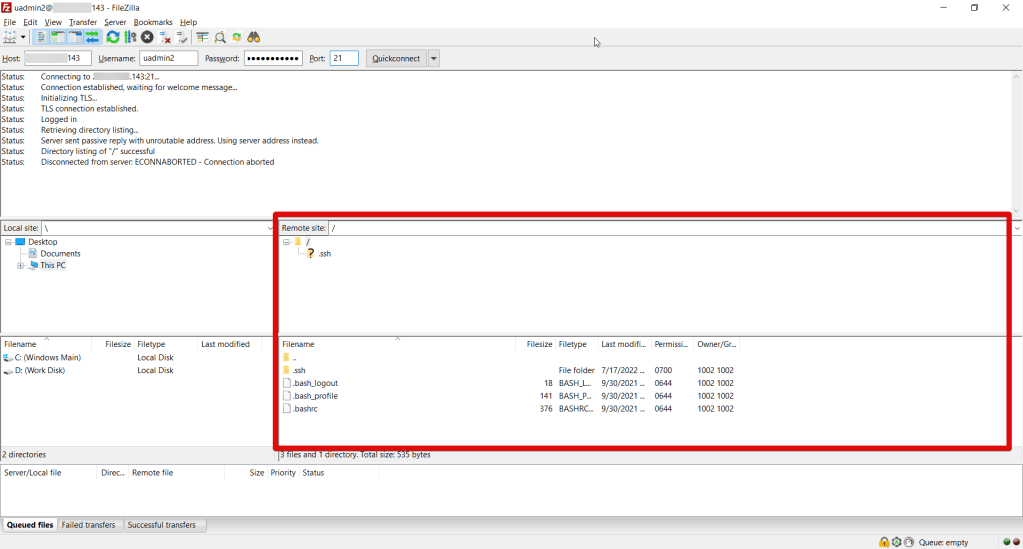
Connecting to FTP using “FileZilla Client”
- To connect to the FileZilla FTP Server, it is recommended to use the “FileZilla Client” application (you can download it from the link: Download FileZilla Client for Windows (64bit x86)).
- When connecting to the FTP server, you need to follow these steps:
- In the <Host> field, enter the VM IP address
- In the <Username> field, enter the username created in step 6 of the previous section
- In the <Password> field, enter the user password created in step 6 of the previous section
- In the <Port> field, enter port 21
- When the data is entered, press Quickconnect
- After starting the connection, a window with a certificate will appear. In it, you must select the Always trust certificate item and click OK
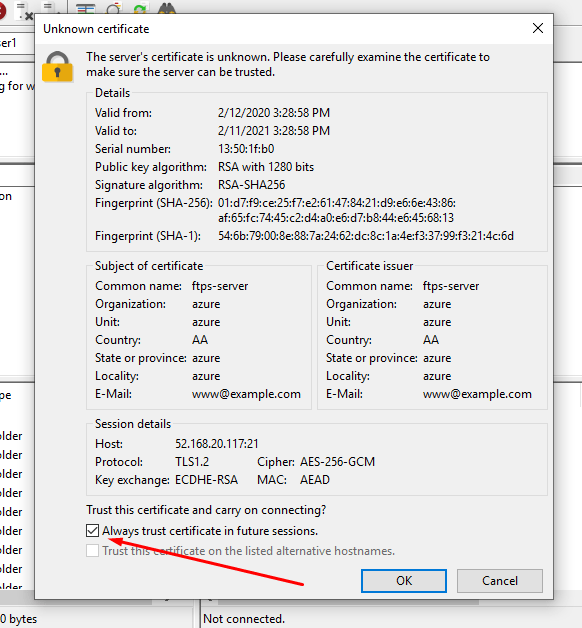
- After that, you will successfully connect to the server.
Disclaimer
This FTP Server solution was built with the help of the altered version of the FileZilla Server Open Source Software. This solution is allowed under the GPLv2 Licence. The original trademarks are owned by the relevant companies. Therefore, no warranty is included with this software.
Use it at your own risk, and if any damages appear resulting from the use of this software, they will be entirely on your own.
Now you can work with your own FTP Server for Windows Server 2016.
