FTP Server Advanced on Ubuntu 18.04 LTS was made for the transfer and storage of computer files.

This is a quick deployment and ready-to-run image.
Simple and rapid installation. Easy to maintain
The guide on how to use FTP Server Advanced on Ubuntu 18.04 LTS
- To connect to a VM, it is necessary to connect the PuTTy application via ssh. You can download it at the following link – Download
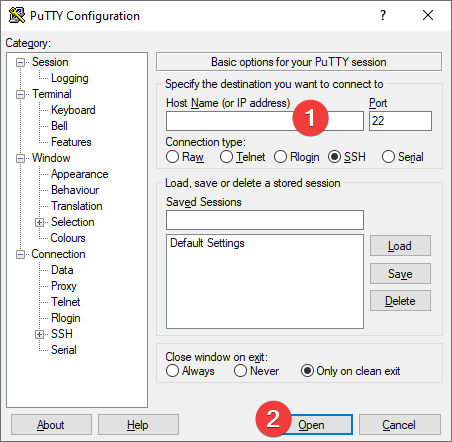
- Run Putty, enter the VM address in the “Host” field and click “Open” to connect.
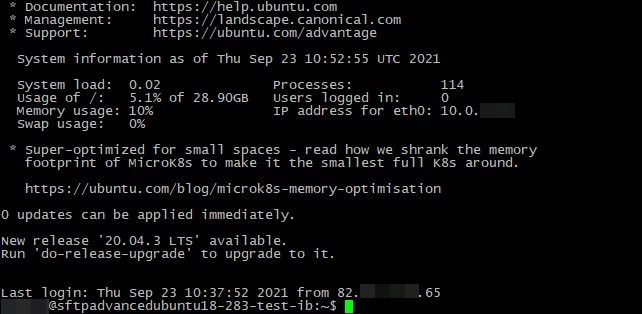
- In the opened console you should enter a username and password that were specified when the VM have been creating.

- The creation of the user
> sudo addsftpuser
Attention: The password has to be a maximum of 8 characters. If you enter a password with more than 8 characters, it will be shortened. While entering a password in the ftp client, only the first 8 characters will be taken.
- To connect to ftp, it is recommended to use the “FileZilla Client” application.
You can download it from the link: https://filezilla-project.org/download.php?platform=win64
- In the “Host” field, enter the IP of your VM
In the “Username” and “Password” fields, enter the data that you entered when creating a new user (see step 4)
In the “Port” field enter 22
And click “Quickconnect“

- The examples of the basic ftp user management commands that can be entered after connecting in the PuTTY client:
The changing of the password for an existing user:
> sudo passwd username
The deletion of user:
> sudo delsftpuser
The blocking of user account: (works only for password login)
> sudo usermod -L username
The unblocking of user account:(works only for password login)
> sudo usermod -U username
