Cacti®: Service Monitoring Server on CentOS 8.4 is a complete network graphing solution designed to harness the power of RRDTool’s data storage and graphing functionality. It provides a fast poller, advanced graph templating, multiple data acquisition methods, and user management features.

This is a quick deployment and ready-to-run image.
Simple and rapid installation. Easy to maintain.
Connecting to Cacti®: Service Monitoring Server on CentOS 8.4 using PuTTY
- To start the server, run the VM through Azure Portal.
- To work, you must open port 80 (TCP) in the network properties in the Azure firewall.
- Install PuTTY. You can download PuTTY from the link – https://putty.org.ru/download.html Launch PuTTY.
- In the “Host Name” field, enter the IP of the virtual machine and click “Open”.

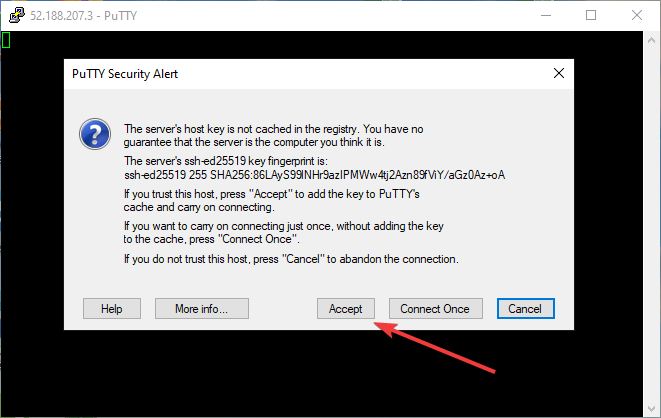
- In the window that appears, click Accept.
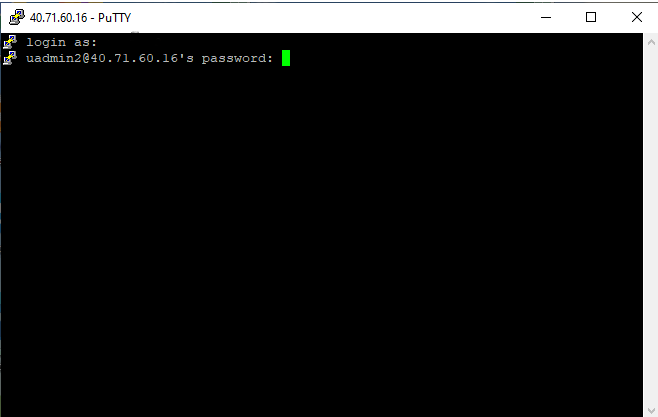
- Enter the username and password that was used to create the virtual machine.
(If you enter a password, it will not be displayed.)
- In the browser enter http://ipVM/cacti. For example http://11.22.123.123/cacti
- Enter your username and password in the window that opens.
Username: admin
Password: cactiAdmin12$
and click “Login”
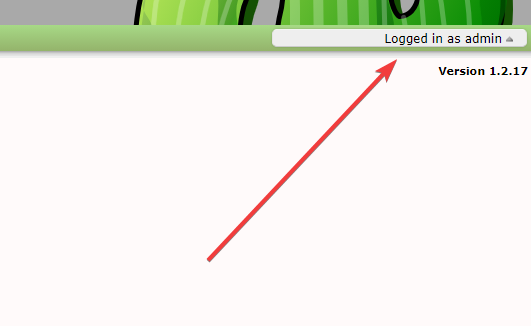
- While on the site, point in the hover to the upper right corner to logged in as admin.
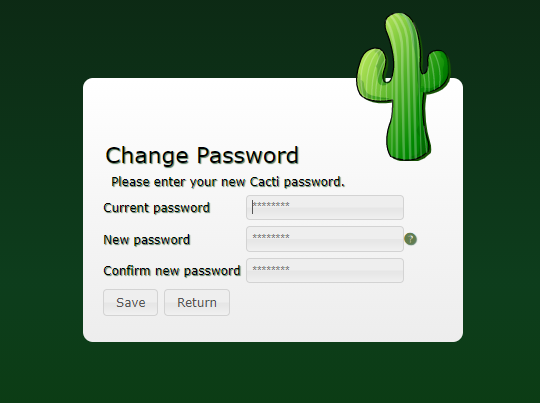
- Click “Change Password”.

- Create a new password and click “Save”.
For further interaction, use this instruction:
https://docs.cacti.net/README.md#plugin-development
If you have any questions, please refer to the main documentation: https://www.cacti.net/documentation.php
Official website – https://www.cacti.net/
License – https://www.cacti.net/downloads/docs/html/LICENSE.html
