AzuraCast is a self-hosted, all-in-one web radio management suite. It has powerful, intuitive web interface, you can start up a fully working web radio station in a few quick minutes, and works for web radio stations of all types and sizes.

This is a quick deployment and ready-to-run image.
Simple and rapid installation. Easy to maintain.
The guide on how to work with the AzuraCast – Radio Management on Ubuntu 18.04 LTS
- To start the server, run the VM through Amazon Portal.
- To work, you should open 80,443,2022,8000-8500(TCP) ports in the network properties in the Amazon firewall.
- After starting the VM, you can go to the main page. To do this, go to the following address http://*vm_ip*.
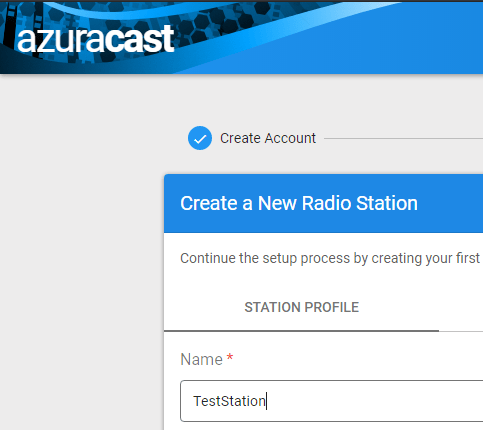
- When you first open the site, a page with the creation of an administrator account will be shown.

- In the next step, you will be prompted to create a station. At this stage, enter only the name of the station and click <Save changes> at the bottom
- Next, the page with the server settings will open. You can leave everything unchanged, or configure it, as for the necessary goals and objectives.

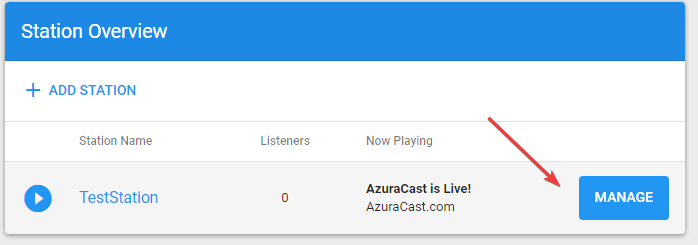
- To check the operation of the radio station, you can add mp3 files for playback. To do this, go to the editing station.
- Go to the “Music Files” section.
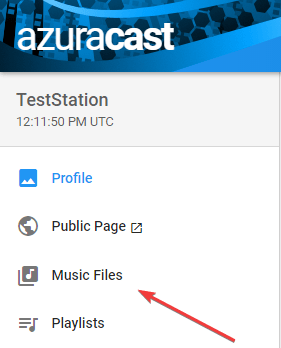
- Press the <Select file> button and select one or more files on your PC.

- After downloading the files, they must be added to the playback queue. To do this, highlight the tracks you want to play and click “Queue”

- Now go to the main page of the radio station by clicking on the “Profile” button
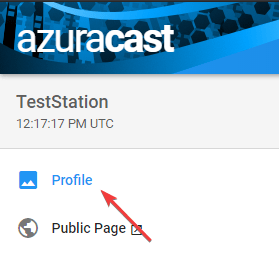
- And play your radio station.

