Ampache is a web-based audio and video file manager and media server. It was originally written to take advantage of Apache’s Mod_mp3 but has since been adapted to use its own streaming method.
![]()
This is a quick deployment and ready-to-run image.
Simple and rapid installation. Easy to maintain.
Configuration and Connection Ampache – Music Streaming Server on Ubuntu 18.04
- To start the server, run the VM through Azure Portal.
- After starting the VM, you can go to the main page. To do this, go to the following address http://*vm_ip*.
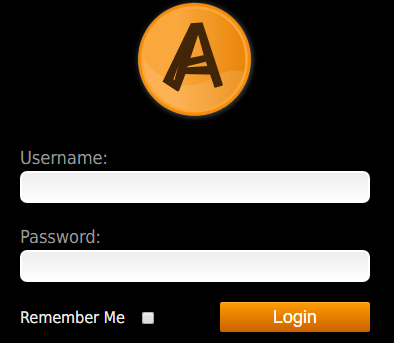
- The authorization page will open. Use the username and password admin to log in as administrator.
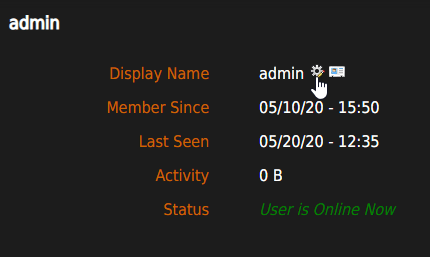
4. First of all, it is recommended to change the standard password. To do this, click on the account name in the upper left corner.

5. Then click the <Edit> button next to the account name records.
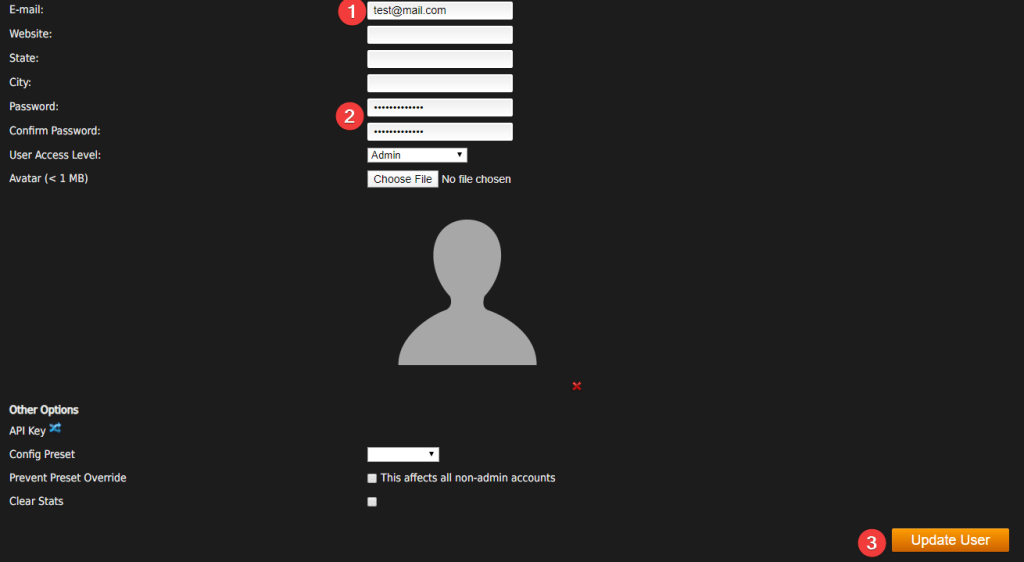
- Enter an email (without it, an error appears that it is impossible to save the profile) a new password in the “Password” and “Confirm password” fields and click <Update user>.
- More information on setting up and working with Ampache can be found here:
Home · ampache/ampache Wiki
Basic · ampache/ampache Wiki · GitHub
