WAMP Server is a Windows web-development environment. It allows you to create web applications with Apache2, PHP, and a MySQL database.

This is a quick deployment and ready-to-run image.
Simple and rapid installation. Easy to maintain.
Connection and Configuring to WAMP Server on Windows Server 2016
Connection to the VM
- Press Win + R.
- In the window that appears, enter “mstsc.exe” and click “OK”.

- In the window that appears, enter the IP of the virtual machine and click “Connect”.
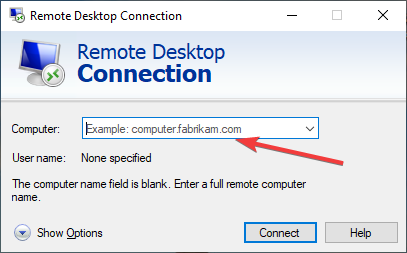
- In the window that appears, enter your username and password and click “OK”.
- Check the box and click “Yes”.

Configuring the WAMP server
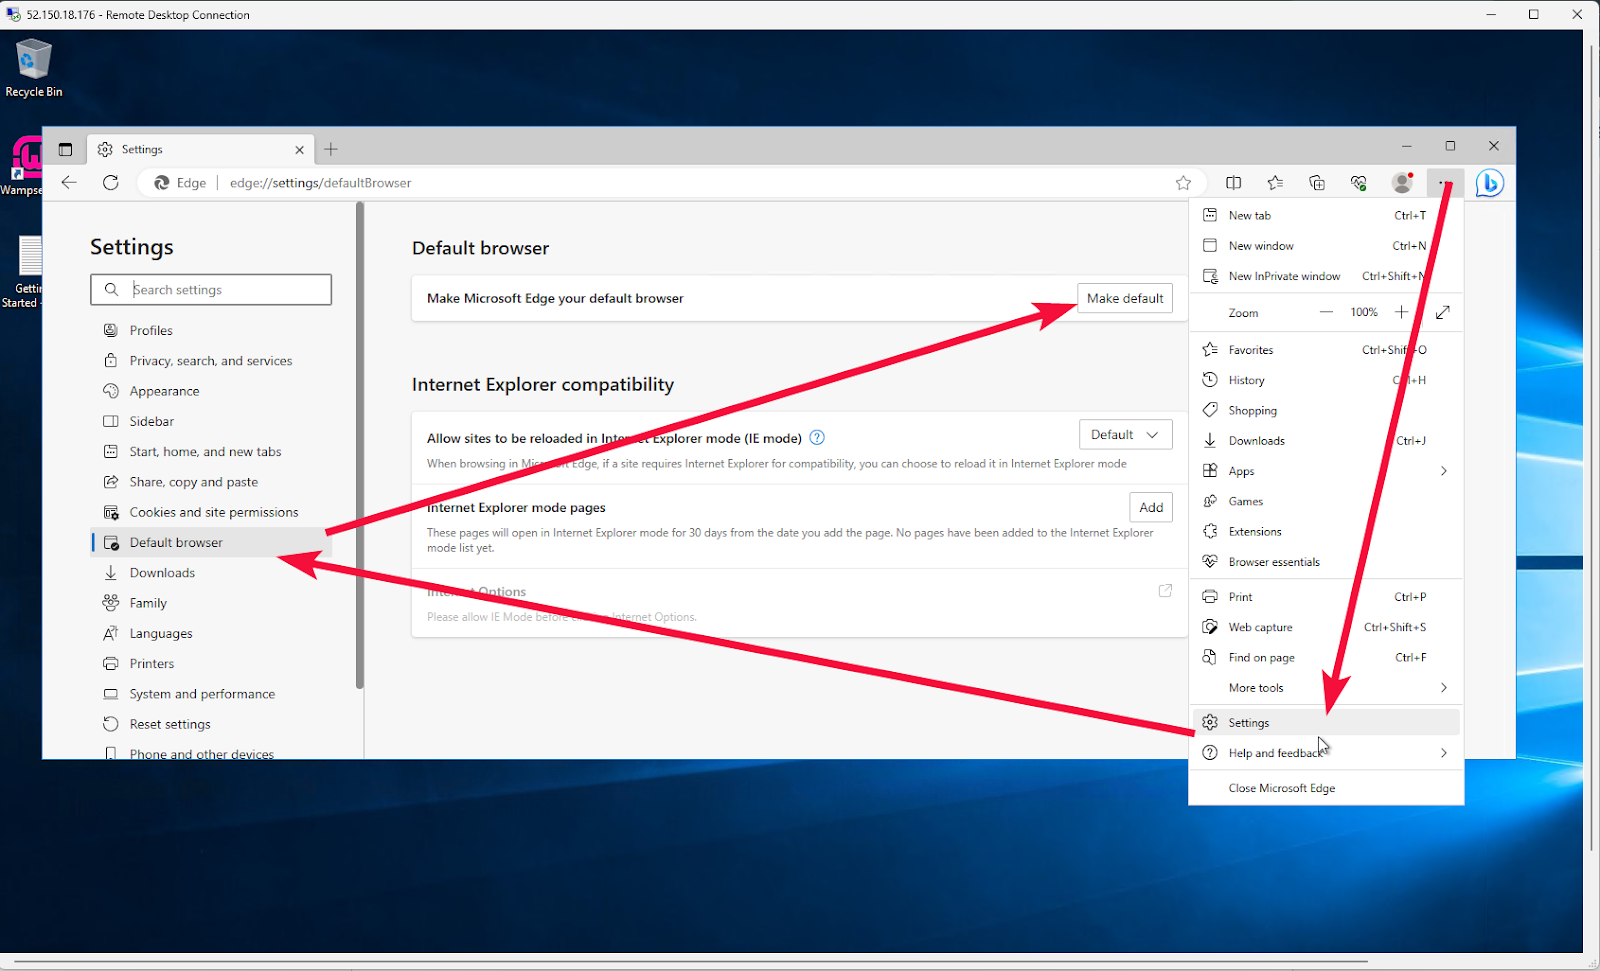
- Run Edge and set it as your default browser
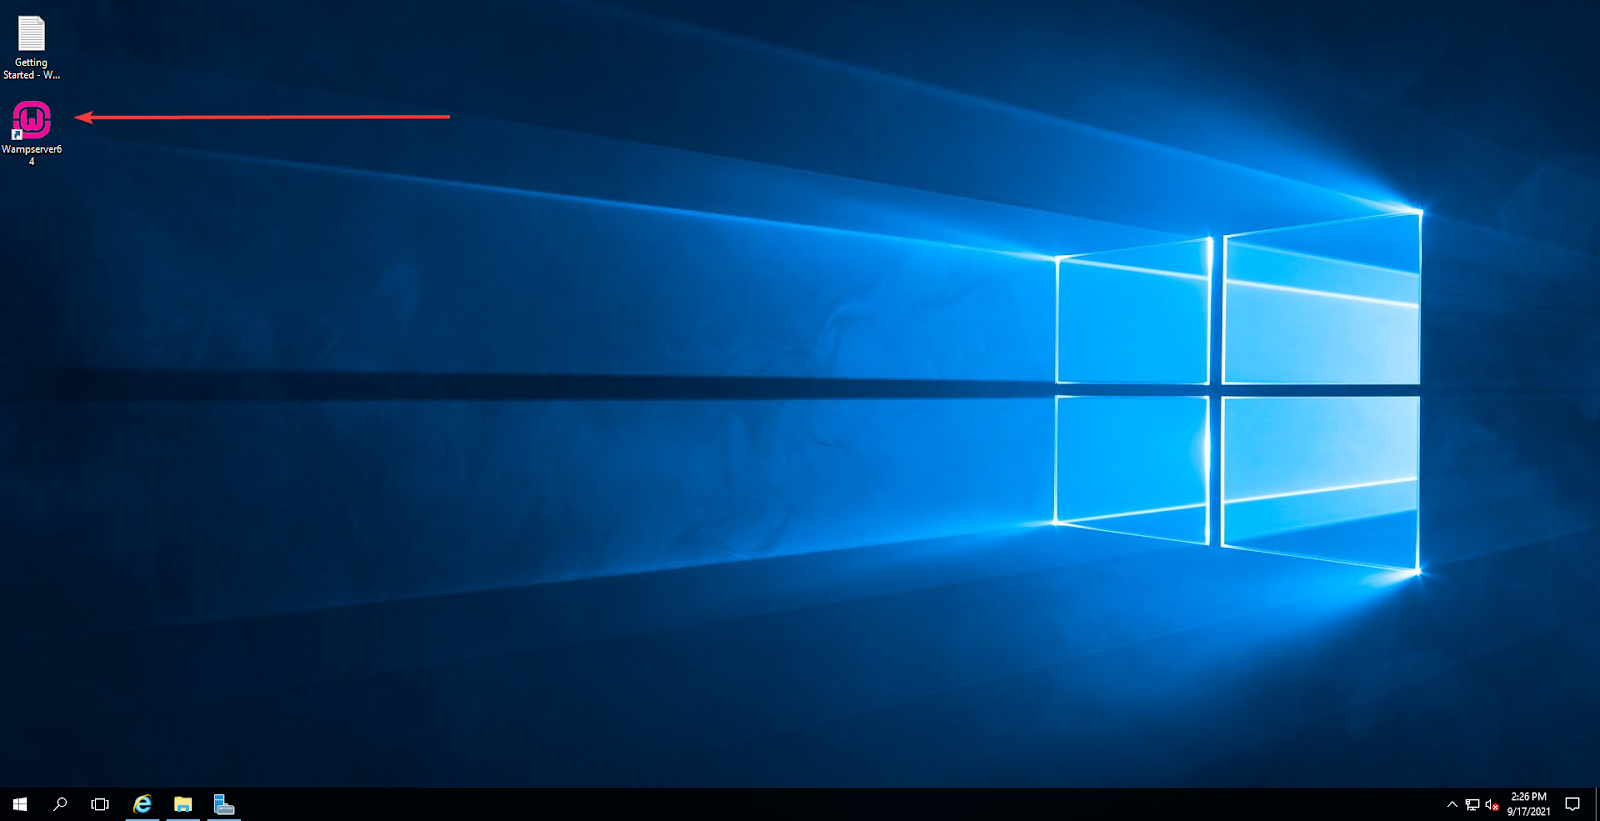
- Double-click on the “Wampserver” icon on the opened desktop
- Once launched, a red icon will appear in the lower right corner. It is necessary to wait until the moment when it turns green. As soon as the icon turns green, it means that all Wamp components have started successfully.
- Depending on the versions of the Wamp Server installers, the default database manager is MySQL or MariaDB.
If MySQL is the default manager, it will use port 3306, in which case MariaDB will use port 3307.
If MariaDB is the default manager, it will use port 3306, in which case MySQL will use port 3307. In some cases, it can also be port 3308.
- You may know which ports MariaDB or MySQL are using and change the default BD manager. To do this right-click on the WAMP icon and open Tools

- To use phpMyAdmin select the corresponding item by left mouse click

- The default Username is root. Leave the Password field blank and click Log in
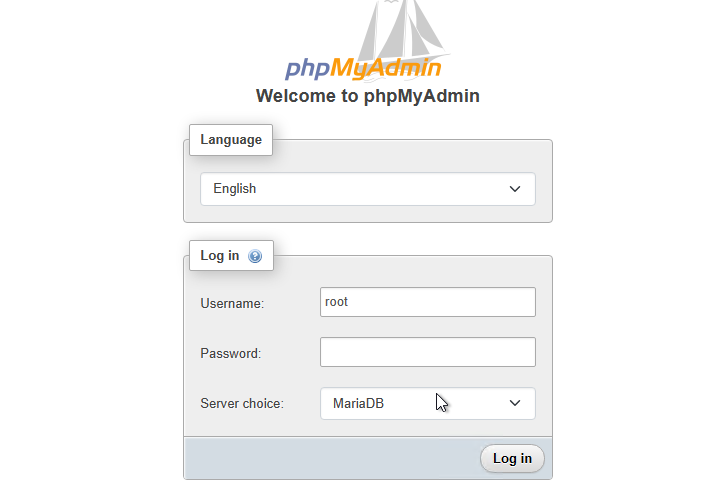
If you receive an error message stating versions, you can ignore the message and continue. This refers to connecting to MariaDB.
Creating or adding a VirtualHost
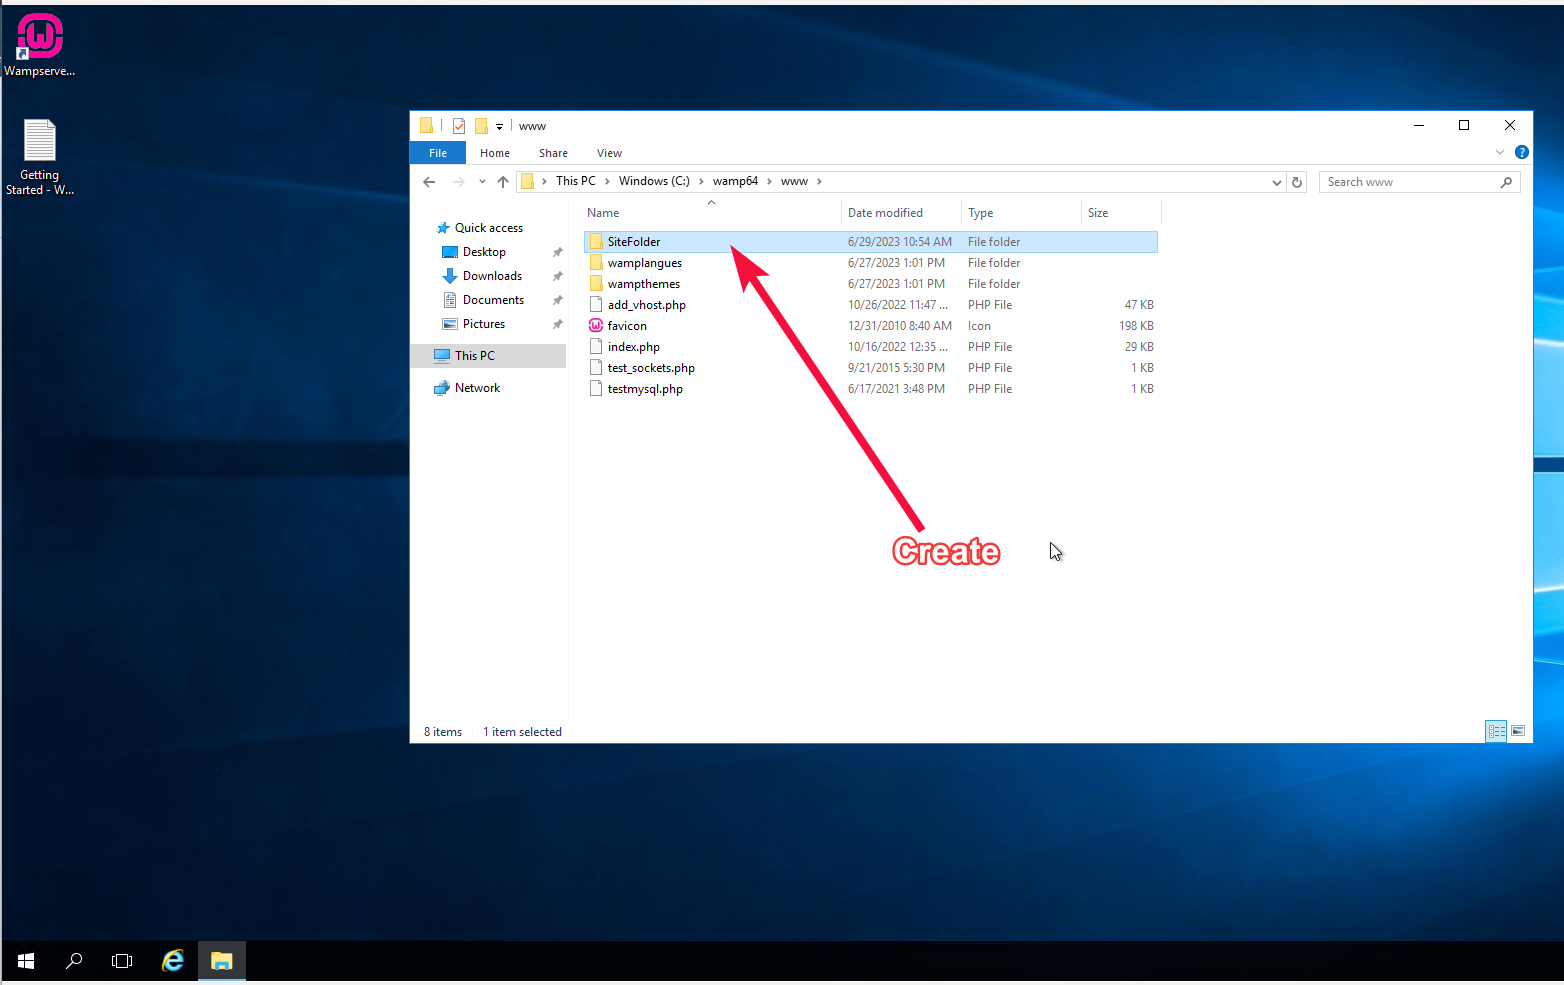
- We need a folder to host the site, existing before the creation of the VirtualHost, we need to create it:
For example C:\wamp64\www\sitefolder
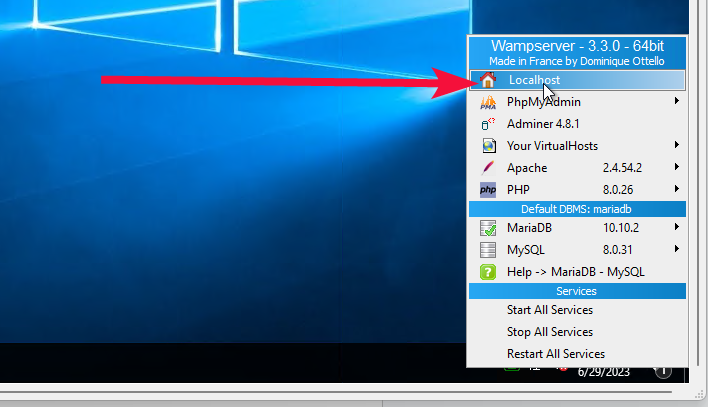
- Right-click on the WAMP icon and select Localhost
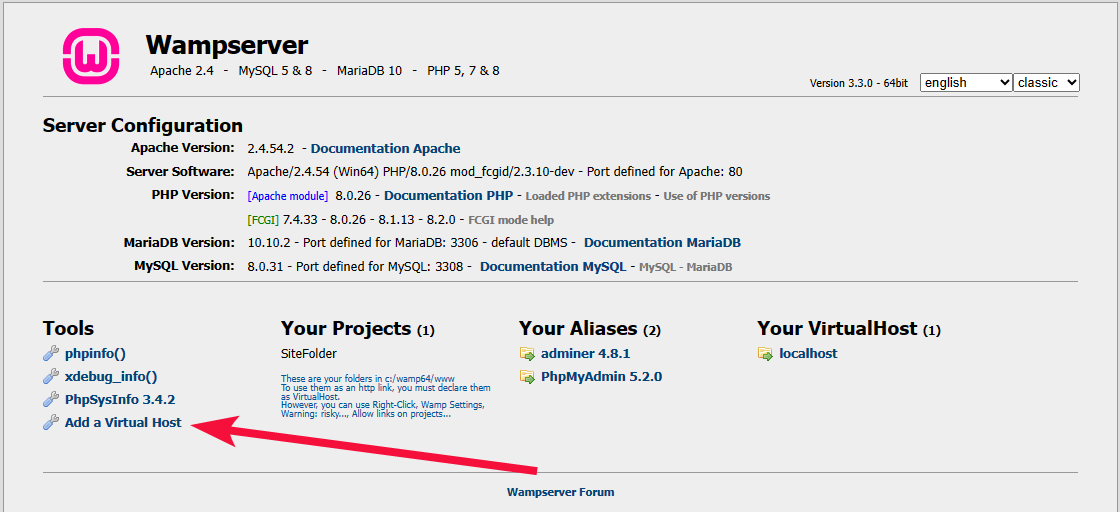
- In the window that opens, select Add a Virtual Host
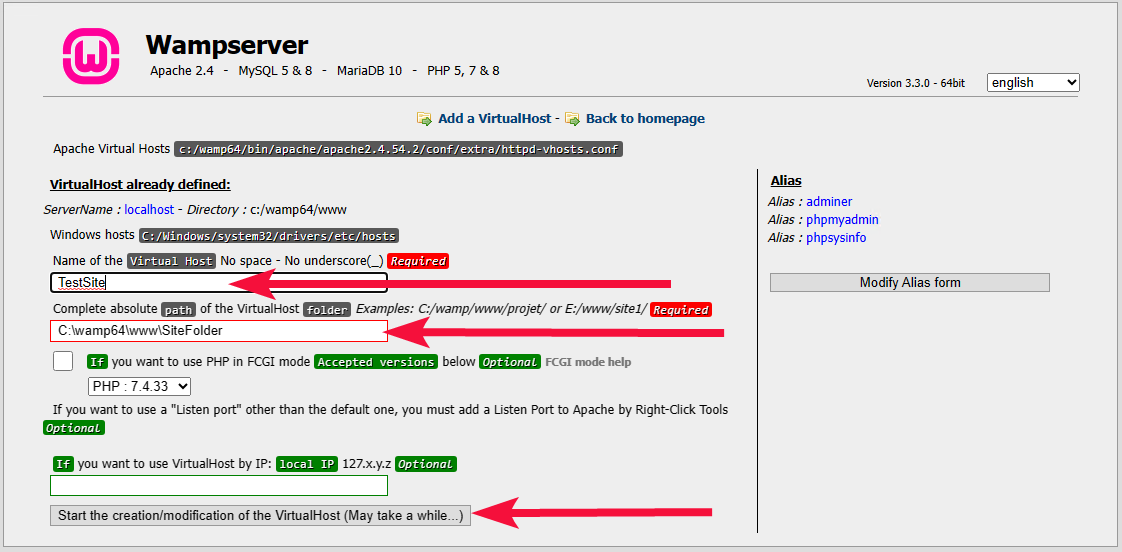
- In the ‘Virtual host name’ field enter the name (without space and underscore). Enter the absolute path to the VirtualHost folder. In our example – C:\wamp64\www\SiteFolder. And click ‘Start the creation of the VirtualHost’
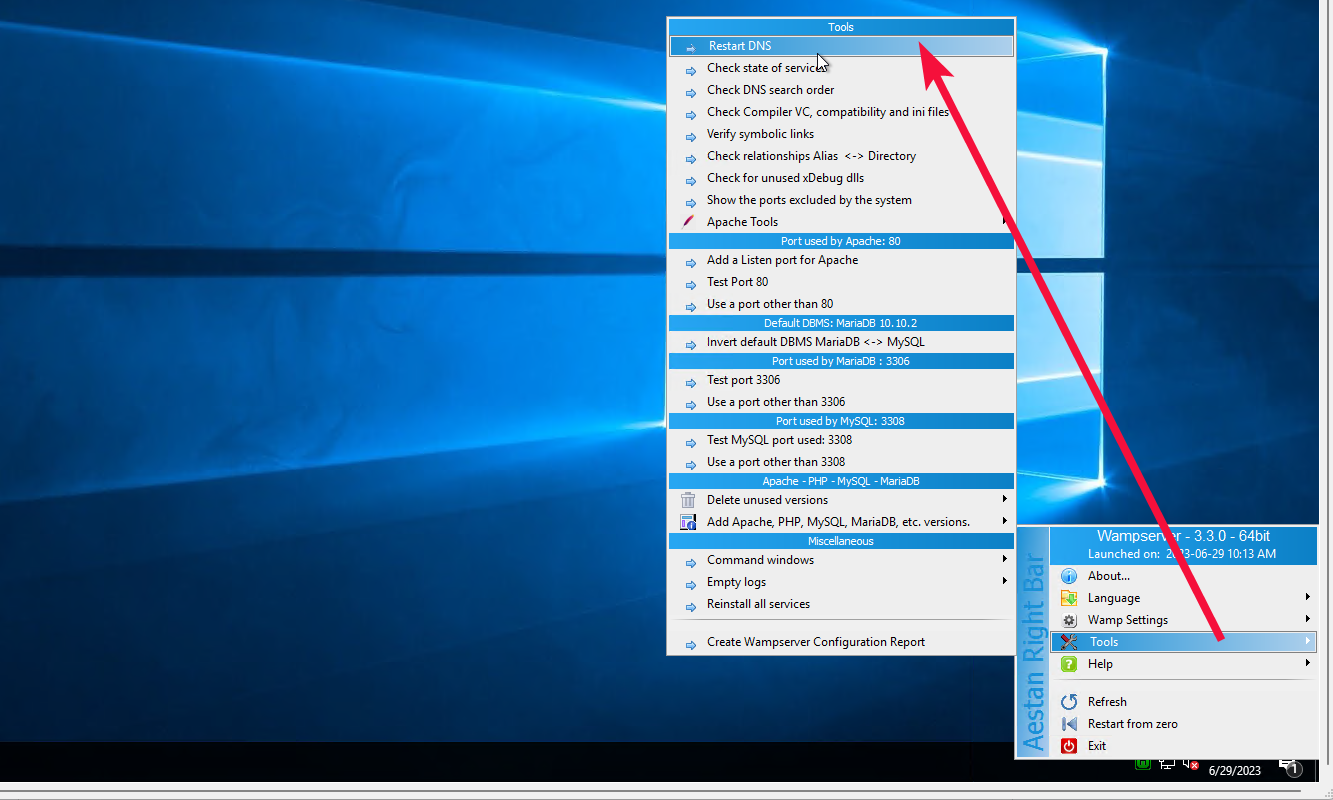
- After that, you need to restart the DNS
- To do this click LMB on the WAMP icon, select “Tools->Restart DNS”

After that, wait until the dream icon turns green.
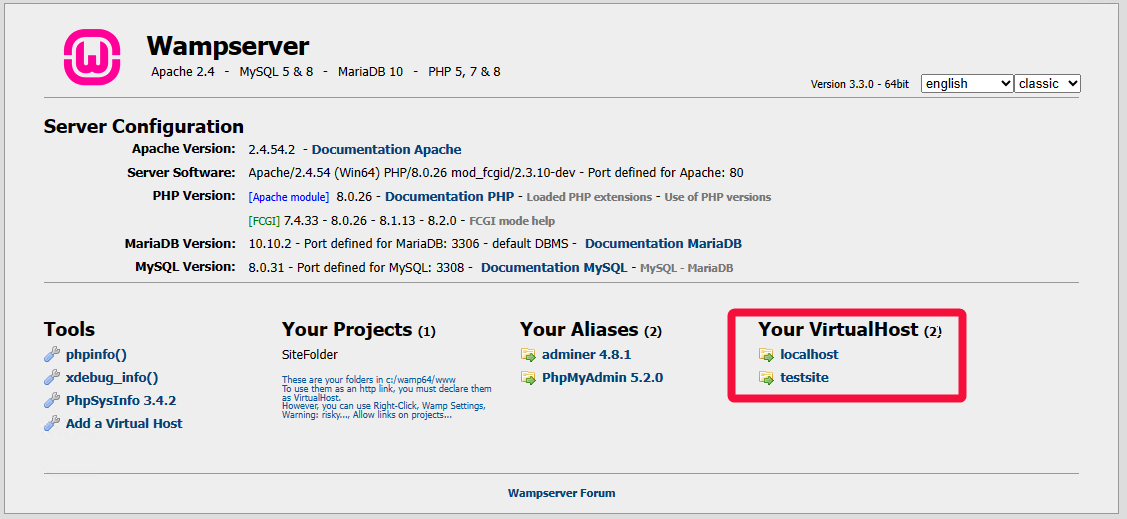
- Now go back to the main menu
There you may notice that you have Your VirtualHost with items like this:
– localhost
– testsite
You are now ready to set up your local site.
