Squid Proxy Server with Webmin GUI on Ubuntu 20.04 by Tidal Media Inc. – a pre-configured and ready-to-run image of a full-featured web proxy cache server application ready to work in the Azure environment

This is a quick deployment and ready-to-run image.
Simple and rapid installation. Easy to maintain.
The connection to Squid Proxy Server with Webmin GUI on Ubuntu 20.04 using Windows settings
Proxy server configuration through the GUI Webmin
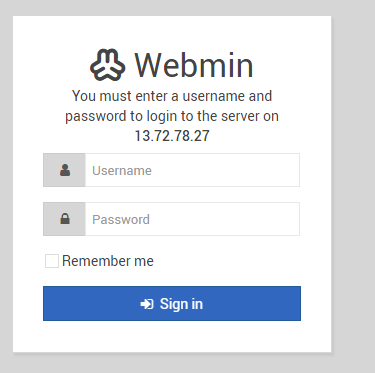
- To access the Webmin GUI, go to https://*vm_ip*:10000
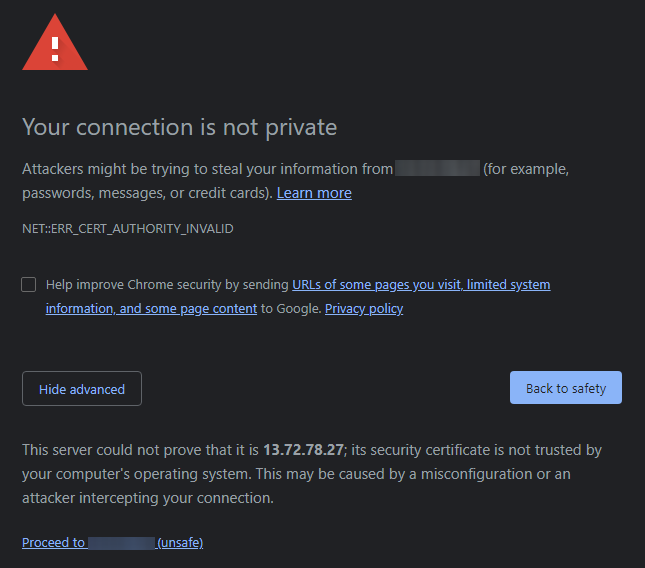
- When you go to the address, you will need to accept a self-signed certificate, for this, click the “Advanced” button and then “Proceed to*vm_ip*”
- The authorization page will open. Use the username and password that you specified when deploying the VM.
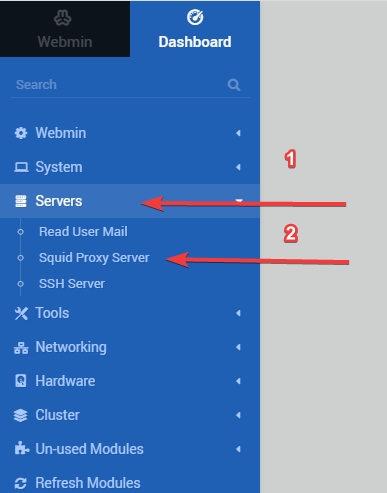
- To go to squid settings, click on “Servers” and select “Squid Proxy Server”.
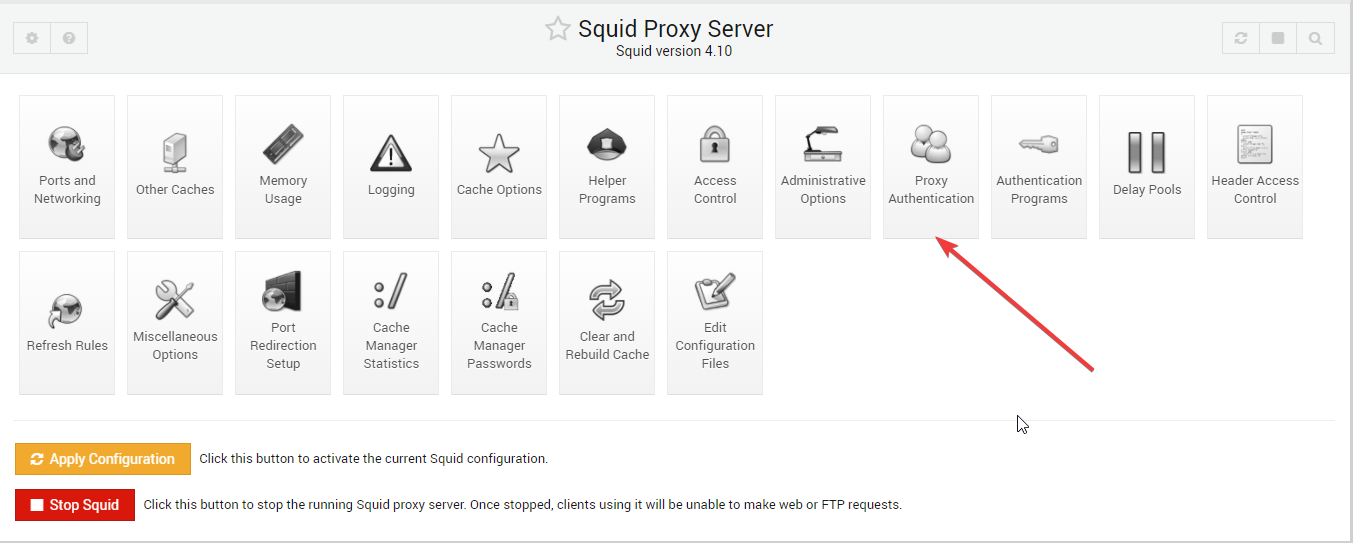
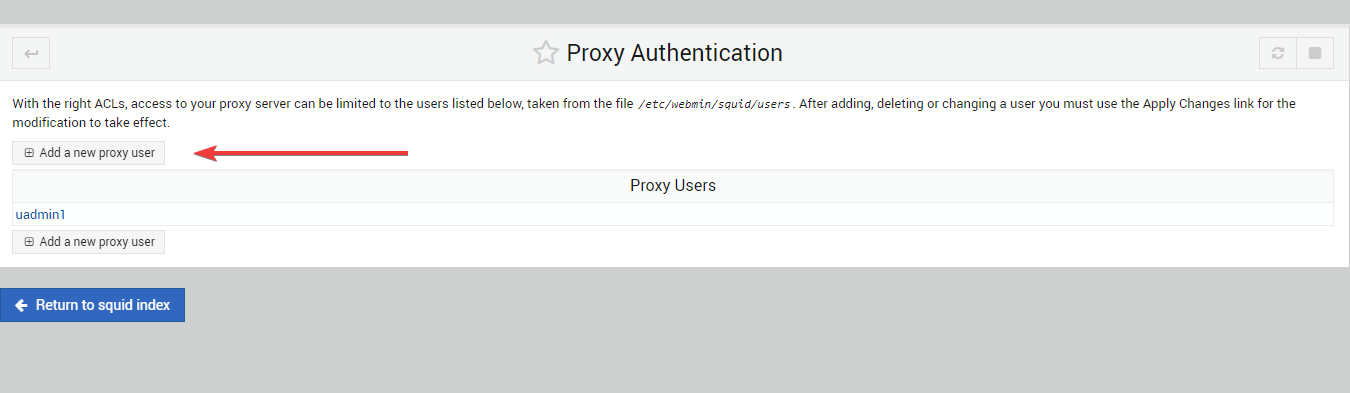
- To create a new user, the data that must be entered when connecting to the proxy can be performed using “Proxy Authentication”
- Click “Add a new proxy user” to add a new user. If you want to delete or change the old user, click on his name (in this case, “uadmin1”)
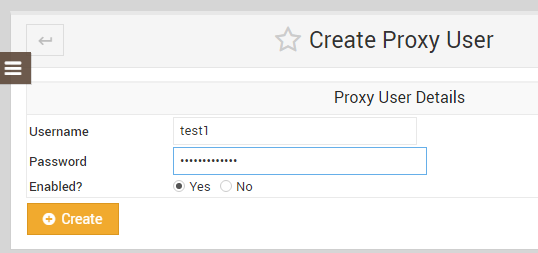
- Enter the Username and Password for the new account and the “Create” button (password must not exceed 10 characters)
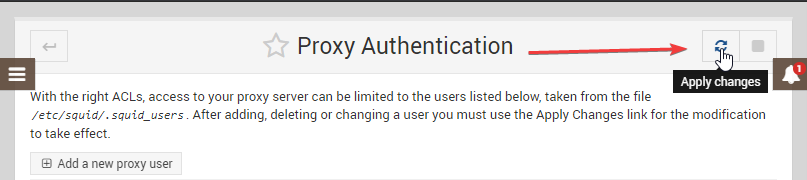
- To apply the changes, click the “Apply Changes” button (looks like an update button)
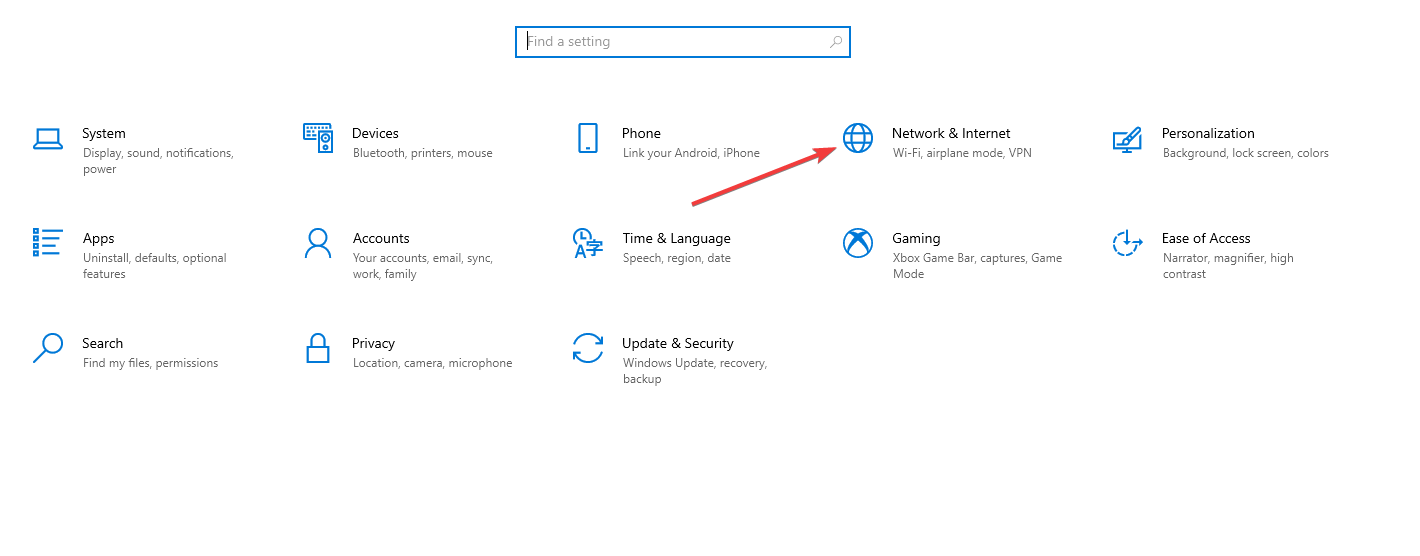
- To enable the proxy, click “Start” and choose “Settings”.

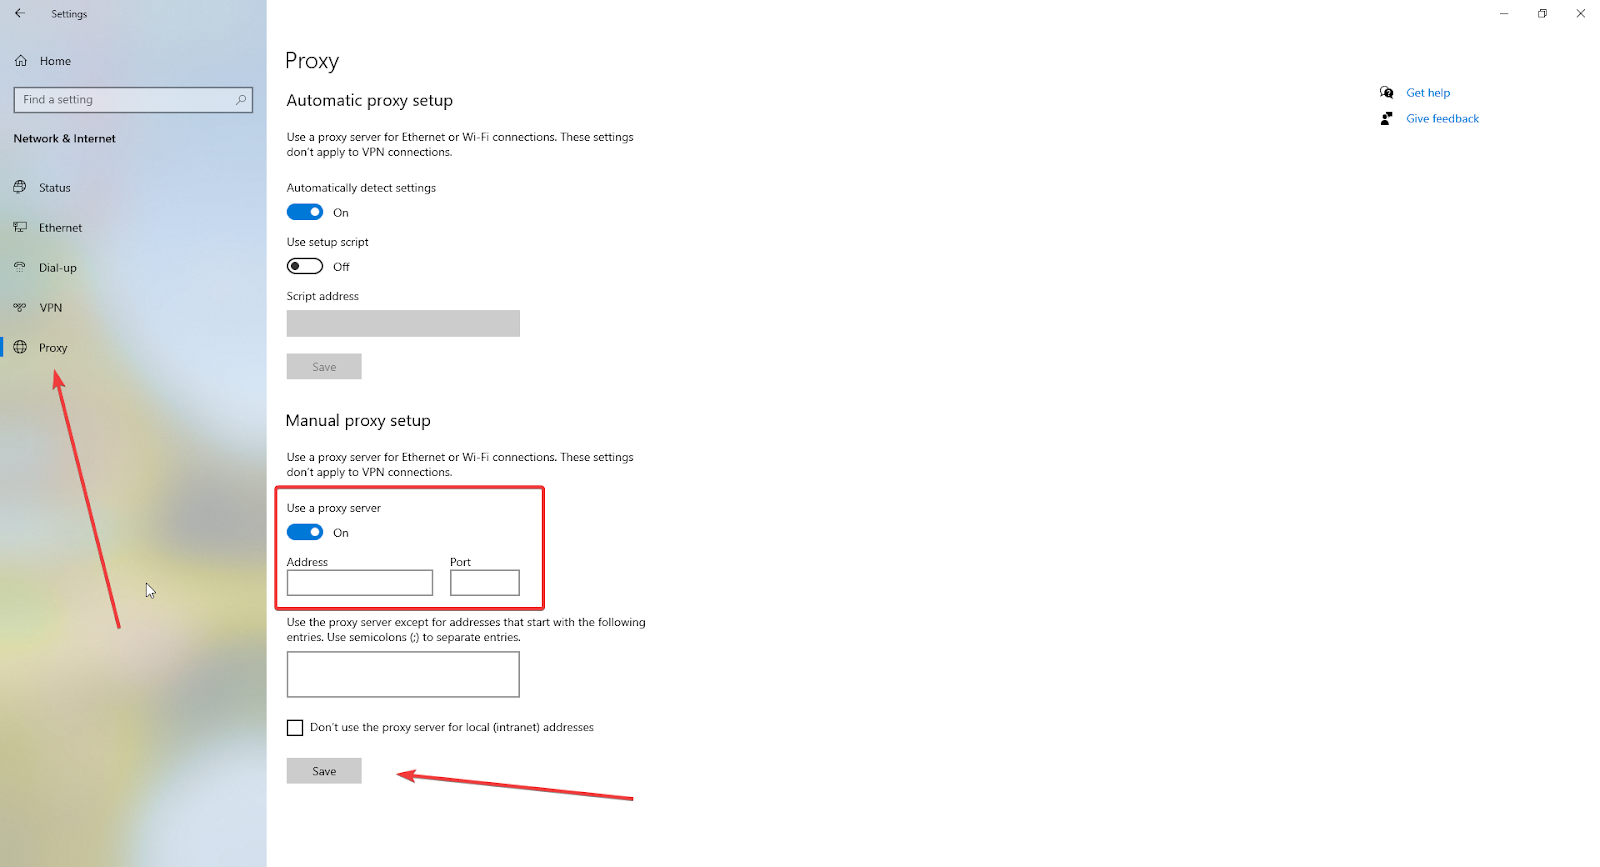
- In Settings select “Network & Internet.”
- Go to the “Proxy” section and set the “Use a proxy server” switch to On
- In the Address field, enter the address of the VM, and in the Port field, specify 3128. Then click the “Save” button.
- To check the connection to the proxy server, open the https://www.myip.com/ website in any browser and check if your IP address has changed.
- When you connect through the proxy server (for example, in the chrome browser), login and password for access will be requested. Enter the data that you used when the new proxy user has been created.
You can find more information about proxy server settings at the following links:
SquidFaq – Squid Web Proxy Wiki
Optimising Web Delivery
FrontPage – Squid Web Proxy Wiki
Optimising Web Delivery
