FTP-server – a server that runs on the File Transfer Protocol (File Transfer Protocol). Used to exchange files between computers over a local network and the Internet.

This is a quick deployment and ready-to-run image.
Simple and rapid installation. Easy to maintain.
Connection to FTP Server Minimal on Ubuntu 18.04 LTS
To start the server, run the VM through Azure Portal.
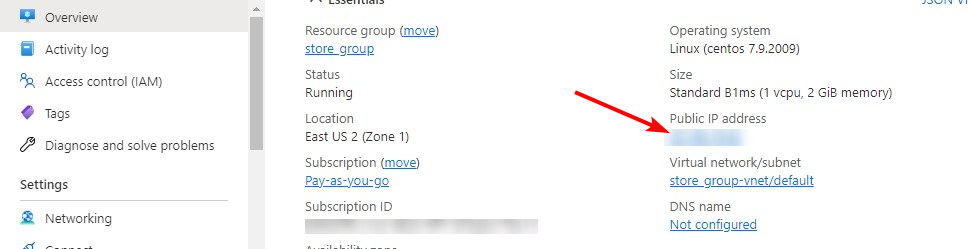
- For the connection to the server, you should know the IP address of the VM. You can find it in the personal account of Azure. (You need to select the virtual machine from the list. By clicking the item “Overview”, your IP is displayed in the line “Public IP Address”).
- To work, you should open ports 20, 21, 50000-51000 TCP in the network properties in the Azure firewall.

- To manage with an FTP server you should connect to a VM.
- With OpenSSH
In the Windows 10 operating system (starting with version 1809 ), an OpenSSH client is available, with which you can connect to Linux servers via SSH. If Windows 10 is suitable and the OpenSSH client is installed, you can start connecting via SSH. To do this, launch a standard Windows command prompt and enter the command “ssh user@*vm_ip*” (1), where “user” is the username that was specified while creating the virtual machine and “*vm_ip*” is the VM IP address.
Then type “Yes” (2) and enter a password (3) that was specified while creating the virtual machine.

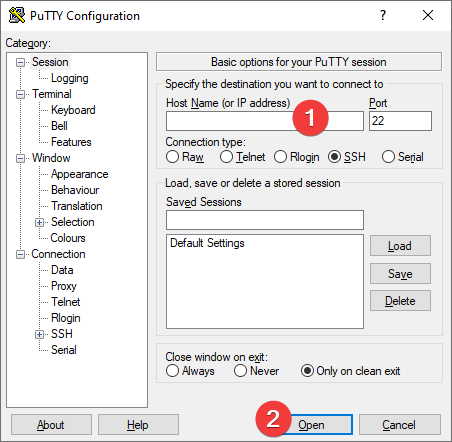
- With the PuTTy application
To do this you need the PuTTy application to connect via ssh. You can download it at the following link – Download
Run Putty, enter the VM address in the “Host” field (1), and click “Open” (2) to connect.
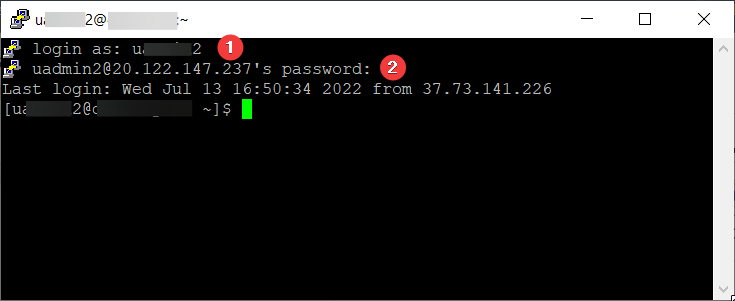
In the opened console you will need to enter a username (1) and password (2) that were specified while the VM was being created (you’ll not see the password in the console while entering it).
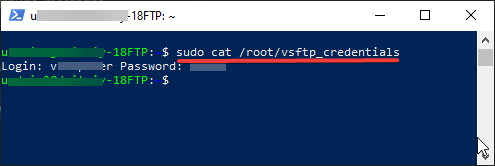
- Enter the command to get default credentials
> sudo cat /root/vsftp_credentials
- To connect to FTP, it is recommended to use the “FileZilla Client” application (you can download it from the link: Download FileZilla Client for Windows (64bit x86)).
- When connecting to the FTP server, you need to follow these steps:
- In the field Host, enter the VM IP address
- In the field Username, enter the login from paragraph 4
- In the field Password, enter the password from paragraph 4
- When the data is entered, press Quickconnect

After entering all the data and clicking on Quickconnect, you will successfully connect to the server. You can use the folder files to upload and download files

Use commands
>sudo adduser UserName
>sudo deluser UserName
to create a new user or delete an existing user
Now you can work with your own FTP server.
