The goal of the server is to provide stable and fast file transportation and enjoyable interaction with the software. The interface is understandable and was designed for quick adaptation to it.

This is a quick deployment and ready-to-run image.
Simple and rapid installation. Easy to maintain.
The guide on how to work with the FTP Server Advanced on Windows Server 2019
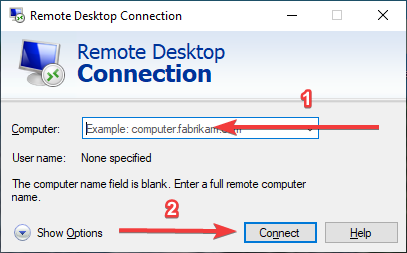
- To connect to the virtual machine, run the “Remote Desktop Connection” program using the “Win+R” key combination.
- Enter “mstsc.exe” in the field and click “OK”.

- In the window that opens, enter the IP address of the machine and click “OK”.
- Enter your “User name” and “Password” and click “OK”.

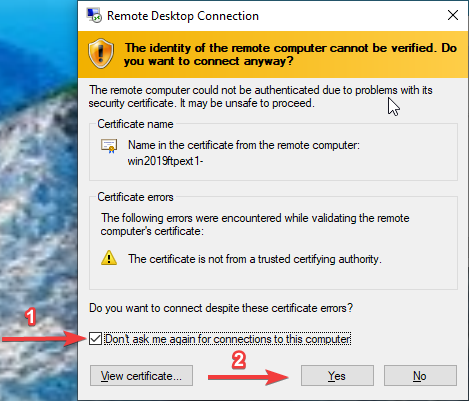
- Select the checkbox “Don’t ask me again for connections to this computer” and click “YES”.
- Start up the Filezilla Server Instance application, with the shortcut on your desktop. In the pop up window click “Connect” as displayed below (the password field is empty).

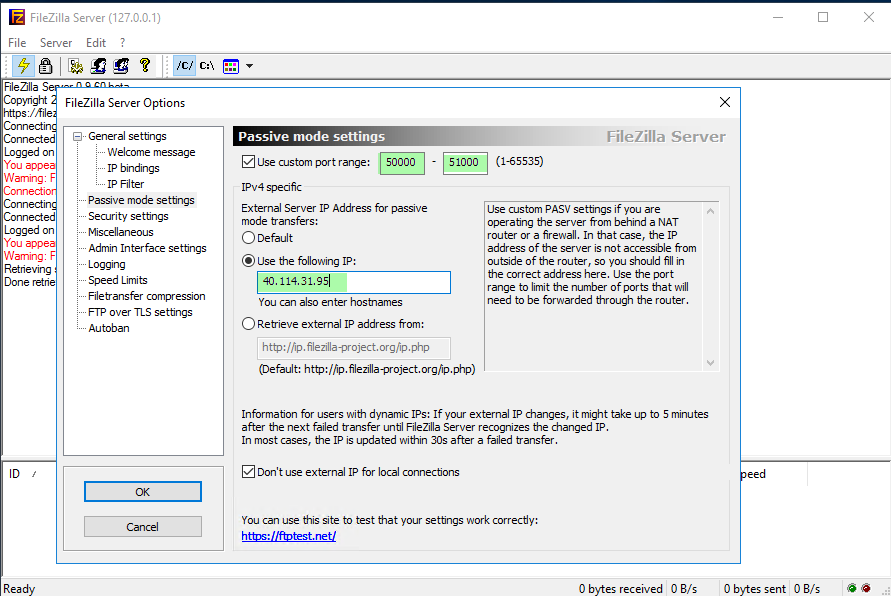
- Passive Mode Settings
When the connection has been established, it’s possible that some errors may occur, that is okay ‘cause some more steps should be done. From the options select
> Edit > Settings > Passive Mode Settings
Then it’s necessary to set a passive mode port range. Typically 50000-51000 TCP ports are used when transferring data to the server.
- Set Public IP Address
To allow the third-party clients to connect – ensure that your VM has the correct public IP Address (in our case it is 40.114.31.95).
If you faced the problem with attaching the public IP Address, follow the Microsoft’s Guide.
Whenever you have associated the public IP address with the NIC on your Azure VM, attach the IP Address to the Passive Mode Settings, as displayed below (highlighted in green), and also the Passive Port Range.
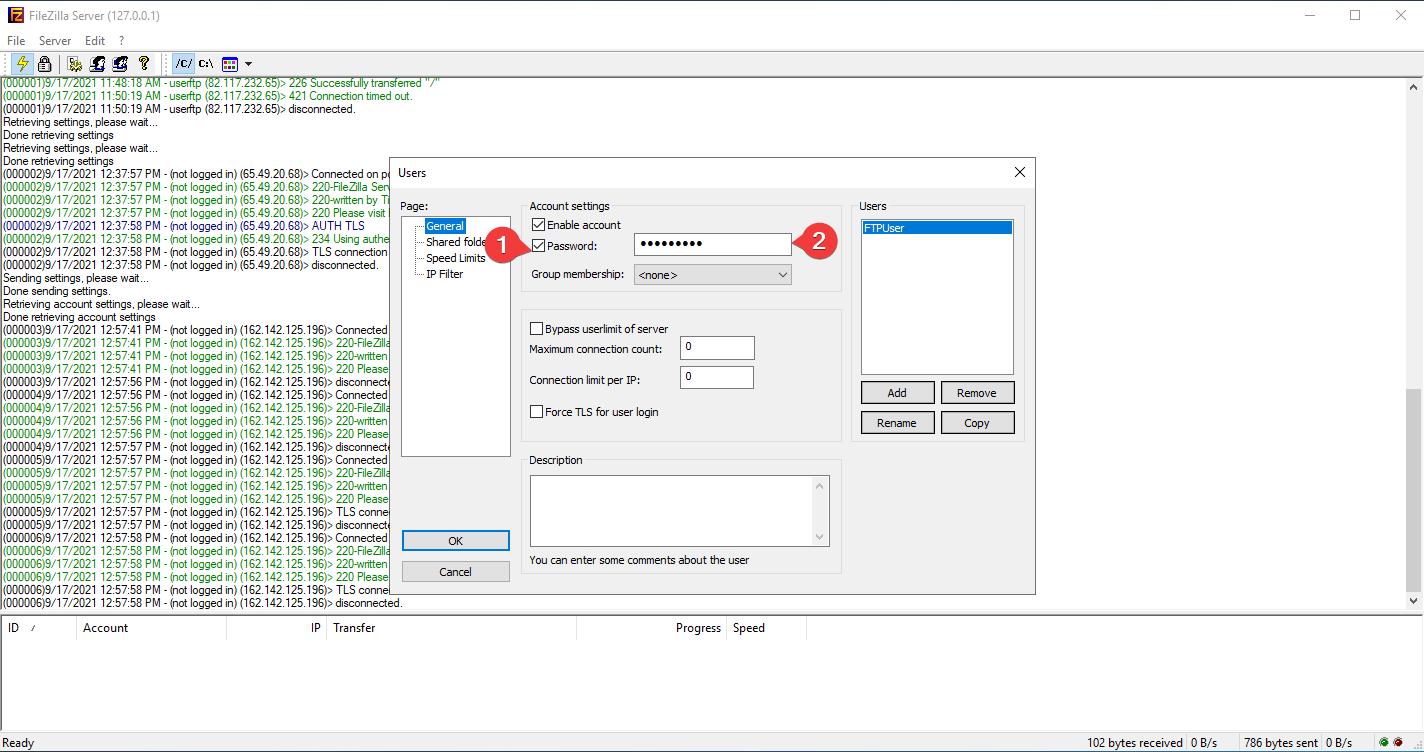
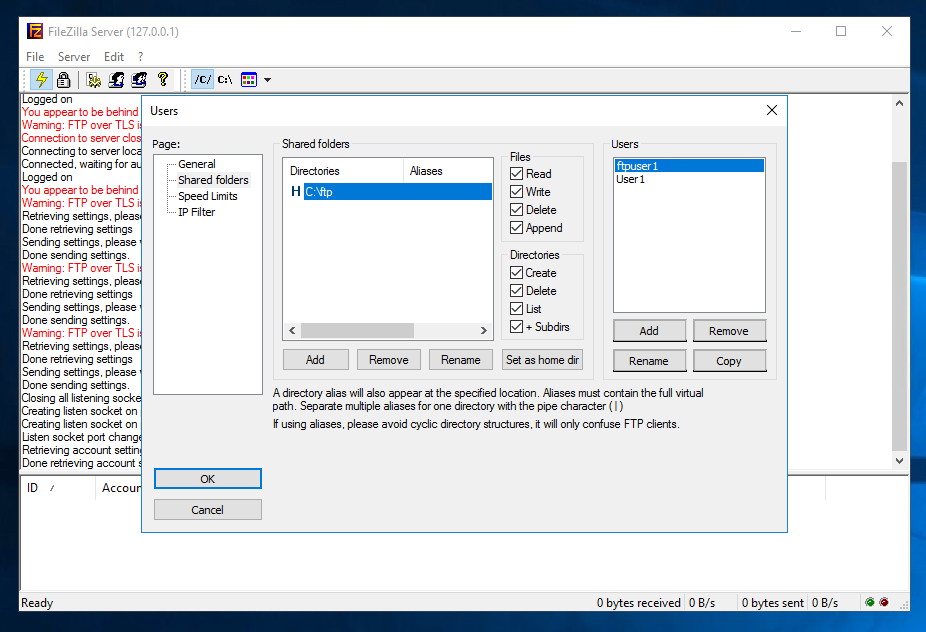
- Set up Local Users
To set up local users and give them access to the directories locally on your server you need to select Edit > Users.
Click the “Add” button and write the username.

In order to create a password for the user, you need to go to the “General” section, put a checkbox next to the “Password” field and enter the password.
After that, provide the users with the access to the necessary local folders.
There is the pre-configured folder on the VM, located on the C:\FTP Directory which can be used. Also you can set up any amount of folders that you need as well. Moreover, you can set up the groups with the permissions according to their status.
To add a directory, you must click the “Add” button and select the given path C:\FTP. In the Files and Directories blocks, put checkboxes in front of all values.
Now it’s high time to test if you can connect using the FTP Client. If it’s impossible to connect, try the next options to adjust any NSG / Firewall rules.
- NSG Rules / Firewall Rules Adjustments
In case you have NSG’s or Firewall appliances in Azure you’ll have to open access to the next ports:
- Port: 21 TCP (Used for FTP)
- Port: 990 TCP (Used for FTPS)
- Port: 14147 TCP (Used for FTP Server Administration)
- Passive Port Range: 50000 – 51000 TCP (Used when transferring data)
- Log saving setup
To configure you need to follow the path: Edit > Setting > Loggin

The logs are saved to the folder: C:\Program Files (x86)\FileZilla Server\Logs
The settings were changed: internal transfer buffer size and socket buffer size.
FileZilla Server configuration backup system is also included. Configuration backups are placed in a folder C:\backup every day
- Client FTP Software
Users can use any FTP Client to allow clients to connect. One of the best solutions is to choose FileZilla’s FTP Client.
Download link: https://filezilla.ru/get/
To connect to FileZilla’s FTP Client you should enter the IP of your VM in the <Host> field and the username and the password to the corresponding fields as well.

After starting the connection, a window with a certificate will appear, in it you must select the <Always trust certificate> item and click <OK>.
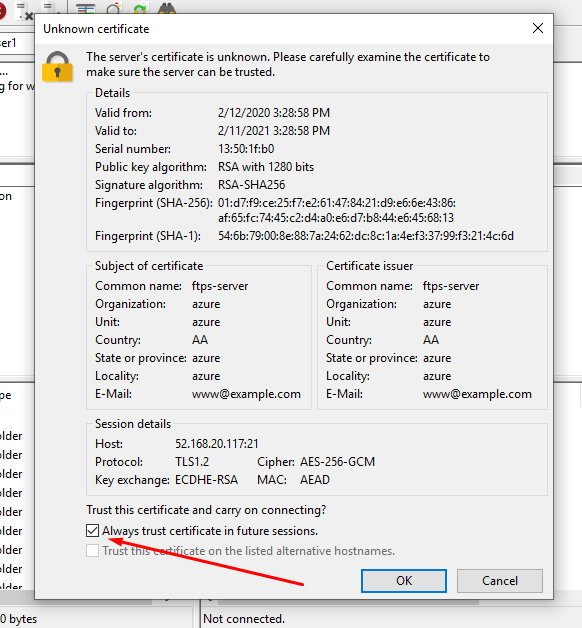
After that, you will be connected to the FTP server.
