Configuration and connection of Docker Registry: Highly Scalable Server on Ubuntu Server 18.04 LTS
Opening ports and creating DNS name through Azure Portal
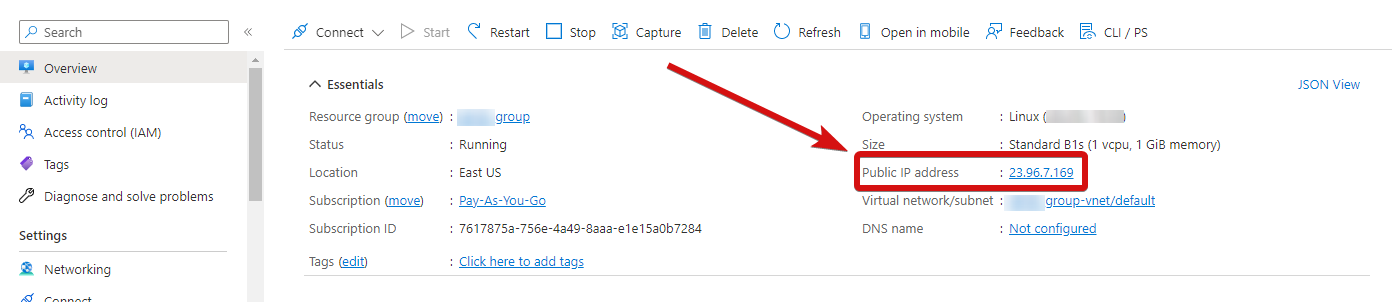
- After purchasing and starting the VM, you should know its IP address. You can find it in the personal account of Azure. (To do so, select the virtual machine from the list and click on the “Overview” item. Your IP address will be displayed on the “Public IP Address” line).
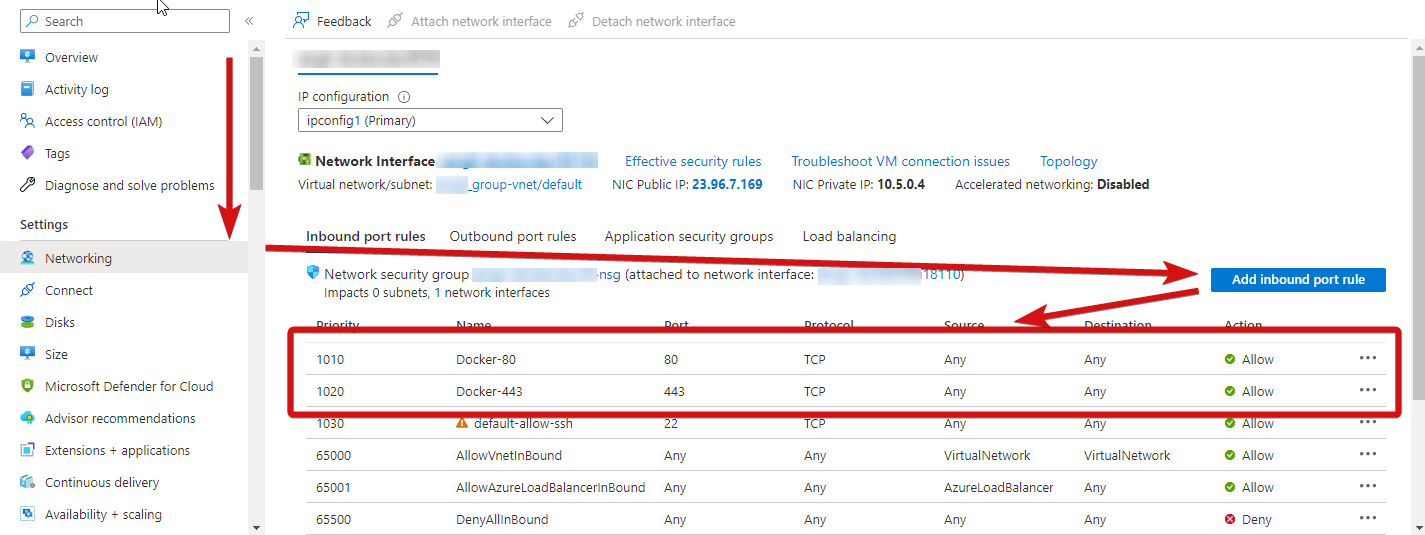
- To work, you must open port 80 (TCP) and 443 (TCP) in the network properties in the Azure firewall.
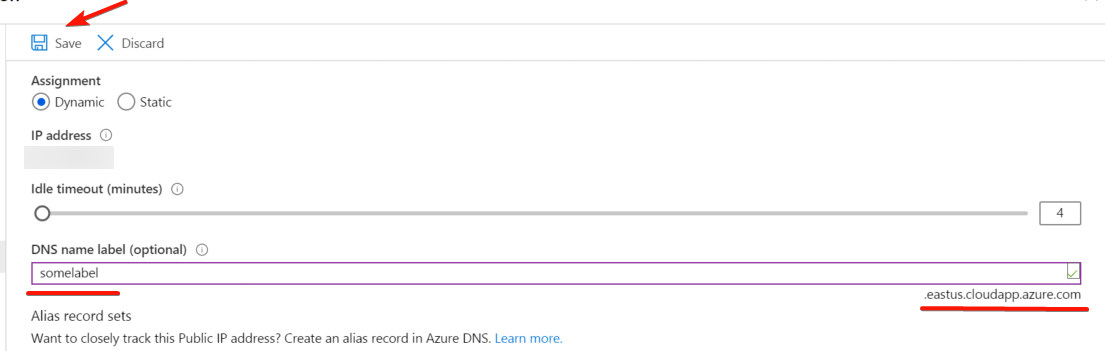
- Next, it is necessary to create a DNS name that will be used for the further connection. If you already have a DNS name for which an SSL certificate has already been purchased, you can use that instead.
- To create a DNS name through Azure Portal, go to the VM settings in the “Overview” section.
- Go to “DNS name” settings.

- Fill in the “DNS name label” field and click <Save> at the top.
Server connection and configuration through the PuTTY SSH client.
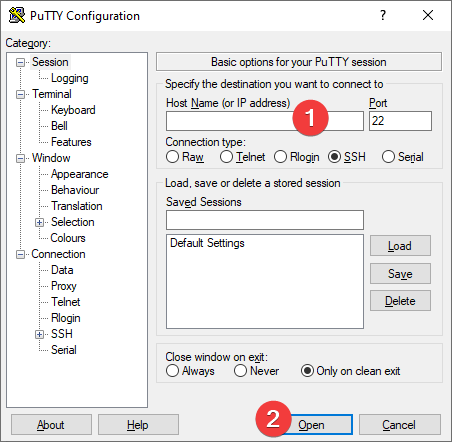
- To connect to a VM, you need the PuTTY application to connect via SSH. You can download it from the following link – Download
- Run PuTTY, enter the VM address in the “Host” field, and click “Open” to connect.
- In the opened console, you will need to enter the username and password that were specified when creating the virtual machine.
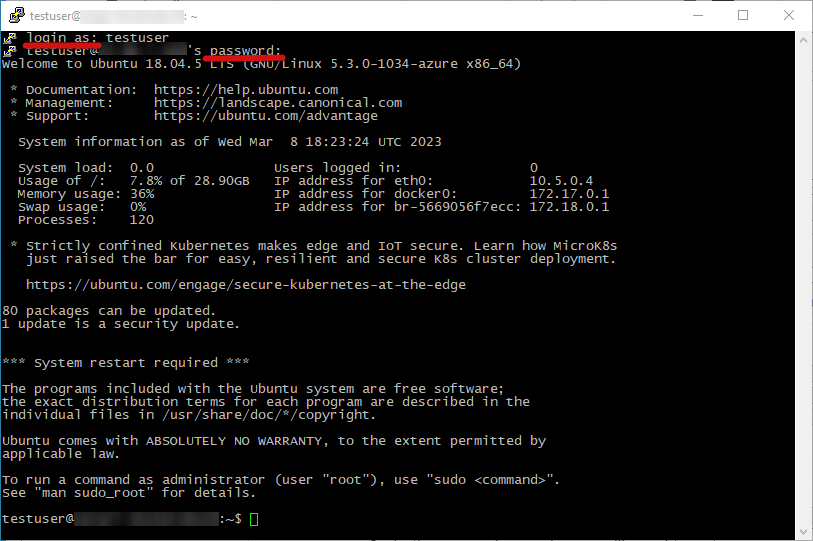
- Use the following command to increase the privileges: $ sudo su

- Use the following command to set the domain name: $ domedit %DNSname%

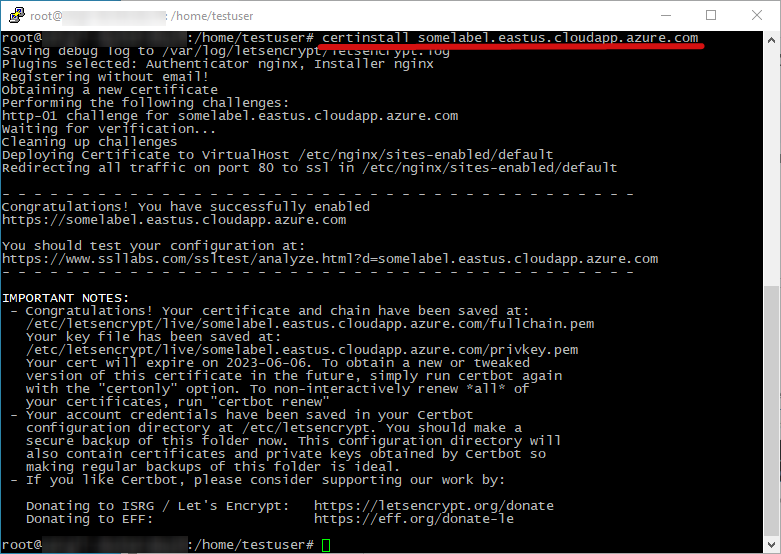
- Use the following command to install the certificate: $ certinstall %DNSname%
- By default, the azure user is already created in the Docker registry with the password azurepwd, so it is important to change the password for security purposes.
- First, you should go to the desired directory: $ cd /docker-registry/auth

- Enter the command: $ htpasswd -B registry.password azureuser
- The line “New password”: will appear. Enter a new password (note that the password entry will not be displayed in the console) and press “Enter”. Enter the password again and press “Enter”.

At this stage, the basic server configuration has been completed.
You can add your users to the Docker registry with the command:
$ htpasswd /docker-registry/auth/registry.password
You can access the file with the list of users with the command:
$ sudo nano /docker-registry/auth/registry.password
